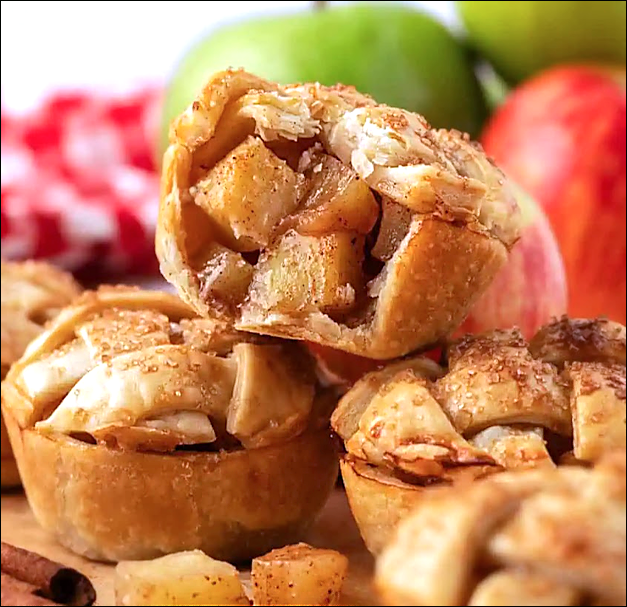
Mini Apple Pies
I hear mini pies are all the rage now. Bye-bye cake pops and chocolate with bacon; hellooooooo mini pies! Here’s a great recipe with which to start. Having made this recipe a few times, I now know a few things…
"It's all about the recipe!"
I hear mini pies are all the rage now. Bye-bye cake pops and chocolate with bacon; hellooooooo mini pies! Here’s a great recipe with which to start. Having made this recipe a few times, I now know a few things…
Photo by Home & Plate I love Honey Baked ham. Love it, love it, love it! But have you heard the definition of eternity? Two people and a ham! Thank goodness I have a panini press for grilled ham and Swiss sandwiches. Thank goodness…
Hmpfff. I just got through looking at the two hundred and seventeen pictures of a recent bride’s Hawaiian honeymoon. As one of her friends commented, “The envy hurts“! I went to Hawaii once. I did. It was with my kids’…
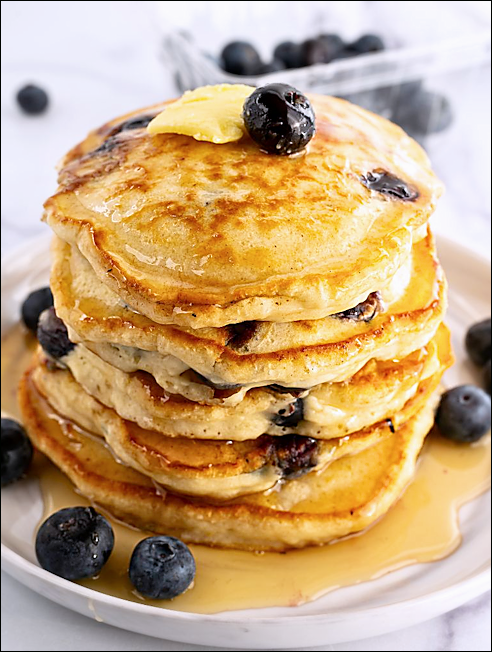
Love blueberries! Love cornmeal! So when I saw this recipe, having bought blueberries just yesterday and forgetting why, I jumped up from my chair (well…, not exactly jumped) to make a special, impromptu breakfast! I saw this recipe on Pinterest…
I must admit, I make a pretty mean manicotti. I’d forgotten how good it was until I made some on the spur-of-the-moment this week. My manicotti is probably not very authentic, seeing as I have no genuine Italian reference point…
My friend Karin made this for our Cookbook Club’s Snow Holiday. I ate it the morning she made it, and had it again for the following three mornings…loved it! She learned to make this from her cousin in Germany; she’d…