Archive for the Category ◊ Breakfast & Brunch ◊

19 Aug 2019 Grandma’s Buttermilk Cornbread
Grandma’s Buttermilk Cornbread
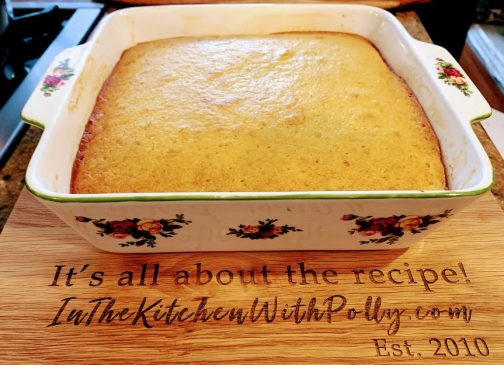
(on my brand new cutting board, a birthday gift from my daughter!)

As a young kid, Jiffy brand cornbread was my favorite and because it was cheap, I think it was fifteen cents a box, it fit into my family’s budget.  The mix only required one egg and a ¼ cup of milk or water to make six muffins.  As I got older, I tried many cornbread recipes and I tried to get fancy by adding in corn kernels or topping with cheese or stirring in sour cream.  I never settled on a recipe until I tried the Albers cornmeal no frills, back-of-the-box recipe baked in an 8″ x 8″ square pan. I was VERY happy with that recipe, until I found this recipe. The recipe is a bit odd, not so much in the ingredients, but in the mixing method. The resulting cornbread can’t be beat though, not by Jiffy, not by Albers, and not by adding in corn, cheese, and sour cream.

Cornbread is not just for chili or soup! In one of Ruth Reichl’s books, I learned how to elevate day old cornbread and now leftover cornbread is a favorite breakfast treat.  Cut the square slice of cornbread, or the muffin, in half lengthwise—across the middle so you have a top and a bottom not a left side and right side!  Butter the cut edges.  Lay the buttered side down in a hot frying pan.  Let the cornbread sizzle until the buttered sides are slightly browned and the cornbread is warmed through. Eat. Delicious!

This recipe was posted in All Recipes in 2006 by Bethany Weathersby. I’ve rewritten the steps to make the recipe easier to follow, but I have not changed any ingredients. Don’t use a mixer for this, cornbread needs to be combined by hand.

I am not going to get into the whole southern vs northern cornbread recipe debate. This is sweet cornbread, and I like it. I live in South San Jose in Northern California, and this recipe works for me and since I am posting it, I don’t see how anyone will not like it!

Can’t wait to try it with my Ham Bone Bean Soup or Gringo Grandma’s Chili
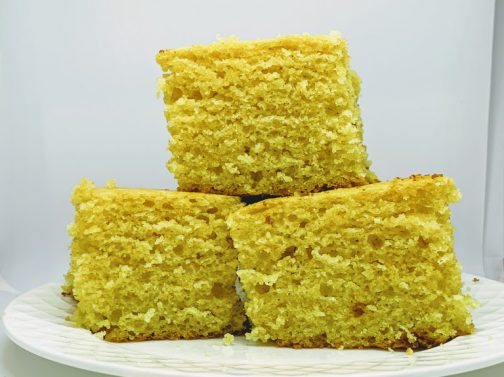
and then I’ll skillet toast another slice for breakfast 🙂

Grandma’s Buttermilk Cornbread

  • ½ cup butter
  • 2/3 cup of white sugar
  • 2 eggs, beaten
  • ½ teaspoon baking soda
  • 1 cup buttermilk
  • 1 cup cornmeal (yes, I use Albers)
  • 1 cup all-purpose flour (125 g)
  • ½ teaspoon salt (add ¼ teaspoon more if using unsalted butter)
  1. Preheat oven to 375 F.
  2. Butter an 8×8 inch square casserole dish
  3. Melt butter in a large skillet or medium saucepan
  4. Remove skillet from heat and stir in sugar
  5. Quickly add beaten eggs into butter-sugar mixture and beat until well blended
  6. Stir the baking soda into the buttermilk
  7. Add the buttermilk mixture to the butter-sugar-egg mixture in the pan
  8. Combine the flour, cornmeal and salt, whisk to evenly distribute
  9. Add the flour mixture into the pan with the butter-sugar-eggs-buttermilk mixture
  10. Stir until well blended, a few small lumps should remain
  11. Pour batter into the prepared 8×8 inch pan
  12. Bake in preheated 375 degree oven for 25-30 minutes or until a toothpick inserted into the center comes out clean
  13. Let cool a few minutes
  14. Serve and share

NOTES: According to the originator of this recipe, the baked cornbread freezes well. She also states that it’s OK to sub whole wheat flour for the all-purpose flour, but baking time will increase about 10 minutes. I haven’t tried this.

Thanks for stopping by my kitchen today, what shall we make tomorrow?

Print Friendly, PDF & Email
25 Jun 2019 Raspberry-Ricotta Snack Cake

This cake is simply delicious, light and moist, unassuming and satisfying. It’s good for breakfast, it’s good for a light dessert, and it’s good for an afternoon tea or snack. It’s good for company, it’s good for a family treat, and it’s good for just honoring the fact that you are alive, it’s Summer, and having something completely homemade with fresh fruit is the right thing to do.

The original recipe is from Epicurious, which called for using frozen berries. I’ve only ever made this with fresh raspberries, so that is reflected in the recipe below. Others have made this cake with blackberries, blueberries, pitted and halved cherries, diced mango, and *gasp* chocolate chips.

Not being a ricotta lover, I wouldn’t have made this cake if weren’t made for me at a Cookbook Club retreat a few years ago. I loved it, the ricotta wasn’t overwhelming and is important to the character of this cake. The ricotta keeps the cake moist and light, and allows it to stay moist for two days or more.

If there are any leftover slices, wrap and freeze for an on-demand treat later on.

1 1/2 cups all-purpose flour (188 grams)

1 cup sugar (198 grams)

2 teaspoons baking powder

1 teaspoon salt

3 large eggs

15 oz carton ricotta

1 teaspoon vanilla extract

1/2 cup (1 stick) unsalted butter, melted

1 cup raspberries (6 oz carton) divided use (can substitute blueberries, cherries, blackberries, small chunks of mango, or even, *gasp*, chocolate chips) Ok to add a few extra berries on top of batter.

Zest of 1 small lemon (OK to sub lime or orange zest)

Approx. 1 teaspoon white sugar, vanilla sugar, coarse sugar, or raw sugar, optional

  1. Preheat oven to 350°.
  2. Line a 9″-diameter cake pan with parchment paper and lightly coat with nonstick spray.
  3. Whisk flour, sugar, baking powder, and salt in a large bowl and set aside.
  4. With an electric mixer, whisk eggs, ricotta, and vanilla in a medium bowl until smooth.
  5. Stir in dry ingredients, whisk just until blended.
  6. Stir in butter just until combined.
  7. By hand, fold 3/4 cup raspberries (or other fruit), taking care not to crush berries.
  8. Fold in zest.
  9. Pour batter into prepared pan and scatter remaining 1/4 cup raspberries (or other fruit) over top (OK to add more berries to make a pleasing design on top.)
  10. Sprinkle a small amount of sugar, vanilla sugar, or raw sugar on top of cake.
  11. Bake cake until golden brown and a tester inserted into the center comes out clean, 50–60 minutes. Let cool at least 20 minutes before unmolding.
  12. If desired, sprinkle with powdered sugar before serving.

Do ahead: Cake can be made 2 days ahead. Store tightly wrapped at room temperature.

Print Friendly, PDF & Email
10 May 2019 Tropical Mango Scones

It takes a lot to get true mango flavor in baked goods.  This scone recipe manages it but it does require mango in three different forms: crushed freeze-dried mango, dried mango, and diced frozen mango. Then throw in a bit of coconut and a bit of lime zest and you have a Tropical Mango Scone. You also have to add an egg. An egg? In a scone? I am usually a scone purist. No eggs! But I’ll make an exception, just this one time, because it works in this recipe.

The original recipe only called for frozen mango, which is interesting in itself. I’d never baked with frozen mango. I didn’t think it would work, but it did! I added the freeze-dried mango (always available at Trader Joe’s, and now starting to show up in main stream grocery stores) and the dried mango (available everywhere) to boost the flavor.

Tropical Mango Scones

  • 2 cups (260g) all-purpose flour
  • approx. 20 grams (less than one ounce) freeze-dried mango crushed to a fine powder
  • ½ cup sweetened flaked coconut
  • ½ cup diced dried mango
  • ½ cup sugar + additional teaspoon sugar (divided use)
  • 2 ½ teaspoons baking powder
  • ½ teaspoon table salt
  • zest of 2 limes
  • ½ cup butter, frozen
  • ½ cup heavy cream + additional 1-2 Tablespoons (divided use)
  • 1 egg
  • 1  teaspoon vanilla
  • ½ cup dried mango, diced
  • 1 cup frozen mango, diced into ¼ inch chunks
  1. Preheat oven to 400 degrees.
  2. Line a baking sheet with parchment paper.
  3. Combine flour, crushed freeze-dried mango, flaked coconut, diced dried mango, sugar, lime zest, baking powder and salt in a large bowl. Stir well to combine.
  4. In another bowl combine ½ cup heavy cream, egg, and vanilla and whisk until combined.
  5. GRATE the frozen butter into the flour mixture then, using a fork, stir the butter into the flour mixture until well combined.
  6. Drizzle the cream-egg-vanilla mixture over the flour-butter mixture. Using the fork, combine the ingredients into a cohesive ball, this may take awhile. If the mixture is too dry, work a little extra cream into the mixture.
  7. Gently fold in the frozen mango mini-chunks.
  8. Divide the dough in half. If necessary sprinkle with a bit of flour. Shape the dough into a circle about the size of a salad plate.
  9. Place onto one side of prepared baking sheet
  10. Using a sharp knife or a pizza cutter, divide dough into six equal pieces.
  11. Repeat with remaining dough in bowl (SEE NOTE BELOW).
  12. Brush tops of scones with the additional 1-2 heavy cream, then sprinkle with additional 1 teaspoon sugar.
  13. Bake for 18-20 minutes.
  14. Remove from oven and share 🙂

NOTE: The second half of the dough can be placed on a plate and frozen for later baking. No need to defrost before baking. Just place on a parchment lined baking sheet. Brush with heavy cream and sprinkle with sugar. Might need to bake 2-4 more minutes.

Thank you for stopping by my kitchen today!

Print Friendly, PDF & Email
04 May 2019 Apricot-Coconut Bars

Feel like baking this weekend? Try these! They are delicious, one of my favorite bar/tray bake recipes. The bars are buttery, crisp, jammy, and coconut-y all at the same time. The dozen or so diced dried apricots sprinkled on top of the apricot jam boost the apricot flavor appreciably.

I’ve been making these bars for at least a decade. The original recipe was made with raspberry jam (and no diced apricots, obviously), but I think my apricot jam version with the addition of diced dried apricots takes the cake…, the bar…, the tray bake!

Apricot-Coconut Bars

1 ½ cups sweetened flaked coconut, divided use

1 ¼ cups all-purpose flour

¾ cup packed light brown sugar

½ teaspoon salt

¾ cup cold, unsalted butter, cut into small pieces

1 ½ cups old-fashioned oats

¾ cup apricot jam

10-12 dried apricots finely diced

  1. Prepare a 9×13 pan by lightly greasing bottom and sides or lining with parchment paper.
  2. Preheat oven to 375 degrees F.
  3. Toast the coconut in a dry frying pan until golden. Stir constantly and watch carefully OR spread onto a baking sheet and bake in a 375 degree oven for about 8 minutes. Set aside to cool.
  4. In the bowl of a food processor blend flour, brown sugar and salt. With motor running add butter pieces gradually then blend until a dough begins to form.
  5. Add 1 cup of toasted coconut and all of the oatmeal to dough in bowl, mix lightly but thoroughly, approx. 2-4 short bursts.
  6. Reserve ¾ cup of the dough and set aside.
  7. Press remaining dough into bottom of a prepared 9×13 inch baking pan.
  8. Sprinkle chopped dried apricots over dough.
  9. Spread jam evenly over dried apricots and the dough layer (It might help to heat jam briefly in the microwave to make it easier to spread).
  10. Crumble reserved ¾ cup of dough over jam.
  11. Sprinkle reserved ½ cup coconut over top of bars.
  12. Bake in middle of preheated 375 degree oven for 20-25 minutes.
  13. Cool in pan.
  14. Lift entire slab out of pan, transfer to cutting board and cut into bars of desired size and shape.
  15. Bars can be made 3 days in advance and stored in an airtight container at room temperature.

Thanks for stopping by my kitchen today!

Print Friendly, PDF & Email