Archive for the Category ◊ Cookies & Bars ◊

31 May 2019 Madelienes

Madeleines. What are they anyway?  Almost a cookie but really a slightly dry cake?  Yes, that’s right! No frosting? Nope, but they are often dusted with powdered sugar… No caramel swirl? Never! No bits of chocolate? Not usually… And what’s with that lump on the back? Gotta have a lump in the back! Sooo…, what’s the big deal? Madeleines are super plain, super dry, and super yummy, I love them! Madeleines are popular tea cakes in cafes around the world. The world loves them!

Madeleines are French tea cakes, but thought of as a cookie, and are instantly recognizable with their scalloped shell shape that is ribbed on one side and smooth, but with a hump, on the other. Direct from the oven these buttery cakes have wonderfully crisp edges, tender crumb and are best eaten right away, although they will keep in a tin on the counter for 3-4 days. A dusting of powdered sugar is all that they really need, although some brush still warm Madeleines with a tangy lemon glaze.  Starbucks dips tips of their Madeleines into chocolate.

Madeleines are quite easy to make, but you’ll need to purchase scalloped Madeleine molds to get started. The molds are available in different sizes and materials, but you’ll probably find non-stick pans to be the easiest to use.

I have tested out many recipes over the years.  This one is from Epicurious, but with changes to cooking times, method, and ingredients (I doubled the lemon zest, upped the vanilla, added in some baking powder, reduced the oven temperature and reduced the baking time).

The recipe below makes 24 Madeleines.

Madeleines

  • 2 large eggs
  • 2/3 cup sugar
  • 1 1/2 teaspoons vanilla
  • 1 teaspoon grated lemon zest (usually from one medium lemon)
  • 1/8 teaspoon salt
  • 1 cup (125 grams) all purpose flour
  • 5 oz (10 tablespoons, 1 1/4 sticks) unsalted butter, melted and cooled slightly (plus extra to brush in molds)
  • Powdered sugar
  • Extra melted butter to brush on pans
  1. Preheat oven to 350 degrees.
  2. Brush each madeleine mold with melted butter (use the additional butter, not the 5 oz needed for the batter!)
  3. Beat eggs and sugar with electric mixer just to blend
  4. Beat in vanilla, lemon zest, and salt
  5. In another bowl, whisk flour with baking powder and salt and then add gradually to butter-sugar-egg mixture.
  6. Gradually add melted and cooled butter to mixture, beating with electric mixer just to blend
  7. Spoon 1 tablespoon batter into each buttered madeleine mold
  8. Place in preheated oven and bake for 9-10 minutes or until edges are slightly browned and there is a visible hump in the middle of each madeleine.
  9. Remove from oven and let cool in pan for about 5 minutes before removing to a cooling rack to cool completely.
  10. Repeat with remaining batter. Recipe makes 24 standard sized madeleines
  11. When cool, dust with powdered sugar. If necessary dust with powdered sugar again just before serving.

Note: Batter can be made one day ahead. Refrigerate batter and baked on day two.

Variation: replace lemon zest with orange zest and add 1/8 – 1/4 teaspoon ground cardamom to the flour mixture.

Thanks for stopping by my kitchen today! I hope you find someone wonderful to share these special treats with 🙂

Print Friendly, PDF & Email
04 May 2019 Apricot-Coconut Bars

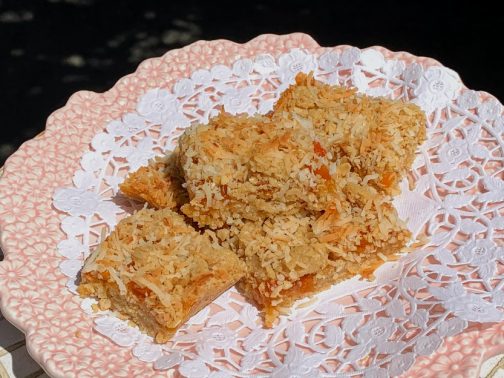
Feel like baking this weekend? Try these! They are delicious, one of my favorite bar/tray bake recipes. The bars are buttery, crisp, jammy, and coconut-y all at the same time. The dozen or so diced dried apricots sprinkled on top of the apricot jam boost the apricot flavor appreciably.

I’ve been making these bars for at least a decade. The original recipe was made with raspberry jam (and no diced apricots, obviously), but I think my apricot jam version with the addition of diced dried apricots takes the cake…, the bar…, the tray bake!

Apricot-Coconut Bars

1 ½ cups sweetened flaked coconut, divided use

1 ¼ cups all-purpose flour

¾ cup packed light brown sugar

½ teaspoon salt

¾ cup cold, unsalted butter, cut into small pieces

1 ½ cups old-fashioned oats

¾ cup apricot jam

10-12 dried apricots finely diced

  1. Prepare a 9×13 pan by lightly greasing bottom and sides or lining with parchment paper.
  2. Preheat oven to 375 degrees F.
  3. Toast the coconut in a dry frying pan until golden. Stir constantly and watch carefully OR spread onto a baking sheet and bake in a 375 degree oven for about 8 minutes. Set aside to cool.
  4. In the bowl of a food processor blend flour, brown sugar and salt. With motor running add butter pieces gradually then blend until a dough begins to form.
  5. Add 1 cup of toasted coconut and all of the oatmeal to dough in bowl, mix lightly but thoroughly, approx. 2-4 short bursts.
  6. Reserve ¾ cup of the dough and set aside.
  7. Press remaining dough into bottom of a prepared 9×13 inch baking pan.
  8. Sprinkle chopped dried apricots over dough.
  9. Spread jam evenly over dried apricots and the dough layer (It might help to heat jam briefly in the microwave to make it easier to spread).
  10. Crumble reserved ¾ cup of dough over jam.
  11. Sprinkle reserved ½ cup coconut over top of bars.
  12. Bake in middle of preheated 375 degree oven for 20-25 minutes.
  13. Cool in pan.
  14. Lift entire slab out of pan, transfer to cutting board and cut into bars of desired size and shape.
  15. Bars can be made 3 days in advance and stored in an airtight container at room temperature.

Thanks for stopping by my kitchen today!

Print Friendly, PDF & Email
24 Mar 2017 Chocolate Peanut Butter Chip Cookies


chocolate-peanut-butter-chip-cookies

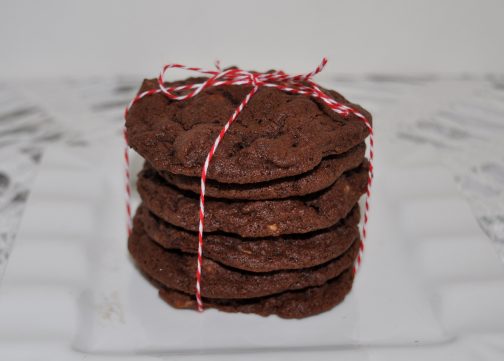
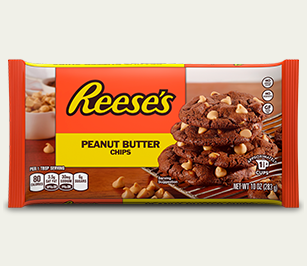
This recipe is from the back of the bag of Reese’s Peanut Butter Chips (see picture below).  The cookie is fabulous.  It’s like a peanut butter cup in cookie form.

My daughter made these cookies for a “Back of the Box” themed Cookbook Club meeting.  She loves peanut butter.  She saw the chips.  She read the recipe on the back of the bag.  She made the cookies. Everyone swooned. End of story.

Well, not quite the end of the story because now I’m posting the recipe, as is, lifted right off the back of the Reese’s Peanut Butter Chip bag. You’ve just read the recipe and my swooning review. You are going to go out to get a bag of Reese’s Peanut Butter Chips. You are going to make the cookie. You and yours will swoon. You’ll go down as one of the best cookie bakers EVER!

End of story.

Chocolate Peanut Butter Chip Cookies

  • 3/4 cup cocoa powder (natural baking powder-like Hershey’s, NOT Dutch processed cocoa powder)
  • 1 teaspoon baking soda
  • 1 10 oz. pkg REESE’S Peanut Butter Chips – divided use
  • 1 1/4 cups butter (2-1/2 sticks), at room temperature
  • 2 eggs
  • 2 cups sugar
  • 2 teaspoons vanilla extract
  • 2 cups all-purpose flour
  • 1/2 teaspoon salt


  1.  Preheat oven to 350°F.
  2. Stir together flour, cocoa, baking soda and salt; set aside.
  3. Beat butter and sugar in large bowl with mixer until fluffy, 3-5 minutes.
  4. Add eggs and vanilla; beat well.
  5. Gradually add flour mixture, beating well.
  6.  Stir in most of the  peanut butter chips. Hold out some peanut butter chips to decorate the tops of the cookies before baking.
  7. Drop by rounded teaspoons onto ungreased, preferably parchment lined, unrimmed cookie sheet. If desired, press 2, 3, or 4 peanut butter chips onto the top of each cookie.
  8. Bake 8 to 9 minutes. (Do not over bake; cookies will be soft. They will puff while baking and flatten while cooling.)
  9. Cool slightly; remove from cookie sheet to wire rack. Cool completely.
  10. Makes about 4 dozen cookies, but depends on the size of your cookie.

Thanks for stopping by my kitchen today!

reese-s-peanut-butter-chips

Print Friendly, PDF & Email
20 Mar 2017 B.O.B. Brownies

bob-brownies-bite

Google “Back of the Box” recipes and you’ll get lists such as 10 Best Back-of-the-box recipes from Epicurious, or Buzz Feed or The Daily Meal.  Never 20 best back-of-the-box recipes or 100 best back-of-the-box recipes.  Nope. Just 10. Because there are only about 10 really good back-of-the-box recipes 🙂

In my (albeit, limited) experience, it seems most back-of-the-box recipes sound good but in reality are quite plain and quite bland.  There are 10 good ones though!  Toll House Chocolate Chip Cookies, Philadelphia Cheesecake, Alber’s Cornbread, Rice Krispie Treats, Lipton Onion Dip jump to mind.  Pssst…! And now I have found another one! It’s on the back of the bag of Dutch Process cocoa powder that I purchased at Costco (brand name: Rodelle Organics).

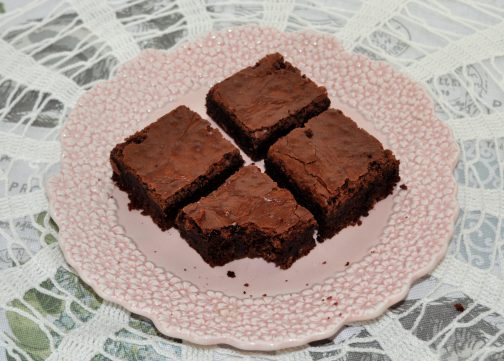
These brownies are delicious, and just my type of brownie.  Everyone seems to have their own preferred brownie type, right? This is mine.  Slightly crunchy top, oh-so-chocolately flavor, dense-but not fudge, light-but not cakey.  These are just right!  AND, they’re easy-to-make, and one batch fills a 9×13 pan!  The brownies slice well, too. What more could one want?

B.O.B.* Brownies

*Back of Bag (Rodelle Organic Dutch Process Baking Cocoa, sold at Costco)

  • 1 cup plus 2 T. butter
  • 2 ¼ cups sugar
  • 5 eggs (yes, 5. I was shocked, too)
  • 1 ½ tsp. vanilla
  • ¾ cup plus 1 T. flour
  • ¾ cup plus 1 T. Dutch Process cocoa powder (no substitutions)
  • 1 tsp. salt
  • ½ cup semisweet chocolate chips
  • ¾ cup chopped nuts (optional)
  1. Preheat oven to 350 degrees.
  2. Line 9×13 inch baking pan with parchment paper and spray lightly with cooking spray.
  3. Melt butter and sugar in a heavy saucepan on very low heat.
  4. Let the mixture slightly cool and transfer to a large bowl. Beat well.
  5. Add eggs, gradually, mixing well.
  6. Add vanilla extract.
  7. Sift dry ingredients together.
  8. Add dry ingredients to egg mixture, stirring gently and minimally.
  9. Stir in chips and nuts.
  10. Pour mixture into prepared pan and bake approximately 35 minutes. Do not overbake.
  11. Cool before cutting.
  12. Cut into squares and enjoy.
Print Friendly, PDF & Email