Tag-Archive for ◊ brownies ◊

20 Mar 2017 B.O.B. Brownies

bob-brownies-bite

Google “Back of the Box” recipes and you’ll get lists such as 10 Best Back-of-the-box recipes from Epicurious, or Buzz Feed or The Daily Meal.  Never 20 best back-of-the-box recipes or 100 best back-of-the-box recipes.  Nope. Just 10. Because there are only about 10 really good back-of-the-box recipes 🙂

In my (albeit, limited) experience, it seems most back-of-the-box recipes sound good but in reality are quite plain and quite bland.  There are 10 good ones though!  Toll House Chocolate Chip Cookies, Philadelphia Cheesecake, Alber’s Cornbread, Rice Krispie Treats, Lipton Onion Dip jump to mind.  Pssst…! And now I have found another one! It’s on the back of the bag of Dutch Process cocoa powder that I purchased at Costco (brand name: Rodelle Organics).

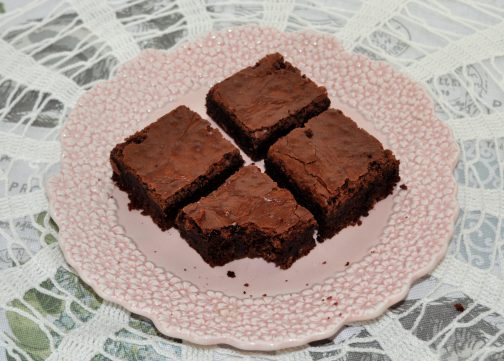
These brownies are delicious, and just my type of brownie.  Everyone seems to have their own preferred brownie type, right? This is mine.  Slightly crunchy top, oh-so-chocolately flavor, dense-but not fudge, light-but not cakey.  These are just right!  AND, they’re easy-to-make, and one batch fills a 9×13 pan!  The brownies slice well, too. What more could one want?

B.O.B.* Brownies

*Back of Bag (Rodelle Organic Dutch Process Baking Cocoa, sold at Costco)

  • 1 cup plus 2 T. butter
  • 2 ¼ cups sugar
  • 5 eggs (yes, 5. I was shocked, too)
  • 1 ½ tsp. vanilla
  • ¾ cup plus 1 T. flour
  • ¾ cup plus 1 T. Dutch Process cocoa powder (no substitutions)
  • 1 tsp. salt
  • ½ cup semisweet chocolate chips
  • ¾ cup chopped nuts (optional)
  1. Preheat oven to 350 degrees.
  2. Line 9×13 inch baking pan with parchment paper and spray lightly with cooking spray.
  3. Melt butter and sugar in a heavy saucepan on very low heat.
  4. Let the mixture slightly cool and transfer to a large bowl. Beat well.
  5. Add eggs, gradually, mixing well.
  6. Add vanilla extract.
  7. Sift dry ingredients together.
  8. Add dry ingredients to egg mixture, stirring gently and minimally.
  9. Stir in chips and nuts.
  10. Pour mixture into prepared pan and bake approximately 35 minutes. Do not overbake.
  11. Cool before cutting.
  12. Cut into squares and enjoy.
10 Oct 2011 Mocha Cheesecake Brownies

I am not a big fan of the food section of my local paper.  In fact, I am not a  fan at all.  I read it every Wednesday just to see which recipe will cause me to roll my eyes the most.  Sometimes I even post LOL comments on my Facebook page.  It’s THAT bad.  Occasionally, there are recipes that don’t cause me to roll my eyes. They cause me to fall asleep. LOL. Just kidding! NOT!  Sometimes there are recipes I think aren’t too bad, but rarely am I inspired to try one.  Then, last Wednesday there was a recipe that hit me over the head and hollered, “Try me, try me”.  The recipe was  “Mocha Cream Cheese Brownies”, and I did roll my eyes before I tried it.   Not because the recipe was bad, it was really very good (as  you have probably guessed based on the picture above).  I rolled my eyes because  the  name of  the brownie was wrong.  I’ve had cream cheese brownies, bars, breads, muffins.  The cream cheese is mixed with a bit of sugar and perhaps an egg, then layered in with the batter. When baked, you get a nice layer of cream cheese. This is  NOT a cream cheese brownie.  It’s a cheesecake brownie.  There’s a world of difference.  A world of yummy difference.

I baked the brownies, as directed, in a 9×9 pan.  I won’t do that again.  The brownies were too tall. They were so tall they were hard to get into my mouth!  And, I had to bake the brownies 15 minutes more than the recipe suggested to get the cheesecake layer to set.  Now I think they the size if the baking pan was wrong in the recipe (or maybe I just know better!). Next time I will bake these Mocha CheeseCAKE Brownies  in a 9×13 pan and then the suggested baking time will probably be spot on.

About one third of my pan of brownies is in the freezer right now.  I think they will freeze very well.  Brownies freeze well.  Cheesecake freezes well.  Why not Cheesecake Brownies?  If they don’t freeze well, I will update this post…but I am pretty sure that won’t be necessary.

This recipe was published in the San Jose Mercury News on Wednesday, October 5 as “Mocha-Cream Cheese Brownies” and attributed to Emly Luchetti, “The Fearless Baker”.

Mocha Cheesecake Brownies

Brownie Layer

  • 9 oz. dark chocolate (58-62% cacao)
  • 10 tablespoons butter, cubed
  • 1 cup sugar
  • 3 eggs
  • 3/4 cup flour
  • large pinch Kosher salt

Cheesecake Layer

  • 16 oz. cream cheese, softened
  • 1/2 cup sugar
  • 2 eggs
  • 2 teaspoons instant coffee granules or instant espresso powder
  • 1 teaspoon vanilla
  1. Preheat oven to 350 degrees.
  2. Grease a pan, your choice, a 9 inch square pan (as the original recipe originally specified), or as I suggest, a 9×13 oblong pan.
  3. Place the chopped chocolate and the cubed butter into a microwaveable bowl.  Melt the chocolate and the butter in the microwave.  (I did this on 50% power for three minutes, stirring after every minute.)  Let the chocolate cool to room temperature.  (You can get the rest of the ingredients for the brownie layer ready to go and also make the cheesecake layer while waiting for the chocolate mixture to cool) (Skip step #4  and come back to it when the chocolate has cooled.)
  4. Whisk 1 cup sugar and 3 eggs together until smooth.  Stir in the melted and cooled chocolate. Add in the flour and the salt and mix until well blended.
  5. Mix the cream cheese and 1/2 cup sugar together until smooth. Blend in the two eggs, and then the instant coffee and the vanilla.
  6. Pour the brownie batter into the bottom of the prepared pan.  Spread the cheesecake layer on top of the brownie layer. Swirl the cheesecake layer and the brownie layer together (use a spoon or a knife–don’t over swirl)
  7. Bake in 350 degree oven for 30-35 minutes or until a toothpick inserted in the center comes out clean. (I had to bake mine–in a 9×9 pan for an additional 15 minutes)
  8. Cool to room temperature.  Cut into bars. Serve.

Thanks for stopping by my kitchen today.  Have fun with these brownies.  They are deeelicious!

10 Feb 2011 Symphony Brownies

Who bothers making brownies from scratch any more?  Bargain hunters pick up boxes of brownie mix for a dollar. Brownie gourmets with no budget constraints are picking up  boxes of Ghiradelli Double Fudge Brownies.  Either choice is cheaper than making a batch of brownies from scratch.  If you are happy in your box brownie life, read no more.  If you dare to dream of something beyond box brownies, read on. I have something special to share…

I’ve  set a boxed brownie next to a home made brownie.   I know the difference.  It’s huge.  Boxed brownies are dark, oily cakes. By no stretch of the imagination can they be called brownies. Scratch brownies are intense.  Fudgey.  Crackly on top.  Rich.  Pure chocolate. Buttery.  So I bother to make brownies from scratch.  Once you set your box brownie down next to your made from scratch one, I think you will too.

My daughter Abby made four types of from scratch brownies recently, and experimented a bit with the method.  The tip for mixing brownies from this month’s Good Housekeeping magazine proved to be a winner.  You know that melt-in-your-mouth, skinny meringue, crackly top on top of a really good brownie?  The secret is to beat the eggs with the sugar until the mixture is a very pale yellow and almost tripled in volume!  This means beating the eggs and sugar for up to ten minutes with an electric mixer! So, not only is making making brownies from scratch more expensive than buying a box of brownie mix, it also takes a bit longer to mix up. Are you turning back to your boxed brownie?  I didn’t think so!

Here’s a great recipe to get you started baking brownies from scratch.  This recipe has a long pedigree.  Abby found it at My Baking Addiction and that website specified that the recipe was inspired by Paula Deen and adapted from Allrecipes.com.  The recipe gets it’s name from the Hershey Symphony Bars, which are layered in the middle of the brownie.  Abby made hers with a Cadbury Dairy Milk bar (her favorite).  I am sure you can use any chocolate bar in the middle.  The name of the brownie is kind of cool though, so I kept it 🙂

The original recipe specified baking this in a 8×8 inch pan, which Abby did.  I found the brownies to be too thick and rich, and a bit too gooey, too.  The third batch found it’s way into a 9×13 inch pan and we were much happier with the results.

Symphony Brownies

1 ½ cups white sugar
3 eggs
4 ounces unsweetened chocolate; coarsely chopped
¾ cup butter
1 teaspoon vanilla extract
¼ teaspoon kosher salt
1 cup all-purpose flour
2 (4.5 ounce) Symphony Chocolate bars; broken into squares (then I cut each square into thirds)

Directions

  1. Preheat oven to 350 degrees. Spray a 9×13 inch baking pan with cooking spray.
  2. With an electric mixer beat the sugar and eggs for ten minutes.
  3. Microwave chopped unsweetened chocolate and butter large bowl at 50% power for 3-4 minutes or until butter is melted, stir after every minute.
  4. With the mixer still going, stir the melted chocolate into the beaten eggs and sugar.  Stir in the vanilla and salt. Gradually add in flour and stir until just combined.
  5. Spread ½ the batter (about 2 cups) into the prepared pan.
  6. Evenly space the pieces of  Symphony chocolate over the batter in the pan.
  7. Add the remaining  brownie batter over the Symphony chocolate pieces.
  8. Bake in preheated oven for 25-30 minutes; do not over bake.
  9. Cool brownies in pan.  Allow to cool completely before cutting. Another hint, cut brownies with a plastic knife!  Really!  You’ll be amazed how nicely plastic knives cut brownies!

Thanks for stopping by my kitchen today!  Here’s hoping that you make some brownies–from scratch–for Valentine’s Day <3

24 Jul 2010 S’mores Bars II

You know I am crying my eyes out about our canceled family and friends camping trip, right? My daughter, Abby, thought these might cheer me up. They did! The are ooey-gooey-sticky-messy-yummy, just like the real thing–and she used the extra thick chocolate option, so they were extra chocolatey, too.

Abby found a picture on Foodgawker that linked to RealMomKitchen which mentioned a new product, a HUGE marshmallow to fit into a s’more (most of us toast two marshmallows to fit into one s’more, right?) who got it from Cooking with My Kid who has a step-by-step picture tutorial for the s’mores bars. With me pointing you to all these good sites on the web it won’t be long before you don’t need me any longer..,.sniff, sniff… [sigh] As my eternally pessimistic ex-husband always used to say, in a comforting voice no less, “Life is hard. Then you die”… ROFLMAO 😀

S’Mores Bars

1/2 cup butter, room temperature
1/4 cup brown sugar
1/2 cup sugar
2 king-sized milk chocolate bars (Abby used the really big extra thick ones…)
1 large egg
1 7 oz jar (1/2 cups) marshmallow creme/fluff
1 tsp vanilla extract
1 1/3 cups flour
3/4 cup graham cracker crumbs (about 7  full-sized graham crackers, processed or pounded until fine)
1 tsp baking powder
1/4 tsp salt

Preheat the oven to 350 degrees. Grease an 8-inch square baking pan. Use an electric mixer to cream together butter and sugar until light and fluffy. Beat in egg and vanilla. Set aside. Meanwhile,whisk together flour, graham cracker crumbs, baking powder and salt. Slowly add flour mixture to the creamed butter mixture until combined. Divide dough in half and press half of dough into an even layer on the bottom of the prepared pan.Place chocolate bars over dough–2 king-sized Hershey’s bars should fit perfectly side by side. Spread chocolate with marshmallow creme or fluff. Place remaining dough in a single layer on top of the fluff (most easily achieved by flattening the dough into small shingles and laying them together). Bake for 30 to 35 minutes, until lightly browned. Be sure to cool completely before cutting into bars. Makes 16 squares. Cool completely before cutting into bars.

Thanks for stopping by my kitchen today.  I always enjoy your company 🙂