Archive for ◊ 2020 ◊

29 Nov 2020 Polly’s Mac n’ Cheese
Thanksgiving Dinner with Mac n’ Cheese
Christmas Party buffet with Mac n’ Cheese

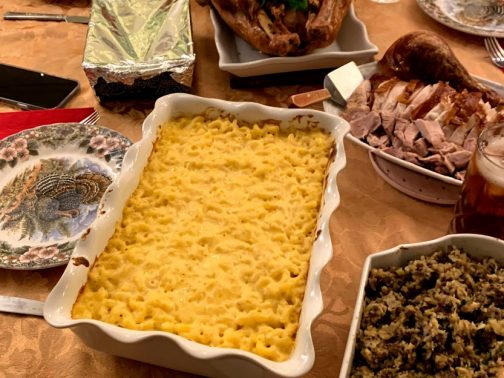
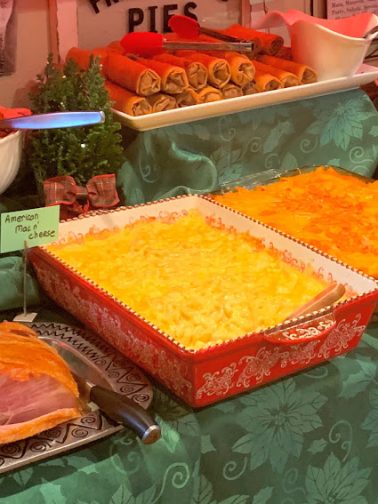
Polly’s Mac n’ Cheese (YEP, I’m claiming it)

I’ve been promising to post this recipe forever, but I have held off because it’s impossible (for me anyway) to get a good picture of Mac n’ Cheese. The issue is partly Mac n’ Cheese’s fault, right? It’s just not photogenic; it’s flat, it’s monotone (just white noodles and melted cheese), and it has NO pops of color anywhere! Garnish Mac n’ Cheese? That would just look silly. So here it is, my recipe for Mac n’ Cheese, without a good picture 🙂

It’s taken a long time to perfect this recipe and there is nothing crazy about it. It’s a traditional macaroni and cheese; no fancy cheeses. No veggies, no lobster, no bacon, no truffle oil, no breadcrumbs and definitely no Flamin’ Hot Cheetos! Just elbow noodles, cheddar cheese, and a roux.

That being said, I do have ONE secret ingredient, I use some chicken broth in the sauce to add more umami, if you will, to the dish.  I use homemade chicken broth/stock/bone broth, not the processed, canned or boxed stuff. 

If you must use a commercial broth, deepen the flavor first.  Pour the broth into a pan, add some bone-in chicken (anything: a thigh, a drumstick or two, leftover carcass of a rotisserie chicken…). Then toss in a bay leaf or two, some chopped onion (with the skin), and perhaps some chopped carrot or celery (whatever you have languishing in the veggie drawer). Let the to-be-enhanced broth simmer while prepping the rest of the ingredients. Drain solids from broth and discard. Use broth as directed below.

One other tip, I wouldn’t use that pre-shredded cheese. I haven’t tasted any pre-shredded cheese that has the required sharpness, and I don’t know how all those additives used to prevent the cheese from clumping will affect the final dish.

Just for the record, Mac n’ Cheese is a side dish, never a main.

INGREDIENTS

  • 2-3 cups homemade or enriched Chicken broth, heated
  • 2-3 cups whole milk, heated
  • NOTE: you need 5 cups total of liquid–use 50/50 chicken broth/milk or 60/40 or 25/75, whatever suits you or whatever fits what you have on hand.
  • 4 Tablespoons butter
  • 1/3 cup flour
  • ¼-½ teaspoon powdered mustard (not so much for taste, but to help with emulsion)
  • 1 lb sharp cheddar cheese grated, approx. 4 cups (Ok to sub a bit of mozzarella, up to 1 cup, for some of the sharp cheddar. Also, if you have odd bits and pieces of various cheeses leftover, use them but remember that the flavor of the dish will change–and kids will object)
  • Salt and pepper, to taste (chicken broth varies in saltiness, so taste the cheese sauce and add salt and pepper as needed.)
  • 1 lb elbow macaroni (cooked in generously salted water, for the shortest time mentioned on the package, rinse with cold water, and drain.)

DIRECTIONS

  1. Preheat oven to 350 degrees.
  2. Combine milk and chicken broth in a large container and microwave until hot.
  3. In a large skillet, melt butter and stir in the flour.
  4. Stirring constantly, cook the flour-butter mixture over medium heat for 3 minutes, taking care not to brown the roux.
  5. Turn off the heat under the roux.
  6. Slowly add about 1 cup of the chicken broth-milk mixture into the roux. Whisk and stir constantly until all liquid is absorbed and mixture looks homogenous and there are no lumps in the sacue. Repeat until all milk-broth mixture has been incorporated into the butter-flour mixture.
  7. Return mixture to heat and simmer gently for 3 minutes, stirring occasionally.
  8. Taste.  Add salt, pepper  to taste along with a small quantity of powdered mustard.
  9. Gradually add cheese a handful at a time. Stir until completely melted, then add another handful and repeat process until all cheese has been incorporated.
  10. Stir cooked elbow macaroni into cheese sauce.
  11. Pour into greased 9×13 casserole dish.
  12.  Bake in preheated 350 oven for 30 minutes. Do not overbake or cheese sauce will begin to separate.
  13.  Cool for 10 minutes or so before serving.

NOTES from experience: To make ahead, make cheese sauce and boil noodles, but store separately. Bring to room temperature. Combine. Bake as above.

I have made premade cheese sauce and frozen it , then defrosted it overnight in the refrigerator.  I do reheat the cheese sauce and whip with immersion blender before combining with boiled noodles.

OK to sprinkle extra cheese on top if you like that look.

Enjoy!

28 Aug 2020 Blueberry Upside-Down Coffee Cake

Just a reminder, there’s no coffee in coffee cake. Coffee cake is cake to be eaten with a perfect cup of coffee.  And that, my friends, is what a weekend quarantine breakfast is all about.  Throw in a good book or a good companion and you’re in heaven.

I’ve been making this cake for decades, except that I had forgotten all about it for the past five or six years. Somehow this recipe went missing from one of my 13 recipe binders.  I didn’t even notice. Then my daughter Hannah brought this coffee cake over as a first day of on-line school snack during the 2020 pandemic. I asked her for the recipe. To which she responded, with a disbelieving eye roll, “Mommmm, it’s YOUR recipe”.  Ooops.

So here it is, the replacement for the missing recipe, the best blueberry coffee cake on the planet, Blueberry Upside-Down Coffee Cake.

Hint #1: If there’s no need for a fancy display, then there’s no need to actually turn the whole cake upside down. Just carve out a slice and turn upside down onto your plate.  You can add whipped cream, or not, depending on your breakfast/brunch rules. 

Hint #2: Don’t skimp on the lemon zest. The lemon zest (and butter) is what makes this cake sing!

I like this cake much better than any cake cooked with blueberries mixed into the batter. Cooked blueberries mess with the texture of any cake. In this cake, the blueberries shine as a layer, and the buttery cake also shines as a layer. You get to enjoy both the cake and the blueberries without one interfering with the other. Win-win! Oh, and it’s supposed to be served warm, win-win-win!

Blueberry Upside-Down Coffee Cake

For the Blueberry Layer

  • ¼ cup butter
  • 2/3 cup brown sugar (light or dark)
  • 3-4 cups fresh blueberries (18-24 oz)
  • 1 ½ tsp grated lemon zest
  1. Get out your best 9×13 inch pan.
  2. In a small saucepan, melt butter.
  3. Stir in brown sugar and boil gently for 3 full minutes, stirring occasionally.
  4. Pour the mixture into the bottom of the 9×13 pan, spreading carefully to make an even layer.
  5. Pour fresh blueberries on top of butter/brown sugar mixture.
  6. Sprinkle lemon zest evenly over the blueberry layer.

For the Cake

  • ¾ cup butter
  • 1 ½ cups sugar
  • 2 eggs
  • 2 teaspoons vanilla
  • 2 ½ cups all-purpose flour (310 grams)
  • 2 ¼ teaspoons baking powder
  • ¼ teaspoon salt
  • ¾ cup milk
  • 1 ½ teaspoons grated lemon zest
  1. Preheat oven to 350 degrees.
  2. With an electric mixer beat together butter and sugar. Continue to beat until light and fluffy, approx. 3-5 minutes.
  3. Gradually add eggs, one at a time, beating well after each addition.
  4. Stir in vanilla.
  5. Combine flour, baking powder and salt in a small bowl.
  6. Add 1/3rd of dry ingredients to the butter-sugar mixture and beat well.
  • Add half of the milk and beat until all of the milk has been incorporated,
  • Add another 1/3 of dry ingredients to the butter-sugar mixture and beat well.
  • Add remaining milk and beat until all of the milk has been incorporated.
  • Add remaining flour mixture and beat well.
  • Stir in lemon zest
  • Pour batter over blueberries in 9×13 pan. Smooth with a spatula.
  • Place pan in a 350-degree oven for 45-50 minutes.  The top will be well browned. Use a toothpick to check that cake in the middle of the pan has been cooked.
  • Remove cake from the oven. If inverting, let cool for 3 minutes. Run a knife along all sides to loosen the cake from the pan. Invert onto a large rectangular platter or cutting board. 
  • Serve warm, with or without optional whipped cream or pouring custard.
26 Jul 2020 Homemade Ketchup
-:: Fresh Homemade Ketchup ::-

Every year I plant tomatoes and every year, for a period of a few weeks, I have more tomatoes than any one family could ever use. I have some recipes on this blog that call for a lot of homegrown tomatoes: Fresh Tomato Lasagna and Tomato Tart jump to mind because we make them every summer. This year we have added two wonderful new recipes, Homemade Tomato Ketchup and Tomato Jam.

This is my recipe for Tomato Ketchup. The recipe originated with Saveur Magazine, was adapted by someone, and then adapted again by myself. I switched from using whole spices wrapped in cheesecloth to ground spices stirred in at the beginning. So much easier!

This ketchup is DELICIOUS. We even taste-tested, side-by-side with Heinz ketchup, this ketchup, and McDonald’s fries. Eight testers, and not one chose the Heinz over this ketchup. One tester even complained about the gluey texture of the Heinz ketchup, something she had never noticed before (OK, so that tester was me)… ?

The ketchup is EASY to make, but it does involve a lot of dishes and utensils: cutting board, sharp knife, stockpot, wooden spoon, a blender, a sieve, measuring spoons, and small bowl. But really…, that’s not too much for a six month’s supply of delicious homemade ketchup with no preservatives, no artificial flavourings, and no chemical thickening agents, is it?

Homemade Tomato Ketchup

INGREDIENTS

  • 4 pounds homegrown tomatoes, roughly chopped
  • 1 large onion peeled and chopped
  • 1-2 Anaheim chilies, seeded and chopped, optional
  • 2 garlic cloves, crushed or diced
  • 2 bay leaves
  • 1/8 teaspoon ground cloves
  • 1/4 teaspoon ground cinnamon
  • 1/2 teaspoon celery seeds
  • 1/4 teaspoon ground allspice
  • 1 tablespoon kosher salt
  • 1/4 -1/2 teaspoon chile flakes, optional
  • 1 cup apple cider vinegar
  • 4 oz. (125 grams) light brown sugar

To finish, optional:

  • 1 ½ tablespoons cornstarch
  • 2-3 tablespoons cold water

INSTRUCTIONS

  1. Place all ingredients, except for the cornstarch and cold water, in a large stockpot.
  2. Simmer mixture over medium heat until tomatoes and chiles are soft and onions are translucent and limp, about 45-60 minutes.
  3. Turn off heat, and let mixture cool (because blending hot liquids can be dangerous and messy). Remove bay leaves.
  4. In batches (probably 3 batches, depending on the size of your blender and temperature of tomato mixture), place tomato mixture into a blender and blend until very smooth.
  5. Strain the ketchup through a fine-mesh strainer and return to the cooking pot (straining removes seeds and peels). Press on the solid pieces to extract as much liquid as possible. Discard the solids.
  6. Once all the pureed liquid has been returned to the pan, cook over medium-low heat for an additional 30-45 minutes or until thickened to your preference.
  7. OPTIONAL: If your ketchup doesn’t thicken to your liking (some tomatoes have more liquid in them than other tomatoes), mix a slurry of cornstarch and cold water. Bring tomato mixture to a rapid boil and, stirring constantly, pour in the cornstarch slurry.  Continue to boil and stir for a full minute.
  8. Remove ketchup from heat and let cool.
  9. Ketchup can be stored in a sealed container (preferably glass) in the refrigerator for up to 3 weeks and frozen for 6 months or more.

Thanks for stopping by my kitchen today. Tomato Jam will be up soon!

27 May 2020 Fresh Cherry Pie

INGREDIENTS

  • 1 double crust pie dough

Cherry Filling:

  • 2 red plums
  • 2 pounds (6 cups) sweet cherries, pitted and halved
  • ½ -1 cup sugar, to taste (½ cup sugar usually results in a slightly tart pie)
  • ¼ teaspoon salt
  • 1 tablespoon freshly squeezed lemon juice
  • 2 tablespoons bourbon
  • 2 ½ tablespoons cornstarch
  • ¼ teaspoon ground cinnamon
  • 2 tablespoons unsalted butter, cut into ¼ inch cubes
  • 1 large egg + 1 teaspoon water (for egg wash)
  • Approx. 1 teaspoon sugar

INSTRUCTIONS

  1. Roll out a generous ½ of pie crust dough and place in bottom of 9-inch pie pan. Wrap pie pan containing bottom pastry with plastic wrap in place in refrigerator.
  2. Roll out remaining pastry for top crust. Place flat onto a baking sheet, cover with plastic, and place in refrigerator. Meanwhile, prepare cherry filling.
  3. Pit the cherries, and cut them in half.
  4. Cut plums in half and remove the pit.
  5. Place plum halves and 1 cup of cherries to food processor and process for 1 minute or until smooth.
  6. Strain the plum-cherry mixture through a fine-mesh strainer over a large bowl. Press down and extract as much liquid as possible, discard the solids and retain the juice in the bowl.
  7. Add the remaining 5 cups of pitted and halved cherries, sugar, salt, lemon juice, bourbon cinnamon and corn starch into bowl containing the puree. Stir to combine. Let mixture stand for 15 minutes to meld flavors.
  8. Remove bottom crust from refrigerator. Pour cherry mixture into to dough-lined pie plate. Scatter 1/4? butter cubes evenly over filling.
  9. Remove the top pie crust from the refrigerator and place on top of pie.  Using thumb and forefinger, flute edges or use the tines of a fork to seal the two pie crusts together.
  10. In a small bowl, lightly beat egg and 1 teaspoon water together. Using a pastry brush, brush egg all over the top pie crust.  Sprinkle a small amount of sugar over the egg wash. Use a sharp knife to make 4-8 evenly spaced vents in top of pie.
  11. Freeze prepared pie for 20 minutes.
  12. Preheat oven to 400 degrees. Place a foil lined baking sheet in oven to preheat.
  13. Remove pie from freezer and transfer to pre-heated baking sheet. Bake for 30 minutes at 400 degrees. Then reduce temperature to 350-degrees and continue to bake for another 30-40 minutes or until the juices bubble around the edges and crust is deeply golden brown.
  14. Allow pie to cool on wire rack for 4 hours before serving. Serve with a side of ice cream or sweetened whipped cream, if desired.

Enjoy!