Archive for the Category ◊ Sandwiches ◊

26 Jul 2020 Homemade Ketchup
-:: Fresh Homemade Ketchup ::-

Every year I plant tomatoes and every year, for a period of a few weeks, I have more tomatoes than any one family could ever use. I have some recipes on this blog that call for a lot of homegrown tomatoes: Fresh Tomato Lasagna and Tomato Tart jump to mind because we make them every summer. This year we have added two wonderful new recipes, Homemade Tomato Ketchup and Tomato Jam.

This is my recipe for Tomato Ketchup. The recipe originated with Saveur Magazine, was adapted by someone, and then adapted again by myself. I switched from using whole spices wrapped in cheesecloth to ground spices stirred in at the beginning. So much easier!

This ketchup is DELICIOUS. We even taste-tested, side-by-side with Heinz ketchup, this ketchup, and McDonald’s fries. Eight testers, and not one chose the Heinz over this ketchup. One tester even complained about the gluey texture of the Heinz ketchup, something she had never noticed before (OK, so that tester was me)… ?

The ketchup is EASY to make, but it does involve a lot of dishes and utensils: cutting board, sharp knife, stockpot, wooden spoon, a blender, a sieve, measuring spoons, and small bowl. But really…, that’s not too much for a six month’s supply of delicious homemade ketchup with no preservatives, no artificial flavourings, and no chemical thickening agents, is it?

Homemade Tomato Ketchup

INGREDIENTS

  • 4 pounds homegrown tomatoes, roughly chopped
  • 1 large onion peeled and chopped
  • 1-2 Anaheim chilies, seeded and chopped, optional
  • 2 garlic cloves, crushed or diced
  • 2 bay leaves
  • 1/8 teaspoon ground cloves
  • 1/4 teaspoon ground cinnamon
  • 1/2 teaspoon celery seeds
  • 1/4 teaspoon ground allspice
  • 1 tablespoon kosher salt
  • 1/4 -1/2 teaspoon chile flakes, optional
  • 1 cup apple cider vinegar
  • 4 oz. (125 grams) light brown sugar

To finish, optional:

  • 1 ½ tablespoons cornstarch
  • 2-3 tablespoons cold water

INSTRUCTIONS

  1. Place all ingredients, except for the cornstarch and cold water, in a large stockpot.
  2. Simmer mixture over medium heat until tomatoes and chiles are soft and onions are translucent and limp, about 45-60 minutes.
  3. Turn off heat, and let mixture cool (because blending hot liquids can be dangerous and messy). Remove bay leaves.
  4. In batches (probably 3 batches, depending on the size of your blender and temperature of tomato mixture), place tomato mixture into a blender and blend until very smooth.
  5. Strain the ketchup through a fine-mesh strainer and return to the cooking pot (straining removes seeds and peels). Press on the solid pieces to extract as much liquid as possible. Discard the solids.
  6. Once all the pureed liquid has been returned to the pan, cook over medium-low heat for an additional 30-45 minutes or until thickened to your preference.
  7. OPTIONAL: If your ketchup doesn’t thicken to your liking (some tomatoes have more liquid in them than other tomatoes), mix a slurry of cornstarch and cold water. Bring tomato mixture to a rapid boil and, stirring constantly, pour in the cornstarch slurry.  Continue to boil and stir for a full minute.
  8. Remove ketchup from heat and let cool.
  9. Ketchup can be stored in a sealed container (preferably glass) in the refrigerator for up to 3 weeks and frozen for 6 months or more.

Thanks for stopping by my kitchen today. Tomato Jam will be up soon!

Print Friendly, PDF & Email
22 Dec 2019 Chicken Curry Sandwiches
Chicken Curry Sandwiches

Chicken Curry finger sandwiches have been a staple at my English Teas for decades. I don’t remember where I found the recipe, but it’s a keeper. The curry mixture keeps well in the refrigerator, covered, for a few days.

Chicken Curry Sandwiches

  • 2 cups cooked and finely diced chicken
  • 2 hard boiled eggs, cooled, peeled and diced
  • ½ to 1 cup mayonnaise (personal preference, I try not to use more than ½ cup)
  • ¾ cup finely diced celery
  • ¼ cup finely diced green onions
  • 1 teaspoon fresh lemon juice
  • ½ to 1 teaspoon salt, to taste
  • 1 to 2 tablespoons curry powder (taste and add more if needed, depends on the brand of curry powder used)
  1. Gently combine all ingredients.
  2. Let mixture sit for a few hours for flavors to develop.
  3. Spread onto choice of bread and enjoy (since I usually serve this filling in crustless finger sandwiches I usually use a bakery white bread)

Makes enough filling for 4 good sized sandwiches or 12 finger sandwiches.

Print Friendly, PDF & Email
13 Mar 2018 British Pork Pie

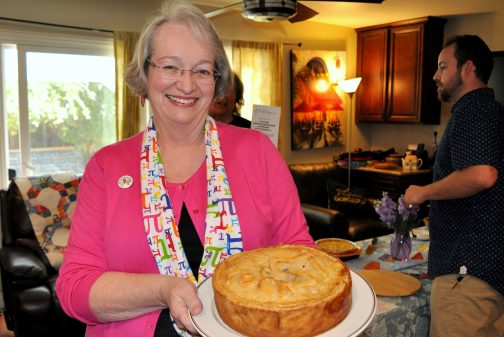
Finally!  A Pork Pie recipe that is pretty darn good (and not that hard to produce)! My Dad, a traditional Yorkshire-man, loved pork pies. I really, really wish he were still here to taste my version. To my mind, this Pork Pie favorably rivals the famous Melton Mowbry Pork Pies, but that might just be a braggadocious assertion 🙂

I have modified a recipe by new wave British chef, Richard Bertinet, for my version of Pork Pie. I have used Chef Bertinet’s version of hot-water crust pastry, unchanged (hot-water crust pastry is only used for making savory pies that are eaten cold). I made some substantial changes to his filling recipe though. First, I changed the meats and the ratios.  Then I added onion (which is so not traditional). I upped the spices and added a few different ones. I added eight hard boiled eggs (which are optional) and, to the “jelly”, I added a good shot of bourbon, which has been in no recipe I’ve ever seen, but I did it for my Dad and, in my mind, it will remain the magical addition to this very tasty version of a British Pork Pie.

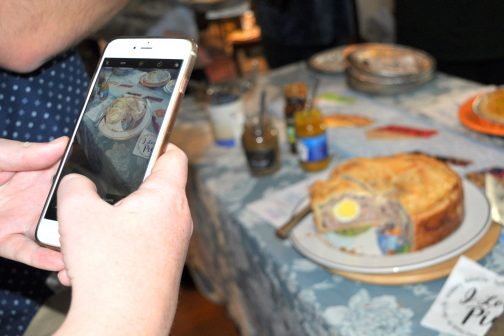
Pork Pie is a traditional picnic, quick meal, or bar snack in England. It’s a firm solid pie, nothing drips out of a Pork Pie.  Instead of gravy moistening the meat, there’s a jelly-like substance. Don’t be afraid of it! It’s delicious. In my version the “jelly” is broth, bourbon and a little unflavored gelatin (see recipe for notes on making the broth).

This recipe requires a 9″ Springform pan. You will also need a meat grinder or a food processor. Have neither? You can still do this, just chop everything very, very finely. A food syringe would be wonderful to have, too, but not to worry if you don’t have one. Above all, you will also need a plan! The recipe has three components: hot water crust pastry, pork filling, and a broth based “jelly”. Cooking time will be approximately 2 ½ hours. Before baking, the pastry will need approximately 90 minutes to “rest”. The filling can be made while the pastry is resting. Make Pork Pie at least one day before serving. The meat and jelly need at least 8 hours to settle, set, and chill before serving.

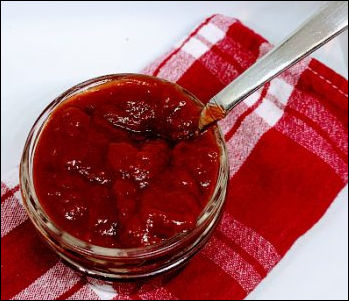
The British like to spread condiments on their pork pies, so serve your pork pie with a jar of Branston’s Pickle*, Piccalilli Relish*, Mango Chutney or coarse mustard (*available on Amazon, some Indian markets and some supermarkets with large international sections).

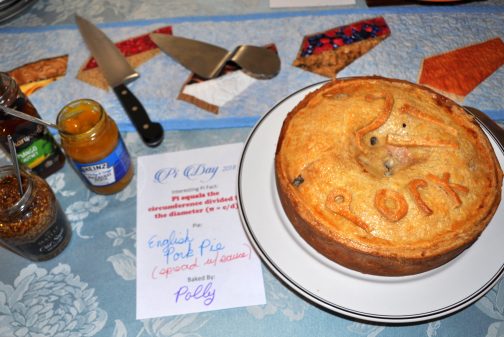
Polly’s English Pork Pie

For the Hot-water Crust Pastry:

  • 175g/ 6 oz lard (or, if you can afford it/find it, use goose or duck fat like Richard Bertinet suggests)
  • 175ml/6 fluid oz. water
  • 1 tsp salt
  • 1 tsp sugar
  • 450g/16 oz all-purpose flour
  • 1 egg , lightly beaten with a fork
  1. Put the lard, water, salt and sugar in a pan and bring to a boil, stirring as the lard melts. When it comes to a boil, count to 30 seconds and immediately take the pan off the heat.
  2. While the lard is melting, put the flour into a large bowl. Make a well in the center of the flour and stir in the beaten egg.
  3. Pour the hot liquid mixture into the flour mixture, stirring continuously with a wooden spoon.
  4. When the mixture forms quite a dough, cover the bowl with a clean kitchen towel and let rest and cool for 1 hour.
  5. While the dough is resting, make the filling.

For the Three Porks Filling

  • 1 onion, diced
  • 1 bunch of green onions, sliced
  • 3 garlic cloves, minced
  • Salt and pepper, to taste
  • Olive oil, as needed OR use the oil from the can of anchovies
  • 1 small can (2 oz) anchovy fillets, drained and chopped
  1. Heat oil in a medium frying pan. Add in chopped onion, and sauté until soft and translucent.
  2. Add in green onion and sauté for another 2-3 minutes.
  3. Add in garlic and sauté for 1 minute. Do not let garlic darken.
  4. Turn off heat and stir in diced anchovies. Set mixture aside to cool.
  • 1 ¼ lbs pork chops, with some fat (pork shoulder or country style pork ribs can be used, too)
  • 8 oz diced pancetta
  • 8 oz bacon, diced
  • Salt and pepper, to taste
  • 1 teaspoon dried sage
  • 1 whole nutmeg, grated OR approximately 2 teaspoons of ground nutmeg
  • ½ teaspoon mace
  • 8 hard-boiled eggs, shelled (the eggs just need to be softly hard boiled, the eggs will have additional cooking time in the oven) – optional
  • 1 egg, lightly beaten
  1. Prepare meat for food processor (large chunks) or meat grinder (long strips). Include some fat! Take your time to season each piece of meat with salt and pepper (heavy on the pepper), crumbled sage, mace, and freshly grated nutmeg.
  2. Combine seasoned pork with diced pancetta, diced bacon, and the reserved onion mixture. Make sure everything is well combined.
  3. Grind the three pork and onion mixture with a meat grinder on a coarse setting or briefly process with short burst in food processor (do not over process, you don’t want a paste, you want chopped meat).
  4. Set ground meat aside and turn attention to pastry now.

To Fill Pie

  1. Turn the pastry onto a lightly floured work surface.
  2. Roll pastry into a rectangle. Fold the dough into thirds by taking one side into the center and then bringing the opposite side over the top. Flatten the dough into a rough oblong shape. Cover with plastic wrap and place in refrigerator for 30 minutes (or longer, if needed)
  3. Prepare 9″ springform pan by lightly greasing and flouring bottom and sides.
  4. Preheat oven to 400° Fahrenheit.
  5. Remove pastry from refrigerator.
  6. Cut off ¼ of pastry and set aside for top.
  7. Roll remaining ¾ pastry into a large circle to fit along the bottom and up the sides of the 9″ springform pan. Be careful with the rolling out.  Pastry should be thick, and equally thick throughout, the sheet (this pie needs a thick, firm shell on the bottom, sides, and top).
  8. Gently fold pastry to lift into prepared pan. Place pastry in center of pan and ensure it covers all the way up all the sides of the pan. Patch any holes or tears.
  9. Place 1/3 of filling in bottom of pastry case. (If you choose not to use eggs, place all the filling in the pastry case.)
  10. Place shelled hard-boiled eggs in a ring on top of filling in bottom of pan, optional.
  11. Lightly spoon remaining filling over the ring of eggs. Be sure eggs are completely covered and the top is evenly smoothed.
  12. Roll out remaining pasty into circle to fit on top of filling.
  13. Firmly adhere top to side pastry. Trim excess crust.
  14. If you have any excess pastry, make decorations for top of pie, if desired.
  15. Beat egg lightly, then brush over top of pastry.
  16. Using the handle of a wooden spoon, make several holes into top of pastry (for steam to escape). Be careful where you poke. Don’t pierce a hard-boiled egg!
  17. Place pie in oven. Bake at 400° for 30 minutes.
  18. Reduce heat to 325°, bake for an additional 90 minutes.
  19. Meanwhile, make the “jelly”

For the “jelly”

  • 7 oz really good quality pork or chicken stock (I make my own. If your pork came with bones, boil the bones with a bit of extra meat, even throw in an extra pork chop, if you have one. Add in some diced veggies for taste. I like onions, carrots, celery and a bay leaf, simmer for at least an hour. Taste the broth, it should taste good and rich. If you don’t say “mmmm”, keep simmering until you do. Add salt and pepper if needed. If you have more meat, bones, or veggies, add them too. If you have homemade chicken stock, use that. If you have only canned stock, jazz it up a bit. Pour broth into a pan and add in a piece of chicken or some chicken bones if you have them, and any veggies you have on hand plus a bay leaf. Simmer and taste. Once you get a really good taste, strain, throw out the veggies, bones, etc. retain the broth).
  • 4 oz bourbon
  • 1 pkt unflavored gelatin
  1. About 15 minutes before pie is done, put 2 tablespoons of cold broth or water in a small bowl, sprinkle gelatin on top, and let sit until gelatin is soft.
  2. Meanwhile, heat broth to a light simmer. Remove from heat.
  3. Stir in softened gelatin and 4 oz bourbon.
  4. When cooked, remove pie from oven.
  5. If you have a baking syringe, fill it with the gelatin mixture and inject pie with stock mixture, avoiding eggs, all over the top of the pie. If you don’t have a syringe, with wooden spoon, re-punch holes in pastry and punch 3-5 additional holes (avoiding the eggs, of course). Pour gelatin mixture into all the holes. Let mixture settle, then add more liquid. Keep doing this until all the gelatin has been added.
  6. When pie has cooled, cover and refrigerate, preferably overnight but for at least 8 hours.
  7. Remove from refrigerator 2 hours before serving. Serve in wedges with jars of Branston Pickle, Piccalilli, Mango Chutney, and whole grain mustard on the side.

Thanks for stopping by my kitchen today!

Print Friendly, PDF & Email
11 Sep 2013 Caprese Garlic Bread (with Tomatoes, Mozzarella and Basil)
caprese bread

It’s just garlic bread, folks, but it’s garlic bread with an upgrade! After running across this recipe at Two Peas and their Pod,  I decided I needed to make it! I quickly sent texts to a few friends and invited them to come over for a light supper and four replied “YES”!  I served this bread, a platter of cold shrimp, some sliced melon, iced tea and lemon meringue pie. It’s  great having friends who are good with spur-of-the-moment things 🙂

The bread was very good!  The Balsamic Reduction highlighted the simple tomato, cheese, and basil topping.  I made a few changes to the original recipe:  I used my own garlic bread base, I adjusted the cooking time for the balsamic reduction and I baked the tomatoes on the bread instead of laying them on after cooking.  BTW, do not skip the balsamic reduction, it’s fabulous!

I hope you have some backyard (or farmer’s market)  tomatoes on hand, because store bought tomatoes just aren’t invited to this party! And the photo above shows a bit too much cheese.  I bought fresh mozzarella from Costco and it came pre-sliced, so I just went with it.  Turns out I used double the cheese!  Oooops!  No one complained though 🙂  The recipe below has the correct amount of cheese listed but if you want to up it a bit, that’s up to you. One other piece of advice, the tomatoes shrink when baked, so pile them on the bread.  I think I could have added another slice of tomato to each row!

Caprese Garlic Bread

AKA: Garlic Bread with Tomatoes, Mozzarella and Basil

  • 1 loaf sourdough bread, horizontally cut in half (french bread would work, too.  The original recipe called for ciabatta, but I am in the SF Bay Area and sourdough rules around here!)
  • 4 tablespoons salted butter, softened
  • 3 cloves garlic, minced
  • 1/4 cup grated Parmesan cheese (plus and extra tablespoon or so for garnish)
  • 3 Tablespoons dried onion, if you have it
  • 2 teaspoons dried basil (or 2 Tablespoons fresh)
  • 2 teaspoons dried parsley (or 2 Tablespoons fresh)
  • 12 oz. fresh mozzarella cheese, sliced
  • 1/2 cup balsamic vinegar
  • 2-3 medium tomatoes, sliced
  • Salt and freshly ground black pepper, to taste
  • 1/3 cup chopped fresh basil
  1. While you are getting all the ingredients together and doing the prep work, make the balsamic reduction. Place 1/2 cup balsamic vinegar in a small saucepan. Bring the vinegar to a boil, decrease the heat to low, and simmer, stirring occasionally, until the mixture is reduced by about half. How do you know when the vinegar has been reduced by half? Keep the measuring jug near the pan.  Every once in awhile pour the hot vinegar into the measuring cup.  If it’s not at 1/4 cup yet, pour it back in the pan and continue boiling. Keep doing this until the vinegar has been reduced to 1/4 cup. This will take about 10-15  minutes. Set the reduction aside to cool.  You won’t  need to use it until just before serving.
  2. Preheat oven to 400 degrees F.
  3. In a small bowl combine butter, garlic, dried onion, basil, parsley, and parmesan cheese.  
  4. Cut the loaf of bread in half horizontally. Place both sides of the loaf on a large baking sheet with the cut side up. Spread the garlic butter mixture over both sides of the cut bread.  Spread to all the corners and completely to the outer edge of the bread.
  5. Place the mozzarella cheese slices on top of the bread, making sure the cheese covers the bread completely.
  6. Top the cheese with the sliced tomatoes.  Sprinkle tomatoes with salt and pepper, to taste. If desired, sprinkle a bit of parmesan cheese over the tomaotes.
  7. Bake the bread at 400 degrees for 12-15 minutes or until the cheese is melted.
  8. Remove the bread from oven.  Sprinkle fresh basil over the top of the bread and drizzle with balsamic reduction.
  9. Cut into slices and serve.

That’s all there is too it!  Enjoy the last of your summer tomatoes!  They are special, aren’t they? And thanks for dropping by today!

Print Friendly, PDF & Email