Did the name of the recipe entice you click on this?! Well then, that makes us friends forever!
When my friends from Southern France were staying with us, they offered to make a side dish for dinner. They didn’t use a recipe. They sliced up a few potatoes, sprinkled them with salt and pepper, poured a carton of cream over the top, and put the whole thing in the oven. Sixty minutes later my family’s love affair with Potatoes Baked in Cream began.
Last year I found an actual written down recipe, one that I can pass on, one with precise quantities and directions. The recipe is from David Tanis’ cookbook, “Market Cooking”. I made one change to Chef Tanis’ recipe, I cut out an additional four tablespoons of butter! Chef Tanis calls his recipe “Classic Potato Gratin”, but to me and my family it will always be “Potatoes Baked in Cream”.
I think you will be surprised at how delicious this very simple dish is. I certainly was. Sublime. After you taste Potatoes Bake in Cream, that will be your word of the day. Sublime.
An important note: Leftovers don’t reheat well, so make sure you eat all of the potatoes in one sitting (invite friends over, take the dish to a potluck, serve these potatoes for a holiday meal…). I haven’t tried reheating leftovers in the oven, so that might work (see David Tanis’ *note below). I have tried reheating leftovers in the microwave. Don’t do it on 100% power! I had so-so results reheating on 50% power. I wouldn’t serve them to anyone else, but I was able to eat them! I have also had so-so results from throwing a handful of diced ham into a hot frying pan, dicing up a serving of leftover casserole, and reheating over medium heat. It made for a good breakfast, but nothing-nothing-like the original casserole served hot from the oven.
Another important note: The potatoes need to be sliced thinly and evenly. 1/8th inch or 3/16ths an inch is about right. You can do this with a very sharp knife and by working slowly and carefully, like my French friends did. I use a mandolin to slice the potatoes. If you don’t have one, I’d suggest getting one. I bought mine on Amazon after looking at all the reviews and selecting the highest rated one. Later I started seeing mandolins at Savers/Goodwill for about $6. I bought used mandolins for my daughters. Go to Savers.
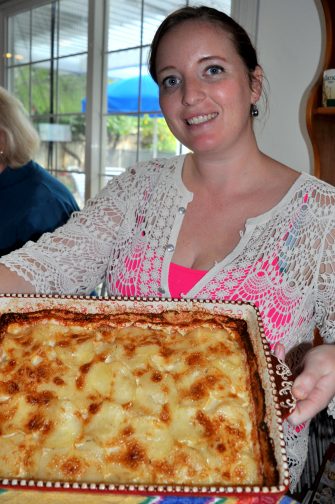
Potatoes Baked in Cream (Potato Gratin)
- 3 pounds russet potatoes
- butter to coat the baking dish (Chef Tanis uses 4 more tablespoons butter to dot top of casserole, I don’t)
- Salt and pepper
- 2½ cups heavy whipping cream (don’t even think about substituting anything for the cream, such as half and half or whole milk, it just won’t work!)
- Pre-heat the oven to 375°. Peel the potatoes and put them in cold water (to prevent them from turning brown while you finish the prep work. Slice only one layer of potatoes as a time. Keep the other potatoes in the cold water. The browning happens fast when the potatoes are so thinly cut).
- Smear a baking dish thickly with butter. (I use a 9×13 dish but I am looking for a dish that’s the same size and a bit shallower since the quantity of potatoes only come half way up the sides of the 9×13 pan. The waste of space bothers me a bit as I’d like to have a dedicated Potatoes Baked in Cream pan because, after all, this is a dish I will be making over and over! That being said, I’ve been using the same 9×13 pan for a few years now, so it’s really not a problem.)
- Drain and dry one peeled potato at a time. Using a mandolin or a very sharp knife, slice one potatoes at a time as thinly as possible. Quickly lay the potato slices in the bottom of the baking dish, overlapping them just slightly to make a “roof tile” style pattern. Sprinkle each layer of potatoes lightly with salt and pepper. Slice more potatoes and make another layer. Continue in this fashion, seasoning each layer, until all the potatoes are used. You should have at least 3, but no more than 4 layers.
- Pour the cream over the potatoes and tilt the pan to distribute well. With your hands, push down on the top layer to even out the pile (I don’t do this, but Chef Tanis says to). The cream should just barely cover the potatoes; add a little more if necessary.
- Cover the casserole dish tightly with foil and place in oven. Bake for 30 minutes at 375°.
- After 30 minutes remove the foil from the casserole, and return to the oven for another 30-35 minutes to finish cooking the potatoes and turn the top of the gratin to a crispy, deep golden brown.
- Let the gratin rest for 10 minutes before serving.
*Note from David Tanis: The gratin can also be cooled and left at room temperature for several hours, then reheated in a moderate oven. (I haven’t tested this)
Thank you for stopping by my kitchen today, what is cooking for tomorrow, hmmmm…. Pork and Tomatillo Stew?