Tag-Archive for ◊ brown sugar ◊

29 Mar 2014 Caramel and Chocolate Covered Graham Crackers

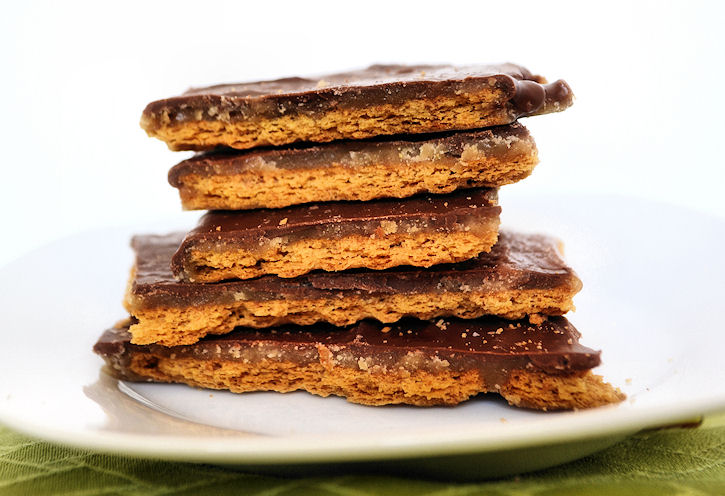
Graham-crackers-2

It’s been a terrible, horrible, no good, very bad few days around here. We are all fine, but there was a family brouhaha that just didn’t sit right. We were all out of sorts, and, truth be told,  a bit afraid of what the future will bring, too.  So what to do? Make the all time favorite family comfort food, of course!

This recipe is rustic and quik, and it’s done in 20 minutes.  So it’s great just to start on this and put some of that pent up adrenaline to good use. But then there’s the cooling off period. Once made, these bars have to  sit in the refrigerator to harden up a bit. Again, another good thing.  A cooling off period is needed after a big family brouhaha.  Then comes the peace and contentment, sitting down with a good cup of coffee, some rustic chocolate covered graham crackers and reflecting on what went right and what went wrong, and figuring out how to right the wrongs and ultimately, bringing peace back to the family.

In August of 2005 my friends Sharon and Margie, from Lake Arrowhead Retreats, gave me a recipe for Saltine Toffee Cookies which they had found on AllRecipes.com.  Truth be told, the recipe didn’t sound very good.  Saltine crackers, brown sugar, butter, and melted chocolate?  Just say no.  But they insisted I try it.  They insisted the recipe was good.  I trusted them, they make some great food, so I tried it. It WAS good. VERY good.  Then I came to find out this recipe is sort of an Internet sensation and I might have been the last person on the planet to know about it!

Years pass, and one fine weekend, I took a chocolate making class.  The instructor of the class talked about how her mother used to make a ganache and pour it over crumbled up graham crackers as a bedtime snack for her and her siblings (I know, I know, what a Mom! I never did that for MY kids…).  Then the gears started churning.  Chocolate covered graham crackers are one of my favorite things in the whole wide world, but I had never made them.  The chocolate covered graham crackers from Starbucks are the best, but they are a bit too rich with a bit too much chocolate. OH!  The light bulb popped!  Could I make chocolate covered graham crackers for my kids, too?  I could one-up that other Mom, as well!  I could make chocolate covered graham crackers and with caramel!  Never mind that she was using a fancy ganache and I was just melting giant chocolate bars, LOL! What if I use the Saltine Toffee Cookie recipe but substitute graham crackers for the saltine crackers.  What if???

So I did it.  Many times.  My son says these are the best things I make. The last tin I made, hidden in the refrigerator behind the lettuce, lasted only three days.

Turns out, I am not the first person to think of this!  Lots of people on the Internet have used graham crackers instead of saltines with this recipe. Again, why am I one of the last people on the planet to know about this?! 🙂 Anyway, here’s my recipe.  You can find lots of versions all over, but this is the one that works for me.  Keep these Caramel Chocolate Covered Graham Crackers refrigerated, when they are not being eaten…  If these cookies sit out too long at room temperature the graham cracker starts to soften and loose it’s crunch 🙁 My 2005 copy of this recipe (with saltines rather than graham crackers) specifies that the recipe makes 35 servings. ROFLMAO!!! That’s so funny 🙂

Caramel and Chocolate Covered Graham Crackers

  • approx. 2/3 a box of graham crackers (two wax covered packages out of a box of 3 packages)
  • 1 cup butter
  • 1 cup dark brown sugar
  • 1 large sized (4 or 5 oz) chocolate bar, chopped (I like a Symphony Bar or a Cadbury Bar, if you like dark chocolate, the Hershey’s Special Dark Bar is good)
  • ¾ cup chopped nuts (if you like nuts.  I have never added nuts) OR, if it’s December, crushed candy canes! (I loooove this option!)
  1. Preheat oven to 400 degrees.
  2. Line a rimmed cookie sheet with graham crackers.  Place the graham crackers as close together as possible. You will need most of 2 waxed covered packages. Set tray aside.
  3. In a medium saucepan, combine butter and sugar and stir constantly, over medium heat, until sugar is melted.
  4. Raise heat slightly, to bring mixture to a boil.  Boil vigorously for 3 minutes, without stirring–shaking the pan occasionally is OK (the original directions said to “stir constantly” but I have found this to make a grainy caramel layer).
  5. Immediately pour caramel over graham crackers.  Use an offset spatula to quickly spread the caramel evenly over the crackers.
  6. Place tray in hot oven and bake for 5 minutes.
  7. Remove tray from oven and sprinkled chopped chocolate evenly over top.  Let chocolate just sit on top of caramel for 5 minutes.
  8. Spread the now melted chocolate evenly over the caramel.  Sprinkle with nuts (if using).
  9. Let tray sit until chocolate has hardened.  This make take a few hours.  To speed things up, put the tray in the refrigerator for about 15-20 minutes.
  10. When chocolate is set, break bars into uneven pieces. Sneak a piece or two.  Serve or cover and hide in refrigerator until needed.

Thanks for stopping by my kitchen today!  If there is a brouhaha in your family, I hope it’s over quickly and sweetly!

02 Aug 2013 Beans!

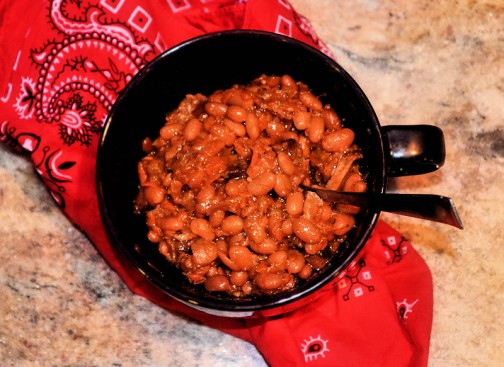
beans01

I am so excited about this recipe!  It’s a paradigm shift recipe!  It’s not a recipe in the true sense of the word, it’s more of a road map to a particular destination.   A road map allows for more flexibility than a recipe, a road map allows the cook to make adjustments based upon personal preferences, taste, time, and what’s in the pantry.  I think most people have a road map for a few good dishes.  I have a road map for spaghetti sauce, chicken soup, stir-fry and hamburgers.  You might have a road map for meatloaf, burritos and rice bowls.  Most people have road maps for sandwiches and salads. A road map means there are guidelines, easy ones, usually ones that can be memorized, and that can always be adapted as the situation requires.

So here it is, a guideline for a pot of beans, in the crockpot no less!  Crockpot cooking is great for summer, the kitchen doesn’t get heated up, and a pot of beans pairs well with almost everything that can be BBQ’d.  In the winter months, a bowl of beans with some cornbread or tortillas is almost the definition of comfort food. Another plus, crockpot cooking is fuss free, so toss everything in the pot and then go sit in the sun or shovel snow.

Many thanks to Mark Bittman of the New York Times for this road map. Thank you, thank you, thank you!!

BTW…, for years I have been looking for a good baked beans recipe, so that’s what I make with this recipe:  meaty, slightly sweet Boston-style beans.  YUM! They go with everything and I have  a serious love for leftover beans on toast (I’m English).  My son mastered this recipe in one take and he makes killer spicy teriyaki beans with chicken.  I can see others going for more of a Mexican style bean. What sort of beans do you like? Make them!

The House Special Beans

  • 1 lb of dried beans, any kind, I like small white and pinquitos but black, pintos, garbanzos, kidney, or a combination of different kinds of beans can also be used.  Don’t have a full pound of beans?  Add in some split peas or lentils to make up the difference.  Remember these are dried beans (about $1.25 for a pound bag) we are not using canned beans here (and there is no need to soak the beans first).
  • 4 cups of liquid, any kind.  Find a mixture that appeals to you. I start with a bottle of beer, then I add in about 1/4 cup of ketchup, 1/4 cup of Worcestershire sauce, 1/4 cup maple syrup, 1/4 cup of brown sugar and a squirt of mustard, using molasses instead of maple syrup and brown sugar would be good too. If my Dad were here I’d stir in 1/4 cup of bourbon. Then I add water, broth (any kind), or cold coffee to make the 4 cups (too much coffee will make the beans a bit bitter, so stick to less than 1 cup of cold coffee).  My son adds BBQ sauce, sriracha, honey, teriyaki or soy sauce along with beer and coffee.  Don’t like beer?  Use some leftover wine. Don’t drink at all, stick to broth and water.   Health nut?  Stir in carrot juice and some of that green liquid you’re so fond of !
  • Seasonings, any kind.  Start with a healthy amount of salt and pepper, then add in what appeals to you.  I add in 2 t. salt, 1 t. black pepper, 1 t. cumin, 2 t. chili powder, minced garlic, and 2 bay leaves.  Other options include oregano, basil, coriander, red pepper, curry powder, ginger, paprika, liquid smoke, parsley, sage, rosemary and thyme…
  • 1 lb meat, any kind, a bit more or a bit less is fine.  I like beef, and I buy something on sale, beef shanks, top sirloin, stew meat, steak, anything.  Throw in a pork chop or two, or some ground meat (brown it first and drain off the fat), chicken (with or without the bones, but boneless chicken does tend to get a bit overcooked), sausage, ham, cooked bacon…, or go for a combo.  Sausage and chicken? Beef and bacon? Or leave out the meat all together if  you’d rather.
  • 2 lbs finely minced or grated veggies, any kind.  I always add diced onion, grated carrots, and minced celery.  Then I might add some shredded zucchini, turnip, cabbage, spinach or kale, whatever I have on hand. Throw in some potatoes. Lots of folk like bell peppers, dice some up and throw them in.  Leeks are yummy. A few diced jalapenos would spice things up. Even canned pumpkin works. The only veggie I don’t add is tomatoes. I heard once that tomatoes interfere with the cooking process of dried beans, so I leave them out (I also don’t use tomato juice as a liquid, but I do stir in a bit of ketchup, and have had no problem with that).

Directions:

  1. Put the dried beans in the bottom of the crock-pot.
  2. Get out a 4-cup measure.  Combine your liquids.  When you have 4 cups, pour it over the beans in the bottom of the crock-pot.
  3. On top of the beans and liquid, add the meat.  I add the meat as is, then remove the fat and bones, and shred the meat after cooking.  You can do the same, or you can add cubes of boneless, skinless meat.
  4. Sprinkle desired seasonings on top of the meat.  (If you add bay leaves, count them so you know how many to remove before serving!)
  5. Finely mince, dice, or shred the veggies.  Add the veggies on top of the meat. (The liquid will not cover the veggies, yet).
  6. With a spatula or a spoon, press on the ingredients to lightly pack.
  7. Put the lid on the slow cooker, plug it in, turn on high, and go out and play! If you are around, check the beans after a few hours.  If the beans look dry add a bit more water, stock, beer, or wine (don’t stir, just pour it on top).
  8. Let beans cook for 6-8 hours.  Turn off.
  9. After the beans have cooled for a bit, taste them.  Needs more salt?  More maple syrup? More heat? Add it now.  If you added large hunks of meat with bones, remove bones and shred the meat. Remove the bay leaves, if you used them.
  10. If you want to add in extras, do it now.  You could stir in some diced tomatoes now, if you’d like, they won’t do any harm at this point (let cook for an additional 30 minutes or so).  Sometimes I stir cooked bacon at this point.  You could stir in frozen corn, if you’d like. Adding chopped parsley, cilantro, or green onion makes the beans look pretty and brightens them up a bit for a pretty presentation.
  11. Remember, beans seem to taste better the day after they are made, so don’t be afraid of letting them rest in the refrigerator for a bit.

Soooo, do you have the road map memorized?  1 lb beans, 1 lb meat, 2 lbs veggies, 1 qt (4 cups) liquid. Seasonings. Crock-pot. High. 6-8 hours, while you go out and play 🙂

Thanks for stopping by my kitchen today!  Go ahead now, make some beans! Let me know what you used and how they turn out 🙂 I can’t stop my son from making these beans! We’re drowning in beans…, but we’re not broke! Beans we can afford 🙂

11 Feb 2013 Crunchy Oat Clusters / Granola Bars

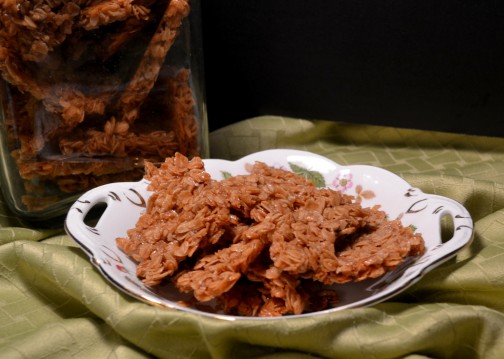
oat clusters

Sometimes, I don’t want to cook in the morning.  Sometimes I don’t even want to make toast.  I just want a lovely latte (I am always willing to make a latte) and  something on the side, while I casually drink my coffee and read the newspaper in my recliner. Sometimes that “something on the side” is a graham cracker, sometimes a cookie, sometimes  it’s something even more sinful. For a couple of years now, I’ve been thinking I should figure out a breakfast that works with my morning routine. You are probably thinking, fruit, eat fruit! No. Apples and oranges, pears and bananas do NOT go with coffee.  Dried fruit does, but that causes me to…ummm…make rude noises on a frequent basis, so dried fruit is out, too.  Last year I made a lot of granola.  I like granola.  I made some good ones, but eating granola  while balancing coffee and a newspaper is  inconvenient and messy.  I couldn’t get my granola to clump, and I needed clumps, big clumps, clumps like the size of a graham cracker.  Paring it down even more: I. want. crunchy. oat. clumps.  Now there’s a challenge!  Try running “Crunchy Oat Clumps” through a search engine and see what you get.  Not encouraging.

So! I have figured it out myself!  It took a couple of tries, and I pared down a lot of recipes, to get just want I wanted. And, tada! I have them now! Sweet, crunchy oat clumps, sort of like a Nature’s Valley Granola Bar.  My oats are tossed with a bit of butter, a bit of oil, some honey and some corn syrup, all necessary to get the large, crisp clumps and I added in some vanilla and a bit of cinnamon, too, so these oat clumps taste GOOD! They have none of those nasty additives, no preservatives and none of the excessive packaging that processed granola bars have. Score!

Crunchy Oat Clusters

  • 4 cups Old-fashioned oats
  • ½ cup light brown sugar
  • ½ teaspoon cinnamon
  • ¼ teaspoon Kosher salt
  • ¼ cup honey
  • ¼ cup corn syrup
  • ¼ cup butter
  • ¼ cup canola oil (or coconut oil, or vegetable oil)
  • 1 tablespoon vanilla extract
  1. In a large bowl combine oats, brown sugar, cinnamon and salt.  Stir to combine.
  2. In a small sauce pan combine honey, corn syrup, butter and oil.  Bring to a boil.  Reduce heat and simmer for 5 minutes.
  3. While sauce is simmering, line a baking tray with parchment paper.
  4. Remove sauce from heat and pour over the oat mixture.
  5. Pour oat mixture onto a parchment lined baking pan.
  6. With spatula or offset knife, spread oat mixture to an even thickness, and press down slightly.
  7. Place tray into preheated 300° oven and bake for 25 minutes.
  8. Open and turn off oven.  Let oats stay in oven for another hour or so, or until oats and oven are cool.
  9. Remove oats from oven and when completely cool break into pieces.
  10. Store in an airtight container.
  11. Eat whenever.  My son snacks on them after swim practice.  I like them in the morning, with a latte while I read the newspaper, in my recliner 🙂

In am sure these Crunchy Oat Clusters can be gussied up a bit.  You could add some coconut, chopped nuts, dried fruit…, make them yours!  You could probably also substitute real maple syrup for the honey, if you wanted.  You have to keep the corn syrup though (don’t worry too much, the corn syrup you buy at the store is not high fructose corn syrup). As for me, I like them just like this.  Simple, slightly sweet, very crunchy, and full of those good-for-you breakfast oats.

Thanks for stopping by my kitchen today and have a wonderful morning!

23 Sep 2011 Apple Pie Cake

With a name like “Apple Pie Cake,” how could I not try this recipe?  I saw a picture of this Apple Pie Cake on Pinterest a few days ago.  (OMG have you visited Pinterest?   I happily waste a lot of time on that website.  I love, love, love it!  It’s like I am writing my own magazine.  I choose the subjects, the articles, and the pictures and have the whole thing saved so I can flip through the pages whenever I want…, but I digress 🙂 Onto this fabulous recipe…!

This is a Martha Stewart recipe.  I have never been a big fan of Martha. To be honest, she scares me.  Doesn’t she seem a bit abrupt?  And imperial?  I get the feeling she’s looking  down her nose at me.  I feel frumpy and incompetent when she’s on TV.  It’s a surprise I tried this recipe actually!  I’m so glad I did though.

I love fruit based desserts.  Mix some fruit with flour, butter, sugar, and cinnamon, bake it until it all melts together and I’ll fall all over myself getting to the table. This recipe results in sort of an apple crisp turned pie that looks like a cake!  De-licious! Easier-than-pie and much easier-than-cake. It’s best eaten the day it’s made, the crust softens a bit after a night in the refrigerator, but no one would turn down a leftover slice. No one.

I tried a slice of this with whipped cream, and a slice of it without whipped cream.  I can’t believe I am saying this, but I liked it better without the whipped cream.   I haven’t tried this with a scoop of vanilla ice cream yet.  I guess I should make another,  just to test that out 😉

I found the recipe at MarthaStewart.com.  And I did make a few changes to the recipe…  The original recipe called for 5 lbs of apples (about 12).  I bought that many, but only used about 3 ½ lbs (6 large apples).  I added a bit of sugar, 1/3 cup, to the apples with the cinnamon, but Martha didn’t.  You can leave the extra sugar out if you’d like.

Apple Pie Cake

  • 2 cups flour
  • 1 cup packed light-brown sugar
  • 2 teaspoons cinnamon (divided use)
  • 1/2 pound (2 sticks) cold unsalted butter, cut into 8 pieces
  • 3-4 pounds (about 6) tart apples, such as Granny Smith
  • 1/3 cup granulated sugar
  • dash of nutmeg (optional, I added this, I love nutmeg…)
  • 2 tablespoons fresh lemon juice
  1. Preheat oven to 350 degrees.
  2. Combine flour, brown sugar and 1 teaspoon cinnamon. Using a food processor, electric mixer, or pastry cutter, cut in butter until the mixture forms pea-size pieces.
  3. Press 2/3 of the mixture onto bottom and 1 inch up the side of a 9-inch spring form pan.
  4. Peel apples, cut into thin slices, and place in a bowl. Pour off any accumulated liquid.  (I didn’t have any)
  5. Toss apple slices with remaining teaspoon cinnamon and lemon juice, and optional 1/3 cup granulated sugar.
  6. Place prepared apples over the “crust” in the prepared pan, pressing down gently as you pack them in.
  7. Sprinkle remaining crumb mixture on top of the apples.
  8. Put the pan on an aluminum foil-lined baking sheet, and bake for 1 hour and 15 minutes, or until golden brown on top.
  9. Run a knife around the edge of the pan, and let the cake cool in the pan to set.
  10. Dust the top of the cake with confectioners’ sugar. Remove the sides of the spring form pan and place on decorative plate to serve.
  11. Serve at room temperature.

I’ll be making this again on Monday night for my Dining For Women meeting.  I know the women will appreciate it.  I also think I will make this for Thanksgiving.  It’s so EASY, and delicious.  I hope  you try this recipe and like it as much as I do.  Thanks for stopping by my kitchen today…, and stop by my Pinterest pages, too!!