Tag-Archive for ◊ corn ◊

02 Oct 2019 Fresh Corn Soup
Fresh Corn Soup with Roasted Poblano Chilies, Queso Fresco, and fried corn tortilla strips.

This is such a plain and simple recipe, it’s hard to believe such a good tasting soup comes out of it!

The ingredient list for this soup is so ordinary that it’s hard to imagine how exceptional the soup tastes.  Been there, thought that. I was wrong. This soup is beyond the sum of its parts. Fresh Corn Soup is divine, and creamy and rich, but it’s not a hearty soup so it needs something else to go with it to make a full meal. Soup-and-sandwich anyone or, even better, a soup-and-enchilada combo?

I like to have this Fresh Corn Soup when the seasons are just beginning to change , just when cooler temperatures heighten the desire for soup and when the end-of-the-season corn-on-the-cob is still available. The original recipe said this soup can be made with frozen corn, so score one for simplicity! I always make things hard on myself though. I strip the corn kernels off six ears of fresh corn and then proceed with the recipe.

The toppings make this soup exceptional. Top each bowl of Fresh Corn Soup with a few corn tortillas cut into strips and fried in a little oil until crisp, a few crumbles of Queso Fresco, and a tablespoon or so of charred, peeled and diced poblano chilis.

This soup can be made vegetarian by substituting vegetable broth for the chicken broth, or by not using broth at all and using milk as the liquid ingredient.

Fresh Corn Soup

4 cups fresh corn kernels (from about 6 ears of corn) or 4 cups frozen corn kernels, defrosted.

1 cup water

4 tablespoons butter

2 cups chicken broth, vegetable broth, or milk

2 cups of milk

½ teaspoon table salt or 1 teaspoon Kosher salt

  1. Mix corn with water and place in blender, process until the water and corn combine into a smooth paste.
  2. Melt the butter in a large saucepan. Add corn puree and sauté for 5 minutes.
  3. Pour chicken broth (or veggie broth) plus milk into pan with corn mixture and bring to a boil.
  4. Reduce heat to medium and gently simmer soup for 15 minutes.
  5. Turn off heat and cool slightly.
  6. Don’t skip this step! I did once and it was not nice. Pour the soup into a fine mesh strainer. Retain the liquid and discard the solids.
  7. When ready to serve, gently reheat and serve with all three of the toppings below.

Makes about 6 cups of soup. Leftover soup freezes well.

Garnishes

2 Poblano Chilies

3 corn tortillas

Queso Fresco

  1. Char the poblano chilies over an open burner. When completely charred and black, place in a brown paper bag to cool. When cool enough to handle, rub the burned skin off with a paper towel, cut away the stem, seeds and membrane and then finely chop the remaining flesh.
  2. Cut the three corn tortillas into thin strips. Heat a thin layer of vegetable oil in a small fraying pan. When hot add some of the strips and fry until light brown. Repeat with remaining tortilla strip.
  3. Open the package of Queso Fresco and crumble the cheese.
  4. Add ½-1 tablespoon of diced chilies into bottom of the bowl along with approx. 1 tablespoon crumbled Queso Fresco.
  5. Ladle hot soup over the chilies and cheese.
  6. Top with crispy fried corn tortillas
Fresh Corn Soup made with white corn, topped with fancy corn tortilla shapes and Queso Fresco. Made and photographed by my daughter, Abby.

Thanks for stopping by my kitchen today.

02 Aug 2013 Beans!

beans01

I am so excited about this recipe!  It’s a paradigm shift recipe!  It’s not a recipe in the true sense of the word, it’s more of a road map to a particular destination.   A road map allows for more flexibility than a recipe, a road map allows the cook to make adjustments based upon personal preferences, taste, time, and what’s in the pantry.  I think most people have a road map for a few good dishes.  I have a road map for spaghetti sauce, chicken soup, stir-fry and hamburgers.  You might have a road map for meatloaf, burritos and rice bowls.  Most people have road maps for sandwiches and salads. A road map means there are guidelines, easy ones, usually ones that can be memorized, and that can always be adapted as the situation requires.

So here it is, a guideline for a pot of beans, in the crockpot no less!  Crockpot cooking is great for summer, the kitchen doesn’t get heated up, and a pot of beans pairs well with almost everything that can be BBQ’d.  In the winter months, a bowl of beans with some cornbread or tortillas is almost the definition of comfort food. Another plus, crockpot cooking is fuss free, so toss everything in the pot and then go sit in the sun or shovel snow.

Many thanks to Mark Bittman of the New York Times for this road map. Thank you, thank you, thank you!!

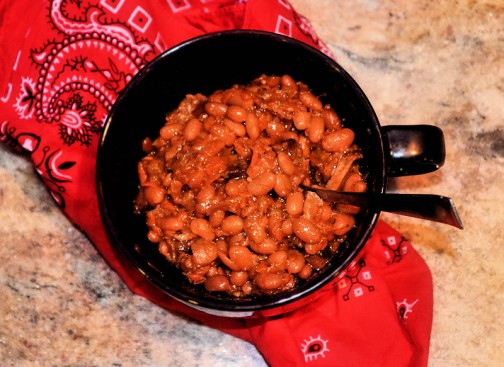
BTW…, for years I have been looking for a good baked beans recipe, so that’s what I make with this recipe:  meaty, slightly sweet Boston-style beans.  YUM! They go with everything and I have  a serious love for leftover beans on toast (I’m English).  My son mastered this recipe in one take and he makes killer spicy teriyaki beans with chicken.  I can see others going for more of a Mexican style bean. What sort of beans do you like? Make them!

The House Special Beans

  • 1 lb of dried beans, any kind, I like small white and pinquitos but black, pintos, garbanzos, kidney, or a combination of different kinds of beans can also be used.  Don’t have a full pound of beans?  Add in some split peas or lentils to make up the difference.  Remember these are dried beans (about $1.25 for a pound bag) we are not using canned beans here (and there is no need to soak the beans first).
  • 4 cups of liquid, any kind.  Find a mixture that appeals to you. I start with a bottle of beer, then I add in about 1/4 cup of ketchup, 1/4 cup of Worcestershire sauce, 1/4 cup maple syrup, 1/4 cup of brown sugar and a squirt of mustard, using molasses instead of maple syrup and brown sugar would be good too. If my Dad were here I’d stir in 1/4 cup of bourbon. Then I add water, broth (any kind), or cold coffee to make the 4 cups (too much coffee will make the beans a bit bitter, so stick to less than 1 cup of cold coffee).  My son adds BBQ sauce, sriracha, honey, teriyaki or soy sauce along with beer and coffee.  Don’t like beer?  Use some leftover wine. Don’t drink at all, stick to broth and water.   Health nut?  Stir in carrot juice and some of that green liquid you’re so fond of !
  • Seasonings, any kind.  Start with a healthy amount of salt and pepper, then add in what appeals to you.  I add in 2 t. salt, 1 t. black pepper, 1 t. cumin, 2 t. chili powder, minced garlic, and 2 bay leaves.  Other options include oregano, basil, coriander, red pepper, curry powder, ginger, paprika, liquid smoke, parsley, sage, rosemary and thyme…
  • 1 lb meat, any kind, a bit more or a bit less is fine.  I like beef, and I buy something on sale, beef shanks, top sirloin, stew meat, steak, anything.  Throw in a pork chop or two, or some ground meat (brown it first and drain off the fat), chicken (with or without the bones, but boneless chicken does tend to get a bit overcooked), sausage, ham, cooked bacon…, or go for a combo.  Sausage and chicken? Beef and bacon? Or leave out the meat all together if  you’d rather.
  • 2 lbs finely minced or grated veggies, any kind.  I always add diced onion, grated carrots, and minced celery.  Then I might add some shredded zucchini, turnip, cabbage, spinach or kale, whatever I have on hand. Throw in some potatoes. Lots of folk like bell peppers, dice some up and throw them in.  Leeks are yummy. A few diced jalapenos would spice things up. Even canned pumpkin works. The only veggie I don’t add is tomatoes. I heard once that tomatoes interfere with the cooking process of dried beans, so I leave them out (I also don’t use tomato juice as a liquid, but I do stir in a bit of ketchup, and have had no problem with that).

Directions:

  1. Put the dried beans in the bottom of the crock-pot.
  2. Get out a 4-cup measure.  Combine your liquids.  When you have 4 cups, pour it over the beans in the bottom of the crock-pot.
  3. On top of the beans and liquid, add the meat.  I add the meat as is, then remove the fat and bones, and shred the meat after cooking.  You can do the same, or you can add cubes of boneless, skinless meat.
  4. Sprinkle desired seasonings on top of the meat.  (If you add bay leaves, count them so you know how many to remove before serving!)
  5. Finely mince, dice, or shred the veggies.  Add the veggies on top of the meat. (The liquid will not cover the veggies, yet).
  6. With a spatula or a spoon, press on the ingredients to lightly pack.
  7. Put the lid on the slow cooker, plug it in, turn on high, and go out and play! If you are around, check the beans after a few hours.  If the beans look dry add a bit more water, stock, beer, or wine (don’t stir, just pour it on top).
  8. Let beans cook for 6-8 hours.  Turn off.
  9. After the beans have cooled for a bit, taste them.  Needs more salt?  More maple syrup? More heat? Add it now.  If you added large hunks of meat with bones, remove bones and shred the meat. Remove the bay leaves, if you used them.
  10. If you want to add in extras, do it now.  You could stir in some diced tomatoes now, if you’d like, they won’t do any harm at this point (let cook for an additional 30 minutes or so).  Sometimes I stir cooked bacon at this point.  You could stir in frozen corn, if you’d like. Adding chopped parsley, cilantro, or green onion makes the beans look pretty and brightens them up a bit for a pretty presentation.
  11. Remember, beans seem to taste better the day after they are made, so don’t be afraid of letting them rest in the refrigerator for a bit.

Soooo, do you have the road map memorized?  1 lb beans, 1 lb meat, 2 lbs veggies, 1 qt (4 cups) liquid. Seasonings. Crock-pot. High. 6-8 hours, while you go out and play 🙂

Thanks for stopping by my kitchen today!  Go ahead now, make some beans! Let me know what you used and how they turn out 🙂 I can’t stop my son from making these beans! We’re drowning in beans…, but we’re not broke! Beans we can afford 🙂

17 Oct 2011 Brown Bag Popcorn

I have been meaning to post this for ages.  It’s so simple.  It’s so easy. It’s so GREAT.  Listen, there is no need to buy any more packages of oily microwave popcorn!  REALLY!  Save money. Save calories. Reduce waste. Skip the preservatives.

Those big time popcorn companies really pulled one over on us.  You don’t need thier fancy box,  their fancy bag, their celephane overlay, their oil (or any oil at all), to pop popcorn in the microwave.  You just need one plain brown lunch bag (approx 10.5 inches x 5.5 inches), 1/3 cup of popcorn, and 1 microwave, and 2 minutes on the timer.  DONE! It’s like….a miracle!

Why did I post this recipe now?  Because a Pumpkin Spice Coffee (my previous post) a fresh bowl of popcorn, and reality TV  is just about the perfect way to enjoy a bit of fall R&R. Project Runway hails on Thursday.  Brew the decaf.  Pop the corn.  Slippers.  Snuggle quilt. It’s gonna be a good, good night!

Brown Bag Popcorn

1/3 cup popcorn kernels (no more, no less)

1 brown lunch bag

1 tablespoon melted butter, if desired

pinch of salt (to taste), if desired

Pour the measured 1/3 cup popcorn kernels into the brown bag.  Fold the top of the brown bag down at least twice, just so the bag fits into the microwave and is able to turn.  Set the timer for 2 minutes.  POPCORN!  IF desired, drizzle the freshly popped popcorn with 1 tablespoon butter and a pinch of salt.  Shake in the bag to combine.  Then pour into a bowl and enjoy.  Serves one or two.

Just a few notes…there will be some unpopped kernels at the bottom of the bag.  Look for them, and then don’t pour them into the serving bowl!  Measure the popcorn!  If you get too much popcorn in the bag the bag could burst.  If you put in too little, the popcorn could start to burn.  Gray popcorn does not taste good.

My grandson likes popcorn for breakfast. I think it's a lot better for him than highly processed, often highly sugared, always full of preservatives boxed cereal.

It’s so SIMPLE!  Thanks for stopping by my kitchen today.  I hope there are many bowls of freshly popped popcorn in your future.


04 Oct 2011 Chicken Pot Pie

It rained here yesterday!  Happy, happy October, my very favorite month of the whole year.  I was so excited with the cooler weather and the rain that  I put on slippers and a sweatshirt to celebrate.   Then I decided to teach my son how to make Chicken Pot Pie.  He has his own apartment now, and needs to know how to make things like this.  I went shopping for ingredients, started to prep them…and no man-child.  He ended up staying late at work, and I had to make the pie by myself.  He was home when it came out of the oven though (how does he doe that?!).  He walked in, kissed me and said, “I love it when you make stuff like this.” he then proceeded to eat half the pie.  Then he called his friend to say there was Chicken Pot Pie at his house, and to come over and have some!  I’d say the pie was a hit.

This is my son.  He’s a good sport about learning how to cook and wearing an apron his mom made for him!

This is a pretty simple Chicken Pot Pie.  Absolute comfort food!  No spices other than salt and pepper, so the true taste  of sauteed chicken and fresh veggies shine through…and are then snuggled up in a smooth gravy and encased in pastry.  Yummmm!

The hardest part of this pie comes after removing it from the oven.  You have to wait!  You have to wait for the gravy to set up a bit, or it will run all over your pastry.  If you can’t wait, it’s  not really a bad thing!  The loose first slice will still taste delicious and by the time you are ready for your second slice, the filling will have set a bit.

Believe me, after making your own Chicken Pot Pie, you will never buy one from the frozen foods  section again.  You might never order one from a restaurant either…

Chicken Pot Pie

  • 2 tablespoons olive oil
  • 2 tablespoons butter
  • 1 cup chopped onion
  • 1 cup diced carrots
  • 1 cup diced celery
  • 1 lb. boneless, skinless chicken (breast or thighs, or a combination)
  • salt and pepper to taste
  • 1/3 cup flour
  • 1 can condensed chicken broth (or 1 1/2 cups homemade chicken broth)
  • 1/2 cup half-and-half or milk
  • 1/2 cup fresh or frozen corn kernels
  • 1/2 cup petite frozen peas
  • 2 9″ Pillsbury pie crusts (1 box) OR 1 homemade double crust pastry
  • 1 egg, beaten with 1 tablespoon water, optional
  1. Preheat oven to 350 degrees.
  2. Melt the butter along with the olive oil (you can use all oil, if you want) in a large skillet over medium heat.
  3. When the butter has melted and the oil is hot, add the chopped onion and saute over medium heat for a few minutes.
  4. Stir in the diced carrot and celery and saute for approx. 5 more minutes, still over medium heat, stirring occasionally.
  5. While the veggies are sauteing, dice the chicken and sprinkle with salt and pepper.
  6. Stir the diced and seasoned chicken into the veggie mixture and saute for three more minutes, still stirring occasionally.
  7. Sprinkle the flour over the chicken and veggie mixture, stir constantly over medium heat for 3 minutes (the flour might try to stick to the bottom of the pan, try to release it by stirring vigorously. If necessary add another tablespoon or so of butter or oil. Do not burn the flour!).
  8. While the chicken/veggie/flour mixture  is sauteing, combine the chicken broth and half-and-half or milk and microwave for three minutes.  When the microwave beeps, remove the pan from the heat and remove the liquid from the microwave.
  9. Now you are going to make the gravy.  Turn the heat off the pan.  Stir in 1/2 cup of the hot broth-milk mixture.  Stir until mixture is smooth.  Add another 1/2 cup of broth-milk mixture. Stir until smooth.  Repeat two more times using 1/2 cup broth-milk mixture each time.
  10. Return chicken-veggie-gravy mixture to heat.  Stir in frozen (of fresh) corn and peas. Simmer for gently over medium heat to defrost the frozen veggies.
  11. Turn off heat and let filling sit while you unroll the pasty and place one sheet in the bottom of a pie pan.
  12. Pour the filling over the pastry in the bottom of the pie pan, and cover with the second roll of pasty.  Cut 3-5 vent holes in top of top pastry (with scissors or a knife).  Crimp the edges of the pastry so the filling is fully encased.
  13. If you want a nice, shiny crust, brush pastry lightly with egg wash (egg beaten with 1 tablespoon water).  This is optional (but nice if you want to show off!) You won’t need all of the egg wash. (Scramble the leftover egg for the baby, or the dog!)
  14. Bake in preheated 350 degree oven for 40 to 45 minutes.
  15. Remove pie from oven and let sit…for as long as you can.  The longer the pie sits, the thicker the gravy will get.  Letting the pie sit for 30 minutes to an hour, is about right. (Don’t worry, the filling will remain hot.)
  16. Serve, and enjoy.

Thanks for stopping by my kitchen today.  Hope you enjoyed the visit.  See you again, soon, I hope!