Archive for the Category ◊ Breads ◊

05 Feb 2021 New York Style Coffee Coffeecake

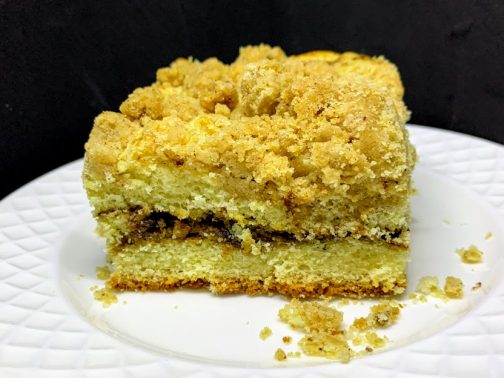
I love New York style coffeecake. For years I have had in mind the perfect New York style coffeecake, and I have tried many recipes in order to produce that coffeecake. What I have in mind is a 1:1 ratio of cake to topping, a coffeecake that is delicious at room temperature, one that stays moist and delicious for a few days, and one that had to be baked in a 9×13 pan. I might finally have achieved my goal, melding hints and bits and pieces of several recipes into this one. The topping in this recipe is based on one in “Cake, I Love You” by Jill O’Connor. The coffee coffeecake portion is only minimally changed from “One Tin Bakes” by Edd Kimber.

YES! This New York Style COFFEE Coffeecake has a coffee swirl running through it and a nice thick layer of New York style coffeecake crumbs on top! Coffeecake just doesn’t get any better.

For New York Style Crumble Topping

320 grams (2 ½ cups) AP flour

½ tsp. baking powder

¼ cup brown sugar

¼ cup white sugar

1 tsp. Kosher salt

1 tsp. cinnamon

1 cup unsalted butter

For the Coffee Ripple

100g (1/3 cup) brown sugar

4 tsp. instant espresso powder

1 ½ tsp. cinnamon

For the Sour Cream Coffeecake

175 grams (6 oz) unsalted butter, at room temperature

300 grams (1 ½ cups) sugar

315 grams (2 ½ cups) AP flour

1 tablespoon baking powder

1 teaspoon salt

2 teaspoons vanilla

3 eggs

180 ml (3/4 cup) sour cream

  1. Preheat oven to 350 F.
  2. Line 9×11 pan with parchment paper.
  3. First, make the New York Style Crumb Topping first. Mix the flour, sugars, baking powder, salt, and cinnamon together in a bowl, and set aside for a minute.
  4. Next, brown the butter. Melt the butter in a pan over medium heat.  The butter will melt, sizzle a bit, then foam. As it foams, brown specks will form. You want those.  Don’t let the brown specks burn though. 
  5. When butter is nicely browned and smelling a bit like nuts, remove from heat and pour over dry ingredients.
  6. Using a fork, combine the butter and the dry ingredients, until the mixture clumps together. You want clumps! If you don’t have some big clumps, squeeze dough together until you get some.
  7. Pop the crumble topping into the freezer (you can do this the night before, if you’d like).
  8. Next, combine all the ingredients for the coffee ripple and set aside.
  9. Now make the cake.  Beat butter and sugar together until light and fluffy, 4-5 minutes with a stand mixer.
  10. Combine all the dry ingredients in one bowl and stir to combine. Set aside.
  11. Combine all the wet ingredients into another bowl and mix well. Set aside.
  12. Add 1/3 of flour mixture to butter sugar mixture and mix well. Add 1/3 of wet mixture and mix well. Repeat two more times to use up all the flour and the wet ingredients.
  13. Spoon ½ (or a bit more) of cake batter into prepared 9×13 pan.
  14. Sprinkle Coffee Ripple mixture over the batter.
  15. Spoon remaining cake batter over Ripple mixture. Cake mixture should completely cover the coffee mixture.
  16. Take the New York Style Crumb topping out of the freezer and sprinkle all over the cake mixture.  The cake should be completely covered by the topping.
  17. Bake for 50 minutes in a preheated 350 F oven.  Check that the middle of the cake is completely done before removing from oven.
  18. Let cake cool at least 20 minutes before removing from pan.
  19. Serve cake warm or at room temperature. Leftover cake will keep 2-3 on counter in a closed container.

Thanks for stopping by my kitchen today.

Print Friendly, PDF & Email
26 Jul 2020 Homemade Ketchup
-:: Fresh Homemade Ketchup ::-

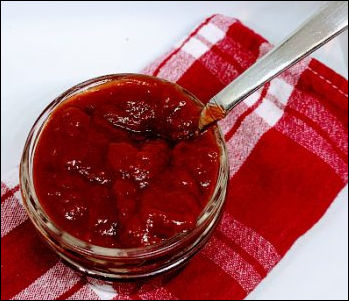
Every year I plant tomatoes and every year, for a period of a few weeks, I have more tomatoes than any one family could ever use. I have some recipes on this blog that call for a lot of homegrown tomatoes: Fresh Tomato Lasagna and Tomato Tart jump to mind because we make them every summer. This year we have added two wonderful new recipes, Homemade Tomato Ketchup and Tomato Jam.

This is my recipe for Tomato Ketchup. The recipe originated with Saveur Magazine, was adapted by someone, and then adapted again by myself. I switched from using whole spices wrapped in cheesecloth to ground spices stirred in at the beginning. So much easier!

This ketchup is DELICIOUS. We even taste-tested, side-by-side with Heinz ketchup, this ketchup, and McDonald’s fries. Eight testers, and not one chose the Heinz over this ketchup. One tester even complained about the gluey texture of the Heinz ketchup, something she had never noticed before (OK, so that tester was me)… ?

The ketchup is EASY to make, but it does involve a lot of dishes and utensils: cutting board, sharp knife, stockpot, wooden spoon, a blender, a sieve, measuring spoons, and small bowl. But really…, that’s not too much for a six month’s supply of delicious homemade ketchup with no preservatives, no artificial flavourings, and no chemical thickening agents, is it?

Homemade Tomato Ketchup

INGREDIENTS

  • 4 pounds homegrown tomatoes, roughly chopped
  • 1 large onion peeled and chopped
  • 1-2 Anaheim chilies, seeded and chopped, optional
  • 2 garlic cloves, crushed or diced
  • 2 bay leaves
  • 1/8 teaspoon ground cloves
  • 1/4 teaspoon ground cinnamon
  • 1/2 teaspoon celery seeds
  • 1/4 teaspoon ground allspice
  • 1 tablespoon kosher salt
  • 1/4 -1/2 teaspoon chile flakes, optional
  • 1 cup apple cider vinegar
  • 4 oz. (125 grams) light brown sugar

To finish, optional:

  • 1 ½ tablespoons cornstarch
  • 2-3 tablespoons cold water

INSTRUCTIONS

  1. Place all ingredients, except for the cornstarch and cold water, in a large stockpot.
  2. Simmer mixture over medium heat until tomatoes and chiles are soft and onions are translucent and limp, about 45-60 minutes.
  3. Turn off heat, and let mixture cool (because blending hot liquids can be dangerous and messy). Remove bay leaves.
  4. In batches (probably 3 batches, depending on the size of your blender and temperature of tomato mixture), place tomato mixture into a blender and blend until very smooth.
  5. Strain the ketchup through a fine-mesh strainer and return to the cooking pot (straining removes seeds and peels). Press on the solid pieces to extract as much liquid as possible. Discard the solids.
  6. Once all the pureed liquid has been returned to the pan, cook over medium-low heat for an additional 30-45 minutes or until thickened to your preference.
  7. OPTIONAL: If your ketchup doesn’t thicken to your liking (some tomatoes have more liquid in them than other tomatoes), mix a slurry of cornstarch and cold water. Bring tomato mixture to a rapid boil and, stirring constantly, pour in the cornstarch slurry.  Continue to boil and stir for a full minute.
  8. Remove ketchup from heat and let cool.
  9. Ketchup can be stored in a sealed container (preferably glass) in the refrigerator for up to 3 weeks and frozen for 6 months or more.

Thanks for stopping by my kitchen today. Tomato Jam will be up soon!

Print Friendly, PDF & Email
29 Mar 2020 Sourdough Bread
 |  Category: Breads  | Tags: , , , ,  | 2 Comments

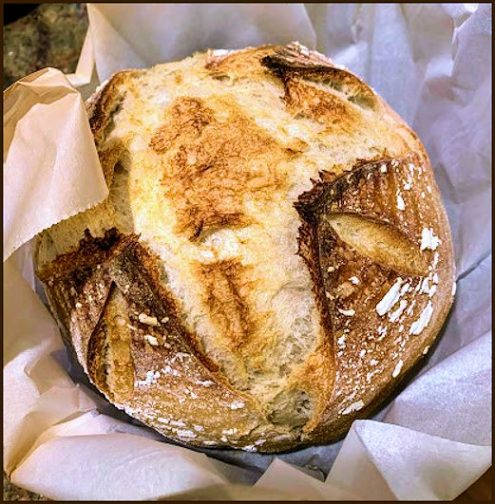
I’ve heard there’s a yeast shortage in these days of Coronavirus Quarantine. I find that truly odd. I didn’t know there were so many people wanting, and able, to make their own bread. Yeasted breads were my Everest for a long, long time, most of my life, in fact. Recently, though, I have gotten into making Sourdough bread. I have posted my recipe below. If you need a starter and live nearby, text me. I will set out a jar on my front porch for you to pick up. Now let’s just hope you are able to get your hands on enough flour, which has been a challenge recently. If you can’t find bread flour, all-purpose can be substituted.

You’ll need a 5 or 6 quart covered Dutch Oven (although my daughter gets by with the smaller version) a Banneton Mold (order on-line) or substitute a greased and floured bowl. It might be a good idea to watch a few technique videos about stretching and folding if my description of the technique is not enough.

I make a few loaves of this bread each week. My adult children have standing orders. In the days past, when I used to be able to go out or host dinner parties, I would often serve a loaf. Everyone seems to love it.

PLAN AHEAD! This recipe takes a minimum of 3 days to make. You need to feed the starter, make the dough, age the dough, bake the dough, and only then can you eat the bread.

SOURDOUGH BREAD

  • 150 grams starter (fed 8-18 hours previously)
  • 235 grams water (I use slightly warm water)
  • 420 grams bread flour (OR 60 grams whole wheat flour PLUS 300 grams bread flour)
  • ¼ tsp diastatic malt powder (optional, helps with rising. Available on Amazon)
  • 11 grams salt

NOTES ON STARTER:

  1. Starter should be fresh, bubbling, and at room temperature.
  2. Before using starter, measure out 50 grams into another glass jar, stir in 100 grams of water and 100 grams of flour until well combined. Cover loosely and set on counter. Use this mixture to make next loaf but be sure to retain another 50 grams for the following loaf. It’s a never-ending cycle.
  3. NOTE: Starter should not sit out on counter more than 24 hours. Refrigerate until needed. Then feed. Leave on counter. Wait 8-18 hours. Make another loaf of bread, retaining and feeding another 50 grams of starter. Like I said, it’s a never-ending cycle.

TO PREPARE DOUGH

  1. In a medium mixing bowl combine room temperature, fed (8-18 hours previously), fresh, bubbling starter with the water and stir well.
  2. In another bowl combine flour, malt powder and salt, stir to combine.
  3. Add the dry ingredients to the wet ingredients.
  4. Stir with fork, hand, wooden spoon or spatula to hydrate the flour. Don’t use an electric mixer or a dough hook.
  5. Place dough onto a piece of baking parchment, flatten slightly, and dimple with fingers. Dust with more flour, if needed. Cover the dough with a bowl and let sit for 15 minutes.
  6. Remove bowl from the top of the dough. If dough is still wet, sprinkle with more bread flour. Grab two sides of dough and stretch, without tearing. Fold the dough back on top of itself. Turn dough 180 degrees, stretch and fold these two ends. Cover dough ball with mixing bowl and let sit for 15-20 minutes. Do this two more times and let set 15-20 minutes between each stretch and fold.
  7. After the fourth rest, shape the dough into a round, tuck in the bottom edges of the dough under itself until the top is smooth. Cover with the mixing bowl again and let rest 5 minutes.
  8. Place dough ball into a flour-covered 8 or 9-inch banneton mold. Allow dough to rise until it has visibly expanded and usually to the top edge of the banneton.
  9. Cover dough with plastic wrap in refrigerate for 12-36 hours to develop sourdough flavor (the longer in the refrigerator, the sourer the bread).

WHEN READY TO BAKE.

  1. Remove dough from refrigerator an hour or so before baking.
  2. Turn banneton mold upside down onto a piece of parchment paper. Wait for dough to flop out of the mold and onto the paper.
  3. Preheat oven to 475, with a 5- or 6-quart Dutch Oven IN the oven.
  4. When dough is out of mold, slash top with a razor blade or lame.
  5. When oven is hot and Dutch oven is hot, using the parchment paper, transfer the dough to the Dutch oven. Quickly replace the lid and put the Dutch oven with dough in hot oven.
  6. Bake 18 minutes at 475 and then remove lid. Continue to bake bread for another 16 minutes. Internal temperature of bread should be 205-210 degrees.
  7. Remove bread from Dutch oven and let cool to internal temperature of 90 degrees before cooking.

Thanks for stopping by my kitchen today. Have fun making, and enjoying, your own sourdough bread!

Print Friendly, PDF & Email
22 Dec 2019 Chicken Curry Sandwiches
Chicken Curry Sandwiches

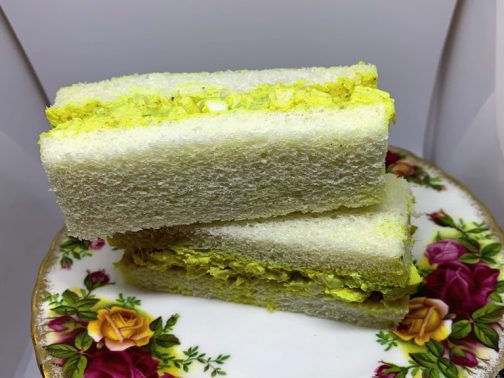
Chicken Curry finger sandwiches have been a staple at my English Teas for decades. I don’t remember where I found the recipe, but it’s a keeper. The curry mixture keeps well in the refrigerator, covered, for a few days.

Chicken Curry Sandwiches

  • 2 cups cooked and finely diced chicken
  • 2 hard boiled eggs, cooled, peeled and diced
  • ½ to 1 cup mayonnaise (personal preference, I try not to use more than ½ cup)
  • ¾ cup finely diced celery
  • ¼ cup finely diced green onions
  • 1 teaspoon fresh lemon juice
  • ½ to 1 teaspoon salt, to taste
  • 1 to 2 tablespoons curry powder (taste and add more if needed, depends on the brand of curry powder used)
  1. Gently combine all ingredients.
  2. Let mixture sit for a few hours for flavors to develop.
  3. Spread onto choice of bread and enjoy (since I usually serve this filling in crustless finger sandwiches I usually use a bakery white bread)

Makes enough filling for 4 good sized sandwiches or 12 finger sandwiches.

Print Friendly, PDF & Email