One Dough-Four Cookies
The actual recipe includes five cookie versions, but four are much easier to make at once: make a double batch of the dough, divide it in half, then add half the quantity of ingredients for each variation to make four…

"It's all about the recipe!"
The actual recipe includes five cookie versions, but four are much easier to make at once: make a double batch of the dough, divide it in half, then add half the quantity of ingredients for each variation to make four…
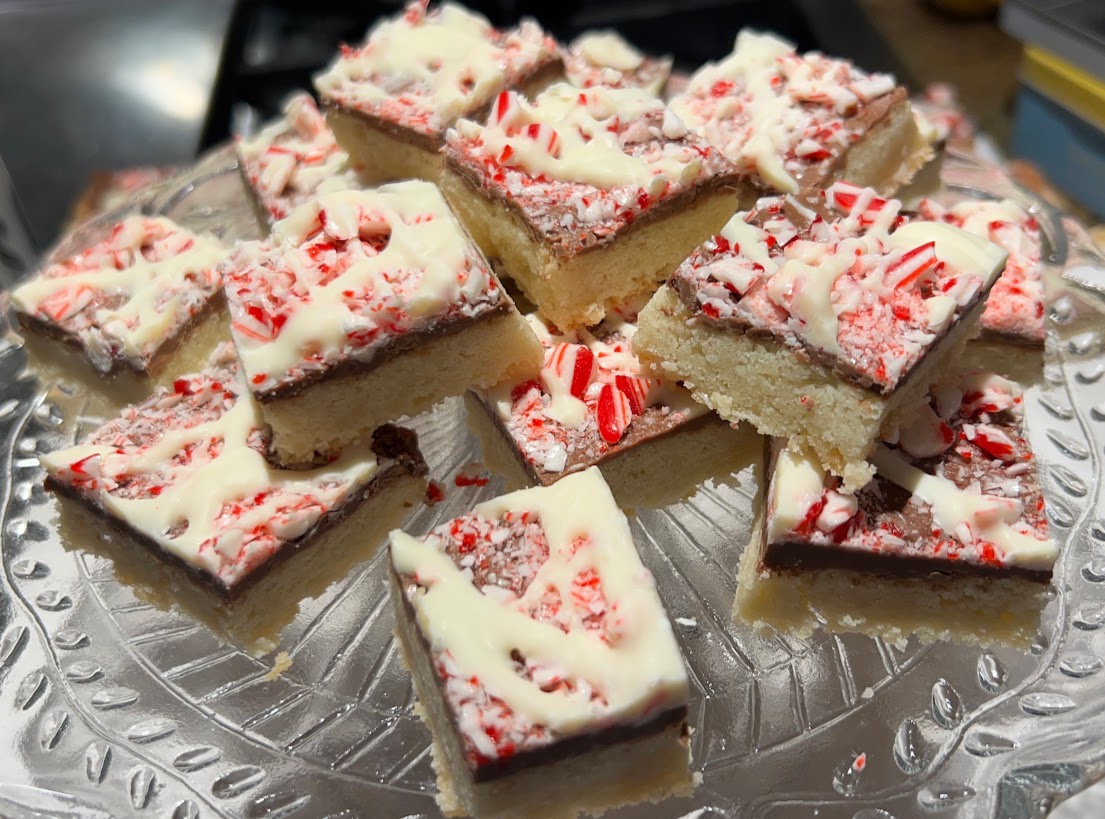
Mmmm, the flavors of Christmas! For me they are gingerbread, eggnog and peppermint 🙂 A decade or so ago, Bon Appetit magazine featured this Peppermint Bark Cookie. It’s a shortbread base that’s topped with melted chocolate, crushed candy canes, and…
Today I am sharing a White Chocolate Spice Cookie recipe. This cookie is deliciously spicy from the black pepper in the dough, and deliciously decadent because of the white chocolate decoration, mmmm. It’s a cookie for grown ups! My friend Kayte…
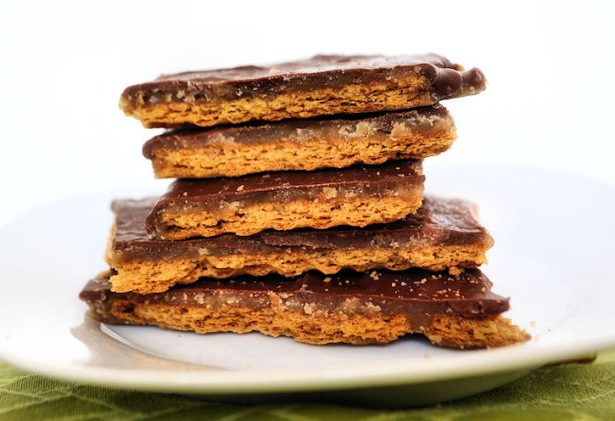
This recipe is rustic, quick, and done in 20 minutes! But once made, the bars have to sit in the refrigerator to harden up a bit 🙂 The finished product also freezes well, so it’s okay to make ahead or…
Tomorrow we’re making Christmas sugar cookies then heading out to see the Christmas lights. It’s finally beginning to look a lot like Christmas around here! This recipe is from King Arthur Flour, and the photo is from there, too. The…
You HAVE to try this! It’s delicious, and it’s mild and smooth and warm and comforting, and sooooo Christmas-y! I don’t know about you, but I don’t like bitter hot chocolate (Starbucks), and I don’t like hot chocolate that is so…
There’s a surprise in the middle!
Every Christmas has to include The Three Big Christmas Flavors: Egg Nog, Gingerbread, and Candy Cane! Here is a sugar cookie made with crushed candy canes—it’s delicious! The candy cane flavor is not overpowering, it’s just right, and the cookie…