Tag-Archive for ◊ citrus ◊

18 Jan 2014 Russian Tea

Russian-Tea-1a

Are you old enough to remember the “Russian Tea” phase back in the 70’s?  I was a teenager then, a very young teenager, and our Moms and Grandmas were mixing up batches of Russian Tea like crazy and giving everyone little jars of the stuff.  I think the mix had instant tea, Tang (remember Tang? Astronauts drank it!), powdered lemonade, and some spices.  You opened up your gift jar, spooned some mix into a cup, added hot water, stirred it up and  you were drinking Russian Tea!  I liked it. It was a different hot drink.  I wasn’t into coffee yet, Hot Chocolate was too childish, English tea with milk was OK, but boring. Russian Tea was fun and different–and a bit exotic.

Fast forward to February 7th, 2014, Opening Ceremonies for The XXII Winter Olympics will be held in Sochi, Russia and I will be hosting a Russian Themed Winter Olympic Dinner.  What to have to drink after dinner? My daughter suggested Vodka shots off the tip of a sword.  Umm, no.  A citrus-y, sweet, slightly spicy version of Russian Tea is more up my alley — but not made of Tang, Country Time Lemonade and Nestea. So I hit the Internet.  First spoiler, the so-called “Russian Tea” of the 70’s isn’t Russian at all. It’s an American concoction! The only thing Russian about it is it’s name.  Shhhhhhhhhh! Don’t tell anyone!  Real Russian tea is “Russian Caravan” tea, because tea used to be imported to Russia from China, via a 16-18 month caravan, and it acquired a smokey flavor from all of the caravan campfires, according to Wikipedia.  So, I went to my local Russian grocery store, yes, we have one in San Jose, and I couldn’t find “Russian Caravan” tea anywhere (nor anyone to help me), but lots of Earl Grey.  I am not serving Earl Grey tea at my Russian Dinner.  Early Gray Tea is English and I don’t like it, it’s too smokey!

So now I am back to my original “Russian” Tea quest.  I found some recipes on the Internet, checked out their star ratings, and tried a few.  One was truly horrid; it involved extracting the juice from oranges and lemons, then boiling the  rinds in sugar and water then adding  the liquid to cold tea. I was skeptical, but the very attractive, very sincere lady on the YouTube video seemed nice, and she was raving over her tea! So I tried it.  She was not honest. Her tea was bitter and horrid.  Of COURSE it was.  Boiling all that pith then adding it to the tea? I should have known better. Why do people post bad recipes?

Eventually, I came up with this version for fresh Russian Tea.  I like it.  I really like it. I served it to five friends and two relatives, and they all said they liked it.  Then I served it to another relative, the daughter who suggested I serve vodka shots off the end of a sword, and she hated it.  I was SHOCKED.  I tied her down and make her try it again.  She STILL didn’t like it.  Harrumph.  She’s no longer my favorite child.  My son loved the tea.  He said, “That’s good.  That’s really, really good.”  He’s a good boy. He’s my favorite child now.

This “Russian” tea is in the same family as hot tea with lemon and honey, but with orange added, and some cinnamon, and a few cloves, it’s a bit more complex (there’s no honey in this tea though).  I’m going to serve it at my Russian themed Winter Olympic dinner, but I’ll brew a pot of Earl Grey, too… for the weirdos.

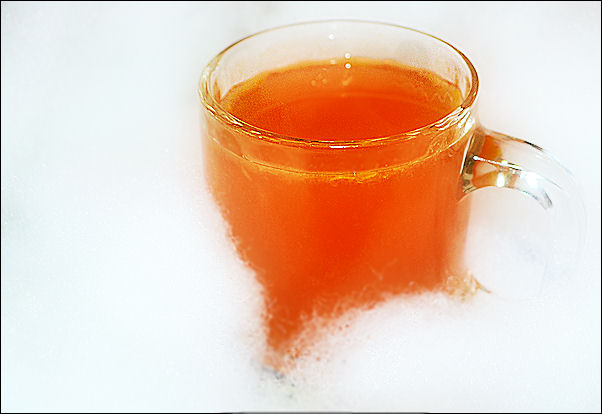
You all know I am not a photographer, right?  I thought I was being deliciously creative setting up a picture to look like hot, citrus-y, Russian tea in cold, stark, white snow.  Epic fail.  What I got looks like tea in bubbles, oh, not even that, it looks like tea in pillow stuffing, which it is.  Can you overlook that?  Can you just try this hot, citrus-y, slightly spiced, American-Russian tea?  I think you will be glad you did.  Just make the tea once, and put it in the refrigerator to reheat as needed. Ponyat’? Da?

I am really getting into the Olympic/Russian thing now. I made Pierogi for dinner last night, and I ordered a Pierogi press and a Pierogi cookbook written by a real babuska from Amazon.  I am trying to find a Russian outfit to wear. It seems I should go as a babushka.  I already have all the right clothes in my closet…and you know, Vodka shots from the end of a sword might not be too far fetched!

Russian Tea

  • 4 strong black tea bags
  • 1 quart (4 cups boiling water)
  • Zest of 1 1/2 oranges
  • Juice of 1 1/2 oranges (about 2/3 cup)
  • Zest of 1 large lemon
  • Juice of 1 large lemon (about 1/4 cup)
  • 6 cloves (0k to double for spicier drink)
  • 1 cinnamon stick (ok to use 2 for spicier drink)
  • 1 cup sugar (might be ok to reduce to 3/4 cup for a less sweet drink)
  • 2 cups cold water 
  1. Make 1 quart of tea by pouring 1 quart of boiling water over 4 teabags and seep for 5 minutes.  Remove tea bags from hot tea and set tea aside.
  2. Zest the oranges and lemon. Put the zest in a small saucepan.
  3. Add 1 cup sugar and 2 cups cold water to the zest in the small saucepan.
  4. Bring water, sugar, and zest to a boil and boil for 5 minutes.
  5. Juice the oranges and lemon. Pour the juice into the brewed tea.
  6. Strain the  boiled water, sugar, spices and zest mixture the add to tea and juice mixture.
  7. Stir well and serve or refrigerate mixture until ready to use. Reheat in the microwave or on the stove top.
  8. Enjoy the Olympics!

Thanks for stopping by my kitchen today.  BTW, I tried one more drink in my quest for my Olympic dinner, but I think that one qualifies as a dessert (and a gold medal)!  White Hot Chocolate.  Too, too, too decadent to post…I must keep my fans from sinning…I must…I must…OK, OK, I’ll post it soon!

22 Aug 2013 Salmon in Parchment

salmon

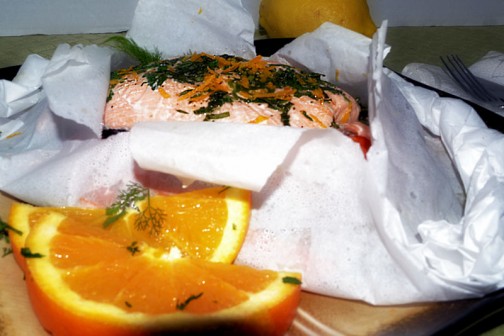
Every once in awhile you run across a recipe that changes everything!  This is one of those recipes.  Cooking salmon in the microwave, with veggies.  How simple is that? How convenient is that? This main dish is simple, delicious  and healthy.  You’ll need a salmon fillet, a cup of fresh julienne veggies, a large piece of parchment paper, a little liquid, and a microwave. Chop and prep, five minutes in the microwave, then BOOM, a tasty, spot on healthy dinner of salmon and veggies!

I can’t get enough of this!  As much as I love, love, love the combination of veggies below, I often have to switch up the veggies and change the sauce to accommodate what I have on hand. The method always works, it’s always good and it never heats up the kitchen.  PLUS, dinner can be ready in ten minutes flat!

Fully Customizable Microwave Salmon & Veggies in Parchment

Recipe by Polly Ferguson, based on a recipe by Alton Brown

  • 1 (8-ounce) salmon fillet, pin bones removed
  • 1/3 cup julienne fennel bulb
  • 1/3 cup julienne leeks, white part only
  • 1/3 cup julienne carrots
  • 1/3 cup julienne snow peas
  • ½ teaspoon Kosher salt
  • 1/8 teaspoon freshly ground black pepper
  • 1/8 teaspoon ground coriander (this could be customized too—curry powder, cumin, or any other powdered spice you are partial to and that would complement the veggies and the salmon could be used)
  • Herbs: 6 basil leaves, chopped finely (or any mixture of herbs from your garden, or spices from your cabinet, that appeals to you—parsley, cilantro, dill, mint, rosemary, green onion, chives, fresh ginger, tarragon, lemon pepper, garlic, chili powder, curry powder, herbs de province, paprika, etc…)
  • Other Stuff: 1 tsp. grated lemon or orange peel, diced pineapple, jalapeño, (maybe even some brown sugar or a drizzle of maple syrup, or a sprinkling of ground coffee or mustard…, pesto or marmalade…)
  • Liquid: 1 tablespoon dry vermouth, OR orange juice, OR white wine… (just don’t use lemon juice, major Yuck!) I’d really like to experiment with soy sauce or teriyaki sauce, rice wine, melted butter (!), dry sherry, coconut milk, Asian Fish Sauce or beer 🙂
  1. Take a rather large piece of parchment paper and fold it in half  like a book. Lay fennel, leeks, carrots, and snow peas on parchment in the center of the paper and on one side of the fold.
  2. Mix together salt, pepper, and ground coriander (or whatever spice mix appeals to you). Sprinkle vegetables with 1/2 of the spice mixture.
  3. Lay salmon on top of vegetables and sprinkle with the remaining spice mixture.
  4. Top salmon with choice of herbs, sprinklings, and 1 tablespoon of desired liquid (wine, vermouth, orange juice, teriyaki sauce…)
  5. Fold empty side of parchment over fish and starting at top, fold up both edges of parchment, overlapping folds as you move along. Once you reach the bottom tip, twist several times to secure tightly.
  6. Place on microwave safe plate and cook for 5 minutes, on high in microwave (or until fish reaches 131 degrees if you have an instant read thermometer and wish to use it–I don’t). Let the package sit for 2 minutes.
  7. Open parchment carefully and serve for a complete meal. Serve from the parchment package, if you’d like. If I am feeling fancy I take the skin off the salmon fillet, place the veggies on the plate, and put the salmon on top and sprinkle with a garnish of  green onion, parsley or snipped basil.

Thanks for stopping by my kitchen today! :)

01 Jun 2013 Lemon Ice Cream

lemon ice cream closer

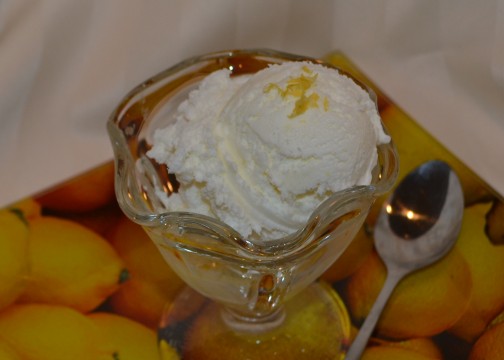
Bet you’ve never had Lemon Ice Cream!  Not lemon sorbet, or lemon sherbet, or lemon granita  or lemon frozen yogurt,  but lemon ice cream–creamy, rich, sweet, intense  lemon ice cream. Intrigued?  Tempted? I hope so, because I have a simple, oh-so-good recipe for you.  You do have an ice cream maker, right?  I use a “frozen bowl” ice cream maker, which seem to be everywhere for $40-$50 now, but sometimes you can get lucky.  This weekend my friend Sharon bought one at a garage sale for $5, and I saw one at  Savers for $12.99.

Homemade ice cream is very, very rich, and Lemon Ice Cream is no exception.  Serve small scoops (with an option for seconds, of course).  This recipe makes a quart of ice cream, richer and more filling than even the most premium commercial ice creams.  One quart of this ice cream will serve as many people as a half gallon of that store bought stuff.

I like to serve this ice cream on fruit pie, crisps and cobblers. My friend Sharon, whom I mentioned above, bought her ice cream maker after I fed her berry crisp with a scoop of this lemon ice cream.  This ice cream is also fantastic as a filling for an ice-cream sandwich.  To make a truly gourmet ice cream sandwich place a small scoop of Lemon Ice Cream between two ginger cookies, squish the sandwich a bit, square the filling up a bit, maybe roll the sides in a bit of chopped chocolate-milk, semi-sweet or white, then put the little bites of heaven in the freezer to firm up.   My pregnant daughter likes to eat  Lemon Ice Cream “as is” straight from a glass bowl with a long spoon.  She downed the sample above in one breath (at 9 o’clock in the morning one week before her due date!).

This recipe was first published in Gourmet magazine in 1999.  I’ve been making it since May 25, 2003.  Yes, I marked the date on my copy of the recipe, with this note, “Delicious and simple!”  “Simple” was written in caps and underlined twice!

Lemon Ice Cream

1 large lemon (zest plus 1/4 cup freshly squeezed lemon juice)

1 cup granulated sugar

1 cup cold milk (I usually only have 2% at home, so that’s what I use)

1 cup well chilled heavy cream


With a vegetable peeler or microplane remove the zest from the lemon, do NOT include any of that bitter white pith in with the zest.  Put the sugar and the lemon peel in a food processor or blender and whirl until the sugar is finely ground and the lemon zest has been incorporated into the sugar. Add in the milk and the cream (On occasion, I have used 2 cups half-and-half instead of the milk and cream mixture).  Blend just to combine.  Stir in 1/4 cup freshly squeezed lemon juice.  Process in ice cream maker for about 20 minutes.  Place soft ice cream in a freezer safe bowl, and set in freezer to harden up a bit (a few hours).  Ice Cream will keep at least a week, if not more, in the freezer but I doubt you will have to test the outer limits.

Thanks for stopping by my kitchen today!  Looks like the next few days are going to be scorchers.  Stay cool. Squeeze lemons. Make ice cream. By the way, I think the picture above is one of the best so far for this blog.  My webmaster, Ratty, fixed it up real nice, didn’t she?

21 Aug 2011 Lemon Layer Cake

I haven’t been doing too much cooking lately.  It’s been too hectic.  My beloved “empty nest” imploded.  My two youngest moved back home for the summer, and brought with them all their stuff, most of it unwashed and unsorted. One of them brought a living and breathing human house guest for the summer, and had other friends stay with us for upwards of a week, too.  The other one had frequent overnight guests, four or five a week.  Then my elder daughter, her son and boyfriend moved in for a week, out for a week, then back for three weeks, then finally they moved into the house seven houses down.  They drop in at least twice a day, dropping off and picking up my grandson.  Borrowing my mixer.  Picking up some boxes they left in the garage.  Checking out the contents of the refrigerator. Then our house guest left. Then my younger daughter left, too.  She went to Ghana.  Yes, Ghana, Africa.  Not all her stuff fit into the two suitcases she was allowed to take.  She packed 93.7 lbs of stuff into those two suitcases.  She left her other ton of belongings here, unwashed and unsorted. Tomorrow my son moves out and into an apartment with three other boys, four hours from here.  He was going to go today, but not all his laundry is done.  All of his laundry may never be done.  He’s taking most of his stuff with him.  And a lot of my stuff, too.  Plus I’ve been trying to teach him how to cook before he goes. I can’t have him starving to death or trying to survive on convenience foods…

So, cooking for me has been down low on my list, but cookbook club sent out an e-vite.  It was time for a “Signature Cake” meeting.  I had to start cooking, and it had to be good, and it was probably going to have to be a little bit complicated.  A “Signature Cake”,  as I see it, is show-y cake,  one that we might become known for (remembered for?!), a special cake our family and friends might look forward to–even ask for–on birthdays and occasions; a from scratch layer cake, with a filling, and a frosting.  I had seen the recipe for “Lemon Layer Cake” in several America’s Test Kitchen magazines (YES, several!  Did you know ATK cycles their recipes through various publications?  I didn’t either, but I have this recipe in two magazines, and neither one of them is a “Best of…”!  I was a little surprised-and yes,  disappointed- to discover this little secret.)

Anyway, after being soooo busy and not cooking, I suddenly had to jump into creating a “Signature Cake” and the one I chose really was a bit of a project.  But it’s worth it!  It looks spectacular.  Look!

The white cake is delicious, very tender, not overly sweet, and sturdy enough to support the lemon filling without compressing. The lemon filling has a perfect texture, with a spot-on, bright and tangy lemon flavor.  The frosting is a “seven minute” or boiled frosting, which I had never made before, but I fell in love with it’s marshmallow-y creaminess which was a wonderful foil to the tangy lemon filling.  (I also loved the fact that the frosting had no butter and no powdered sugar.) I will definately be making this cake again. But I’d have a plan.  I’d do it in three parts.  Day one, make the lemon filling.  Day two, bake the cakes.  Day of party, make the frosting and assemble the cake.

A few other hints:

First thing, before you get everything else ready, cut 1 cube of butter into 1/2 inch pieces, and put in the freezer.  You will need to use these frozen butter cubes in the lemon filling.

I was tempted to grate the rind of a few lemons to add to the lemon filling.  I am so glad I didn’t.  The lemon filling was tangy enough as it was.  I think adding lemon rind would have ruined it.

Don’t be afraid of the frosting. You’ll need an instant read thermometer, a double boiler, and an electric mixer…but it’s really pretty easy to make (and it’s fat free and yummy!)

I frosted this cake the night before it was to be served, I don’t think that was a good idea.  The frosting seemed to loose a bit of it’s volume.  I think you could layer the cake with the lemon filling the night before, cover with plastic wrap (or a cake dome) and refrigerate, but I think the frosting needs to be made, and applied to the cake, just a few hours before the cake is to be served.

Lemon Layer Cake

America‘s Test Kitchen

For the filling:

1 cup fresh lemon juice (from about 6 lemons) (you’ll need an additional 1T. of lemon juice for the frosting)

1 teaspoon unflavored gelatin (less than one package, so measure out a teaspoonful)

1 1/2 cups granulated sugar

1/8 teaspoon table salt

4 large eggs

6 large egg yolks (reserve all of the egg whites for the cake)

8 tablespoons unsalted butter, cut into 1/2-inch cubes and frozen

For the cake:

2 1/4 cups cake flour, plus more for dusting the pans

1 cup whole milk, at room temperature

6 large egg whites, at room temperature (leftover from making the filling from the six egg yolks)

2 teaspoons vanilla extract

1 3/4 cups granulated sugar

4 teaspoons baking powder

1 teaspoon salt

12 tablespoons unsalted butter, cut into tablespoons, softened but still cool

Fluffy White Icing

2 large egg whites

1 cup granulated sugar (7 ounces)

1/4 cup water

1 tablespoon fresh lemon juice (from 1/2 lemon)

1 tablespoon corn syrup

Begin by Preparing the Filling: Measure 1 tablespoon of the lemon juice into a small bowl and sprinkle the gelatin over the top to soften.

Heat the rest of the lemon juice, the sugar, and salt in a medium saucepan over medium-high heat, stirring occasionally until the sugar is dissolved and the mixture is hot but not bubbling. In the bowl of an electric mixer, whisk the whole eggs and egg yolks until blended. Slowly whisk the lemon syrup into the eggs, then return the mixture to the saucepan over medium-low heat. Cook stirring constantly, until the mixture reaches 170 degrees on an instant read thermometer  Stir in the softened gelatin until completely dissolved.

Remove the pan from the heat and stir in the frozen butter until the butter has melted and the mixture is smooth. If desired/necessary, pour mixture through a fine mesh sieve into a non-reactive bowl (I skipped this step). Cover the surface with plastic wrap and chill until firm, at least four hours or up to two days. Stir mixture to loosen before spreading on cake layers.

To Make the Cake: Adjust an oven rack to the middle position and preheat the oven to 350 degrees. Grease and flour two 9-inch round cake pans and line the bottoms with parchment paper.

In a large measuring cup, whisk together the milk, egg whites and vanilla. In the bowl of a standing mixer fitted with the paddle attachment, mix together the flour, sugar, baking powder and salt at low speed. With the mixer running on low speed, add the butter pieces one at a time until the mixture resembles fine, even crumbs. Stop the mixer and add all but about 1/2 cup of the wet ingredients. Beat the batter at medium speed until it is pale and fluffy, about 1 1/2 minutes. With the mixer running on low, slowly pour in the rest of the wet ingredients, then crank the speed back up to medium and beat for 30 seconds more. Scrape down the bowl and beat for 30 more seconds.

Divide the batter equally among the two cake pans and smooth the tops. Bake for 23 to 25 minutes, or until a toothpick comes out clean–do not overbake. Let the cakes cool in the pans for 10 minutes, then remove the cakes from the pans, peel off the parchment and cool completely, right side up.

When the filling has chilled and the cake layers are cool, begin assembling the cake. Slice the cake layers in half horizontally. Place one layer golden side down on a serving platter, and tuck a few strips of parchment paper under the edges of the cake to protect the platter. Spread a third of the lemon filling on the cake layer, leaving a 1/2 inch border around the edge of the cake. Repeat twice more with cake layers and filling. Place the top layer of the cake golden side up.

To Make the Icing: Combine all ingredients in bowl of standing mixer or large heatproof bowl and set over medium saucepan filled with 1 inch of barely simmering water (do not let bowl touch water). Cook, stirring constantly, until mixture registers 160 degrees on instant-read thermometer, 5 to 10 minutes. Remove bowl from heat and transfer mixture to standing mixer fitted with whisk attachment. Beat on medium speed until soft peaks form, about 5 minutes. Increase speed to medium-high and continue to beat until mixture has cooled to room temperature and stiff peaks form, 5 minutes longer. Using icing spatula, spread frosting on cake. Serve.

Notes From ATK… Leftovers can be stored covered in the refrigerator, with the cut side of the cake covered tightly with plastic wrap, for up to 3 days.

Thanks for stopping by my kitchen today. I am glad I was home and cooking.  I hope you make this cake for an upcoming special occasion. It’s worth the effort…and you may become “famous” for it!

Polly