Tag-Archive for ◊ cloves ◊

18 Jan 2014 Russian Tea

Russian-Tea-1a

Are you old enough to remember the “Russian Tea” phase back in the 70’s?  I was a teenager then, a very young teenager, and our Moms and Grandmas were mixing up batches of Russian Tea like crazy and giving everyone little jars of the stuff.  I think the mix had instant tea, Tang (remember Tang? Astronauts drank it!), powdered lemonade, and some spices.  You opened up your gift jar, spooned some mix into a cup, added hot water, stirred it up and  you were drinking Russian Tea!  I liked it. It was a different hot drink.  I wasn’t into coffee yet, Hot Chocolate was too childish, English tea with milk was OK, but boring. Russian Tea was fun and different–and a bit exotic.

Fast forward to February 7th, 2014, Opening Ceremonies for The XXII Winter Olympics will be held in Sochi, Russia and I will be hosting a Russian Themed Winter Olympic Dinner.  What to have to drink after dinner? My daughter suggested Vodka shots off the tip of a sword.  Umm, no.  A citrus-y, sweet, slightly spicy version of Russian Tea is more up my alley — but not made of Tang, Country Time Lemonade and Nestea. So I hit the Internet.  First spoiler, the so-called “Russian Tea” of the 70’s isn’t Russian at all. It’s an American concoction! The only thing Russian about it is it’s name.  Shhhhhhhhhh! Don’t tell anyone!  Real Russian tea is “Russian Caravan” tea, because tea used to be imported to Russia from China, via a 16-18 month caravan, and it acquired a smokey flavor from all of the caravan campfires, according to Wikipedia.  So, I went to my local Russian grocery store, yes, we have one in San Jose, and I couldn’t find “Russian Caravan” tea anywhere (nor anyone to help me), but lots of Earl Grey.  I am not serving Earl Grey tea at my Russian Dinner.  Early Gray Tea is English and I don’t like it, it’s too smokey!

So now I am back to my original “Russian” Tea quest.  I found some recipes on the Internet, checked out their star ratings, and tried a few.  One was truly horrid; it involved extracting the juice from oranges and lemons, then boiling the  rinds in sugar and water then adding  the liquid to cold tea. I was skeptical, but the very attractive, very sincere lady on the YouTube video seemed nice, and she was raving over her tea! So I tried it.  She was not honest. Her tea was bitter and horrid.  Of COURSE it was.  Boiling all that pith then adding it to the tea? I should have known better. Why do people post bad recipes?

Eventually, I came up with this version for fresh Russian Tea.  I like it.  I really like it. I served it to five friends and two relatives, and they all said they liked it.  Then I served it to another relative, the daughter who suggested I serve vodka shots off the end of a sword, and she hated it.  I was SHOCKED.  I tied her down and make her try it again.  She STILL didn’t like it.  Harrumph.  She’s no longer my favorite child.  My son loved the tea.  He said, “That’s good.  That’s really, really good.”  He’s a good boy. He’s my favorite child now.

This “Russian” tea is in the same family as hot tea with lemon and honey, but with orange added, and some cinnamon, and a few cloves, it’s a bit more complex (there’s no honey in this tea though).  I’m going to serve it at my Russian themed Winter Olympic dinner, but I’ll brew a pot of Earl Grey, too… for the weirdos.

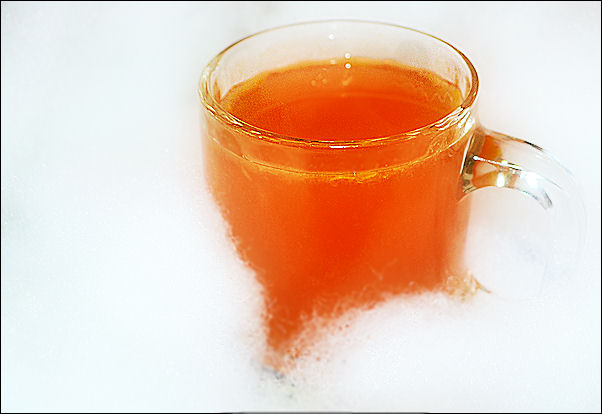
You all know I am not a photographer, right?  I thought I was being deliciously creative setting up a picture to look like hot, citrus-y, Russian tea in cold, stark, white snow.  Epic fail.  What I got looks like tea in bubbles, oh, not even that, it looks like tea in pillow stuffing, which it is.  Can you overlook that?  Can you just try this hot, citrus-y, slightly spiced, American-Russian tea?  I think you will be glad you did.  Just make the tea once, and put it in the refrigerator to reheat as needed. Ponyat’? Da?

I am really getting into the Olympic/Russian thing now. I made Pierogi for dinner last night, and I ordered a Pierogi press and a Pierogi cookbook written by a real babuska from Amazon.  I am trying to find a Russian outfit to wear. It seems I should go as a babushka.  I already have all the right clothes in my closet…and you know, Vodka shots from the end of a sword might not be too far fetched!

Russian Tea

  • 4 strong black tea bags
  • 1 quart (4 cups boiling water)
  • Zest of 1 1/2 oranges
  • Juice of 1 1/2 oranges (about 2/3 cup)
  • Zest of 1 large lemon
  • Juice of 1 large lemon (about 1/4 cup)
  • 6 cloves (0k to double for spicier drink)
  • 1 cinnamon stick (ok to use 2 for spicier drink)
  • 1 cup sugar (might be ok to reduce to 3/4 cup for a less sweet drink)
  • 2 cups cold water 
  1. Make 1 quart of tea by pouring 1 quart of boiling water over 4 teabags and seep for 5 minutes.  Remove tea bags from hot tea and set tea aside.
  2. Zest the oranges and lemon. Put the zest in a small saucepan.
  3. Add 1 cup sugar and 2 cups cold water to the zest in the small saucepan.
  4. Bring water, sugar, and zest to a boil and boil for 5 minutes.
  5. Juice the oranges and lemon. Pour the juice into the brewed tea.
  6. Strain the  boiled water, sugar, spices and zest mixture the add to tea and juice mixture.
  7. Stir well and serve or refrigerate mixture until ready to use. Reheat in the microwave or on the stove top.
  8. Enjoy the Olympics!

Thanks for stopping by my kitchen today.  BTW, I tried one more drink in my quest for my Olympic dinner, but I think that one qualifies as a dessert (and a gold medal)!  White Hot Chocolate.  Too, too, too decadent to post…I must keep my fans from sinning…I must…I must…OK, OK, I’ll post it soon!

15 Oct 2011 Pumpkin Spice Coffee

It took two years, but FINALLY, I have a Pumpkin Spice Coffee recipe that is delicious and…, wait for it…, better (yes, BETTER!) than Starbucks’ Pumpkin Spice Latte!  I don’t make this assertion casually.  I had taste tests.  With friends.  Eleven taste testers.  This Pumpkin  Spice Coffee won over Starbucks’ Pumpkin Spice Latte.  The coffee was made with an easy, homemade Pumpkin Spice Syrup. I found the recipe at Budding Baketress (after been tipped off by Foodgawker)!  Thank you, thank you! I made no ingredient changes, I just refined the method.

Now about the taste tests.  We tested a Starbucks Pumpkin Spice Latte, a Latte with Torani Pumpkin Spice syrup, a Latte with this Pumpkin Spice syrup, and coffee with this Pumpkin Spice syrup.  The hands down winner? The COFFEE with this homemade syrup!  The COFFEE!  The Torani syrup Pumpkin Spice Latte was set aside immediately.  Yuck. There is something in that syrup that was just NOT good.  I poured the bottle down the drain.  I wasn’t go to try it in anything else, and I wasn’t going to pass it on to anyone.  I was hoping we would find something close to the Starbucks Pumpkin Spice Latte (because I love, love– correction–loved, Starbucks’ Pumpkin Spice Latte, but after the taste test…the Starbucks version was set aside, TOO!  BTW, have you ever looked at the Starbuck’s Pumpkin Spice Latte?  Taken the top off,  eaten the whipped cream and looked? There is some nasty orange slime floating on top of the latte which is not at all appetizing….but even if there were no slime, homemade Pumpkin Spice syrup would win anyway.  YES, it’s true, bye-bye Starbucks!

Next in our taste testing,  we tried this homemade syrup in a latte, and then in coffee.  The coffee won!  We liked the stronger coffee flavor to compliment the complex pumpkiny-spicy deliciousness.  What a HUGE surprise!

Here is the recipe for the Pumpkin Spice Syrup, and the recipe for a batch of Pumpkin Spice Coffee which can be made to serve at parties, meetings or family get-togethers this fall,.  Of course, the syrup can also be used on a one cup of coffee at a time basis.  I have included directions for all three below.

Pumpkin Spice Syrup for Coffee

  • 1/3 cup pumpkin puree (fresh or canned)
  • 1 cup sugar
  • 1/2 teaspoon vanilla
  • 1 teaspoon cinnamon
  • 1/2 teaspoon nutmeg
  • 1/4 teaspoon cloves
  • 1/4 teaspoon ground ginger
  • 1 1/4 cups water
  1. In a small saucepan, combine pumpkin puree with vanilla and spices.  Stir well to combine.  Add in water, stir well.
  2. Bring pumpkin mixture to a boil. Reduce heat to medium, and simmer, stirring occasionally until it becomes syrup-y and begins to coat the spoon (about 10-15 minutes).
  3. Remove from heat. Cool. Then refrigerate until needed.

To make a batch of Pumpkin Spice Coffee

  • 1 cups of syrup
  • 2 cups of milk
  • 4 cups of very strong, hot, coffee
  • whipped cream, optional
  • sprinkles or ground nutmeg, optional
  1. While the coffee is brewing, heat milk with syrup.
  2. Blend with an immersion blender (or in a blender, or with a whisk).  Can be made ahead and refrigerated until ready to use.  Re-heat and re-blend then continue as directed below.
  3. Stir hot coffee into milk-pumpkin syrup mixture.  (I usually blend a bit more at this point, but it’s probably not necessary).
  4. Pour into cups.  Top with whipped cream, and maybe some sprinkles or ground nutmeg, if desired.  MMMMMMm (You can set a small pitcher of extra syrup out in case some people like a stronger/sweeter Pumpkin Spice Coffee).
  5. Makes approx. 6 servings.

To make one cup of Pumpkin Spice Coffee

This is up to you! Start with a cup of strong, hot coffee.  Stir in 1-2 T. pumpkin syrup, to taste.  Add hot milk, or 1/2 and 1/2 or whipping cream…what appeals to you?  Stir well.  If desired, top with some whipped cream and some ground nutmeg or sprinkles. Remaining Pumpkin Spice Syrup can be stored in the refrigerator.

Thanks for stopping by my kitchen today, and not by Starbucks!  You’ll find it cheaper to make your Pumpkin Spiced Coffees at home. And you might be surprised by how much better they taste, too! I was, and I am a loyal,  long time Starbucks aficionado.

01 Dec 2010 Gingerbread Cookies (with Royal Icing)

It’s December first, time to start the Twelve Days of Christmas Cookies posting.  I should be excited!  I should be baking!  My house should be filled with the smell of molasses, peppermint, gingerbread, chocolate, butterscotch, and so on!  My counters should have piles of freshly baked cookies on them!  My freezer should be ready to received tins of stacked cookies!  But, I’m, afraid, this is not the case…

On Sunday a pipe burst under my kitchen.  On Monday the fence guy noticed it.  On Tuesday the plumber said, “It’s bad. Call an excavation company.”  The excavation company and the insurance company will be here this afternoon.  I can’t use the sink.  The wall between my kitchen and garage is going to have to be knocked down.  The money I was going to spend on butter, sugar, vanilla and flour is now going to have to multiply and pay for pumps and plumbers and pipes, oh, MY. Not sure how many cookies I am going to get baked in the next twelve days, not sure how happy I am going to be over the next twelve days. This is SO not a good thing…

BUT! I did make a head start on my Twelve Days of Christmas Cookies special.  So…, with fingers crossed, let’s get started! And let’s hope we can finish 🙂  Ready, set, BAKE!

EVERY Christmas cookie plate needs an old fashioned Gingerbread cookie.  I have been using this recipe for years.  The cookie is sturdy, bakes flat and although it has a pronounced gingerbread taste, it’s not overwhelming; kids can decorate it without it breaking, and kids will eat it without complaining! I found this recipe in a small spiral bound Christmas Cookie cookbook back in the 1980s or 1990s.  My daughter just baked 12 dozen of these cookies for two Christmas parties she’s catering.  She’s making the cookies, and the kids will decorate with royal icing and assorted candies and then take them home to their families.

If you don’t have memories of decorating and eating Gingerbread cookies from your childhood, perhaps you’d like to create that memory for the children in your life.  Start with this recipe.  It’s a good one.  If you do have memories of decorating and eating gingerbread cookies, then do the happy dance! I’m sure you are going to start, or already have started, creating the same memories for the children in your life. Use this recipe, use the recipe that your grandmother used…, just get started!  It is, after all, the beginning of the Twelve Days of Christmas Cookies!

Save this recipe; it’s not just for Christmas.  Cut the dough into pumpkins, bats, ghosts and witches… It’s perfect for Halloween!  The same pumpkin cutter, along with leaves, pilgrims and turkeys, make it a good cookie for Thanksgiving, too.  And hearts, cupids, X’s and O’s, along with pink, red and white Royal Icing, make it a very good cookie for Valentine’s day <3

Gingerbread Cookies

1 cup sugar
1 cup butter
2 eggs
1 cup light molasses
2 tablespoons cider vinegar
2 teaspoons ground ginger
2 teaspoons ground cinnamon
2 teaspoons baking soda
¼ teaspoon salt
4 ½ cups flour

  1. Cream butter and sugar together until light and fluffy–at least 5 minutes.
  2. Add eggs, one at a time, beating well after each addition.  Stir in molasses and vinegar.
  3. In another bowl stir ginger, cinnamon, baking soda and salt into flour.  Add flour mixture to butter mixture.  (Dough will be very soft)
  4. Divide dough into fourths, and place into a large Ziploc bag and place in freezer for an hour.  (I prefer to let the dough rest overnight in the refrigerator, because the dough is VERY firm, and difficult to roll when out of the freezer.) Dough can be made up to two days ahead.  When ready to bake proceed as below.
  5. Preheat oven to 350 degrees.
  6. Gently roll dough to ¼ inch thickness.  Cut into shapes. Re-roll scraps. This recipe will make a lot of cookies, but the number depends on the size of the cookie cutters used.  I think you’ll get at least 4 dozen 3 inch cookies out of this recipe.
  7. Bake in a preheated 350 degree oven for ten to twelve minutes.  Remove to racks to cool.
  8. Store baked cookies in an airtight container.

Royal Icing

3 Tablespoons meringue powder (available at Michael’s, specialty baking stores and many upscale grocery stores)
1/3 cup warm water (or more, add additional water 1 Tablespoon at a time)
4 ½ cups (1 pound) powdered sugar
1 teaspoon vanilla
½ teaspoon cream of tartar

  1. Beat ingredients together with an electric mixer.
  2. When combined increase speed to high and beat for seven to ten minutes.  Place in decorator bag with a decorator tip.
  3. Decorate cookies!
  4. There will be a lot of Royal Icing for this cookie recipe. (Almost double the amount you’ll need).  Gingerbread cookies look good with plain white Royal Icing, but icing can also be colored with paste food coloring.

Thanks for stopping by my kitchen today! Hopefully we’ll be able to meet back here SOON for some more baking!