Tag-Archive for ◊ white chocolate ◊

26 Jul 2011 Blueberry Chip Cookies

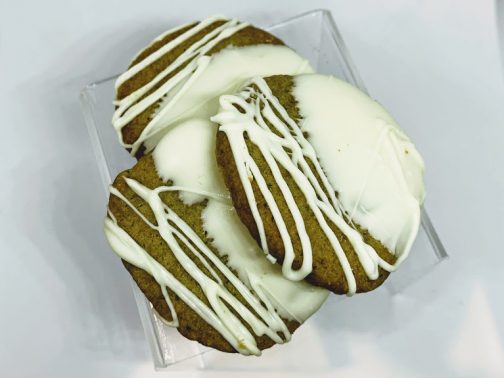
Hey world, there’s a new cookie on the plate!  It’s sort of like a chocolate chip cookie.  It has all the elements of a chocolate chip cookie.  It crunches like a chocolate chip cookie; crisp around the edges and chewy in the middle. It even looks like a chocolate chip cookie.  But it’s NOT!  It’s a Blueberry Chip Cookie!  Nope, not reminiscent of a blueberry muffin  or a blueberry cake.   Nothing like a blueberry tart or a sugar cookie with jam either.  I think it really is a chocolate chip cookie.  With blueberries. And white chocolate chips.

Two secret ingredients:  freeze dried blueberries and dried wild blueberries!  I had never seen freeze dried blueberries either, but there they were right on the shelf at Trader Joe’s, not too far from the dried blueberries.  The freeze dried blueberries are crushed into a powder and then mixed into the dough with the flour.  The small dried blueberries have a lot a flavor and don’t burst into a gooey mess when cooked.   Genius, pure genius!  And we have Irvin, from Eat the Love, to thank for this delightfully twisted Chocolate Chip Cookie 🙂

I made a few changes to the original recipe.  I didn’t use Kamut flour (what IS that?) and I didn’t make these jumbo.  Irvin made 18 cookies from this recipe (they must have been the size of a PIE!), I made 5 dozen.  I am not sure the sugar sprinkle is necessary, I might leave it off next time but my daughter liked the sparkle (she’s such a girlie girl).

Blueberry  Chip  Cookies

  • 3 cups plus 3 tablespoons All-Purpose Flour
  • 1/2 cup freeze dried blueberries, crushed into powder (put into a Ziploc and go to town with a meat tenderizer or rolling pin)
  • 1 1/4 teaspoon baking soda
  • 1 1/2 teaspoon baking powder
  • 1 1/2 teaspoon Kosher salt
  • 1 teaspoon cinnamon
  • 1 1/4 cups (2 1/2 sticks) butter at room temperature
  • 1 cup dark brown sugar
  • 1 cup white sugar
  • 2 large eggs
  • 2 teaspoons vanilla extract
  • 10 oz white chocolate chips (don’t use Nestle’s-they are nasty)
  • 1 cup dried wild blueberries (I’d probably add an extra 1/4 – 1/2 cup next time)
  • 2 tablespoons white sugar to sprinkle on top (optional)

1. Preheat the oven to 350º F and line a baking sheet with parchment paper or a Silpat.

2. Place the  flour, freeze dried blueberry powder, baking soda, baking powder, salt and cinnamon in a medium bowl. Whisk vigorously until the dry ingredients are evenly distributed and uniform in color.

3. Place the butter and sugars in the bowl of a standing mixer fitted with the paddle attachment. On medium speed, cream the butter and sugar until light and fluffy, about three minutes.

4. Add one egg to the creamed butter and beat on medium until incorporated. Scrape down the sides and repeat with the second egg and then the vanilla.

5. Add 1/3 of the dry ingredients to the butter and beat on slow speed turning up the speed to medium as the ingredients incorporate into the dough. Scrape down the sides of the bowl and then add an additional 1/3 of the batter repeat, beating on slow to medium. Scrap and add the final 1/3 dry ingredients.

6. Add the white chocolate chips and dried blueberries to the cookie dough and turn the mixer on to slow speed, mixing in the chips and blueberries until evenly distributed.

7. Scoop a tablespoon of the dough, roll into a ball, place on cookie sheet and flatten slightly. Sprinkle with a little white sugar. Repeat.  I found I could place 14 cookies on each cookie sheet.

8. Bake in preheated 350º oven for  about 13 minutes or until the edges of the cookie starts to look golden brown. Remove from the oven and let rest on the pan for 5 to 10 minutes to cool before moving them to a wire rack to cool to room temperature.

Makes about 5 dozen cookies.

I am so pleased with these cookies!  They are so much like a chocolate chip cookie, but so different.  The dichotomy tickles me purple!   I hope you are the first person on your block to make Blueberry Chip Cookies!

Thanks for stopping by my kitchen today!

13 Feb 2011 French Hot Chocolate

Just in time for Valentine’s Day: French Hot Chocolate!

This is soooo good, made with real cream and real chocolate–bearing no resemblance at all to that powdery mix in a paper packet. The serving ritual makes this really special. Pass a bowl of the chocolate cream mixture, then pass a pot of steaming hot milk (I like to put the milk in a teapot).  Let each person scoop a desired amount of the chocolate cream into their cup.  Pass the hot milk so the person can fill the cup up the rest of the way.  Make sure everyone has a spoon.  Stirring the hot chocolate is the fun part.  So is the sipping to taste.  Then maybe adding a bit more chocolate cream.  Then stirring some more and sipping some more.  Ahhhh.   So civilized.  So social.  So calming.  So special.

I was going with ¼ chocolate cream to ¾ hot milk, when one of my taste testers announced that half chocolate cream and half milk was just about right!  Serve this in small cups. This is rich. To cut the fat, I put non-fat milk in the teapot 🙂

I found this recipe at MakeAndTakes.

The chocolate cream mixture can be kept for a few days in the refrigerator, but you need to put the cream in a sieve, and then cover with plastic. This is, truly, the best hot chocolate you’ll ever make.

French Hot Chocolate

To make the chocolate cream:

1 cup chopped chocolate (your choice–milk, semisweet, bittersweet, or combination. You can also use chocolate chips!)
1 cup corn syrup
1/4 cup water
2 cups cold whipping cream

To serve:

2 quarts (8 cups) hot milk (go ahead and use non-fat or low-fat, it will make you feel better!)

To make chocolate cream: Heat chopped chocolate, corn syrup, and water in a small saucepan, stirring until chocolate has melted.  Set mixture aside to cool. Beat the cream in a large mixing bowl until peaks form.  Slowly add the chocolate sauce to the whipped cream in a steady stream while beating.  After all the sauce has been added to the cream, beat for a few more seconds until the cream is thick.  Place in chocolate cream refrigerator until ready to use.  To keep chocolate cream for longer than an hour or two, place the chocolate cream in a sieve over a slightly larger bowl and cover with plastic warp.

To serve: Heat the desired quantity of milk (2 qts if using the whole batch of chocolate cream, and serving 10-12 people) until steaming (I heat the milk in the MW).  Pour hot milk into serving pitcher (I use a teapot).  Pass the chocolate cream, and spoon a bit of the into the bottom of cup or mug.  Add enough hot milk to fill cup.  Stir to combine.

One batch makes enough to serve 10-12 people (depending on size of cups or mugs).

Thanks for stopping by my kitchen today! Take the time to make an occasion of serving this hot chocolate.  You’ll be glad you did!

11 Dec 2010 White Chocolate Spice Cookies

Today I am sharing a White Chocolate Spice Cookie.   The cookie is deliciously spicy from black pepper in the dough, and deliciously decadent from the white chocolate decoration. It’s a  cookie for grown ups.

My friend Kayte introduced this cookie to me in December of 1996.  I still have the original recipe, which was clipped from a Sunset Magazine from that same month and year.  I changed the method of making this cookie. Sunset’s directions said to mix the cookie in the food processor.  I didn’t like that at all.  The dough didn’t feel right, and the cookie was a tough so I have changed the recipe to reflect the more traditional method of mixing cookie dough.

I used to make these cookies as a cut out cookie, not any more though.  Now I roll the dough into a cylinder, refrigerate until firm, then slice and bake. When cool, I dip the half the cookie in melted white chocolate, and then drizzle with the remaining chocolate on the other side. DELICIOUS. 

White Chocolate Spice Cookies

2 cups flour
2/3 cup firmly packed light brown sugar
1 teaspoon ground ginger
¾ teaspoon freshly ground black pepper (make sure you have fresh pepper, the stuff from last year won’t produce the result you want)
½ teaspoon baking soda
½ teaspoon unsweetened cocoa powder
¼ teaspoon ground cinnamon
1/8 teaspoon ground allspice
1/8 teaspoon salt
1 cup butter, cubed, at room temperature
1 tablespoon water
1 teaspoon vanilla
1 teaspoon grated lemon peel
6 oz. high quality white chocolate, chopped (the cookies pictured above were decorated with melted Ghiradelli White Chocolate Chips)

  1. Combine flour, brown sugar, ginger, pepper, baking soda, cocoa, cinnamon, salt and allspice in a medium mixing bowl and set aside.
  2. In the bowl of an electric mixer beat softened butter for a minute or so.  Add in brown sugar and beat for an additional 3 minutes.
  3. In a small bowl, combine water, lemon peel, and vanilla.  Then add to the butter-sugar mixture and beat until combined.
  4. Slowly add flour-spice mixture to butter-sugar-lemon mixture. Beat with electric mixer until all the flour has been incorporated.
  5. Divine dough into 2 or 3 portions and roll into cylinders. Wrap with plastic and refrigerate for an hour or so or until dough is firm enough to work with. (Overnight it better)
  6. Preheat oven to 325ºF and line cookie sheets with parchment paper.
  7. Unroll dough and slice into cookies approx 1/4 inch thick.  Place on parchment lined cookie sheeets
  8. Bake at 325ºF for 15 minutes or until cookies are pale brown. Do not overbake.  Remove cookies to rack to cool.
  9. Melt chopped white chocolate on 50% power in MW for 2 or 3 minutes.
  10. Dip each cookie into chocolate, covering 1/3 to 1/2 of the cookie.  When all cookies have been dipped.  Use a fork to flick remaining white chocolate over undipped portion of cookie.
  11. Chill to harden the white chocolate.
  12. Store cookies in an airtight container.  Can be frozen for longer storage.  Makes 5-7 dozen cookies, depending on the size of the cookie.

Thanks for stopping by my kitchen today! I hope you enjoy this cookie, it’s been one of my favorites for decades years now, so I heartily recommend it!

10 Dec 2010 Peppermint Bark Cookies

Mmmmm…, the flavors of Christmas! For me they are gingerbread, eggnog and peppermint.  Last December Bon Appetit magazine featured this Peppermint Bark Cookie. It’s a shortbread base topped with melted chocolate, crushed candy canes, and then drizzled with white chocolate.  When cooled this bar cookie is broken into irregular pieces. Yes, a bar cookie!  This is a very easy cookie to make!

I can’t think of anything more Christmas-y than a plate of Gingerbread Folk, Egg Nog Spritz, and Peppermint Bark Cookies…, with Tangerine Sugar Cookies, Jam Pinwheels, Caramel Bars, Chocolate-Caramel Coconut Bars AND my soon-to-be-posted White Chocolate Spice Cookies, too 🙂

Peppermint Bark Cookies

2 cups flour
¼ teaspoon salt
1 cup butter, room temperature
1 cup sugar
1 teaspoon vanilla
1 large egg yolk
6 ounces (approx 1 cup) bittersweet or semisweet chocolate, chopped (try to use a better chocolate than chocolate chips)
½ – ¾ cup finely chopped red-and-white striped hard peppermint candy canes ( 6 – 8 candy canes)
3 oz. (½ cup) white chocolate (such as Lindt or Perugina–no white chocolate chips if you want really, really good flavor)

  1. Preheat oven to 350°F.
  2. Spray a jelly roll pan or quarter sheet pan with nonstick spray. Line bottom of pan with long strip of 9-inch-wide parchment paper, leaving overhang on both short sides of pan.
  3. Whisk flour and salt in medium bowl.
  4. Using electric mixer, beat butter in large bowl until creamy, about 2 minutes. Gradually beat in sugar. Continue beating until mixture is light and fluffy about 3 minutes more. Beat in vanilla, then egg yolk. Gradually add flour mixture, beating on low speed just to blend.
  5. Using moistened fingertips, press dough to form even layer over bottom of pan. Pierce dough all over with fork. Bake until light golden brown and slightly puffed and edges begin to come away from sides of pan, about 30 minutes (check after 20, mine got overcooked).
  6. Place pan on rack; immediately sprinkle chopped chocolate over hot shortbread. Let stand until chocolate softens, about 3 minutes. Using small offset spatula, spread chocolate over top of cookie in thin even layer. Immediately sprinkle chopped peppermint candies over the melted chocolate.
  7. Melt white chocolate (I put in a small freezer Ziplock and MW-ed on 50% power for 90 sec. Squished to melt, cut a hole in corner of bag and drizzled over chocolate and candy canes). Drizzle white chocolate all over cookies. Chill until white chocolate is set, about 30 minutes.
  8. Using paper overhang as aid, lift cookie from pan and transfer to work surface. Using large knife, cut cookie into irregular pieces.

DO AHEAD: Can be made 1 week ahead. Store in refrigerator in airtight containers between layers of waxed paper or parchment paper.

The cookie plate is looking spectacular now, isn’t it?

Thanks for stopping by my kitchen so often.  This is FUN!