Tag-Archive for ◊ Summer ◊

01 Jun 2013 Lemon Ice Cream

lemon ice cream closer

Bet you’ve never had Lemon Ice Cream!  Not lemon sorbet, or lemon sherbet, or lemon granita  or lemon frozen yogurt,  but lemon ice cream–creamy, rich, sweet, intense  lemon ice cream. Intrigued?  Tempted? I hope so, because I have a simple, oh-so-good recipe for you.  You do have an ice cream maker, right?  I use a “frozen bowl” ice cream maker, which seem to be everywhere for $40-$50 now, but sometimes you can get lucky.  This weekend my friend Sharon bought one at a garage sale for $5, and I saw one at  Savers for $12.99.

Homemade ice cream is very, very rich, and Lemon Ice Cream is no exception.  Serve small scoops (with an option for seconds, of course).  This recipe makes a quart of ice cream, richer and more filling than even the most premium commercial ice creams.  One quart of this ice cream will serve as many people as a half gallon of that store bought stuff.

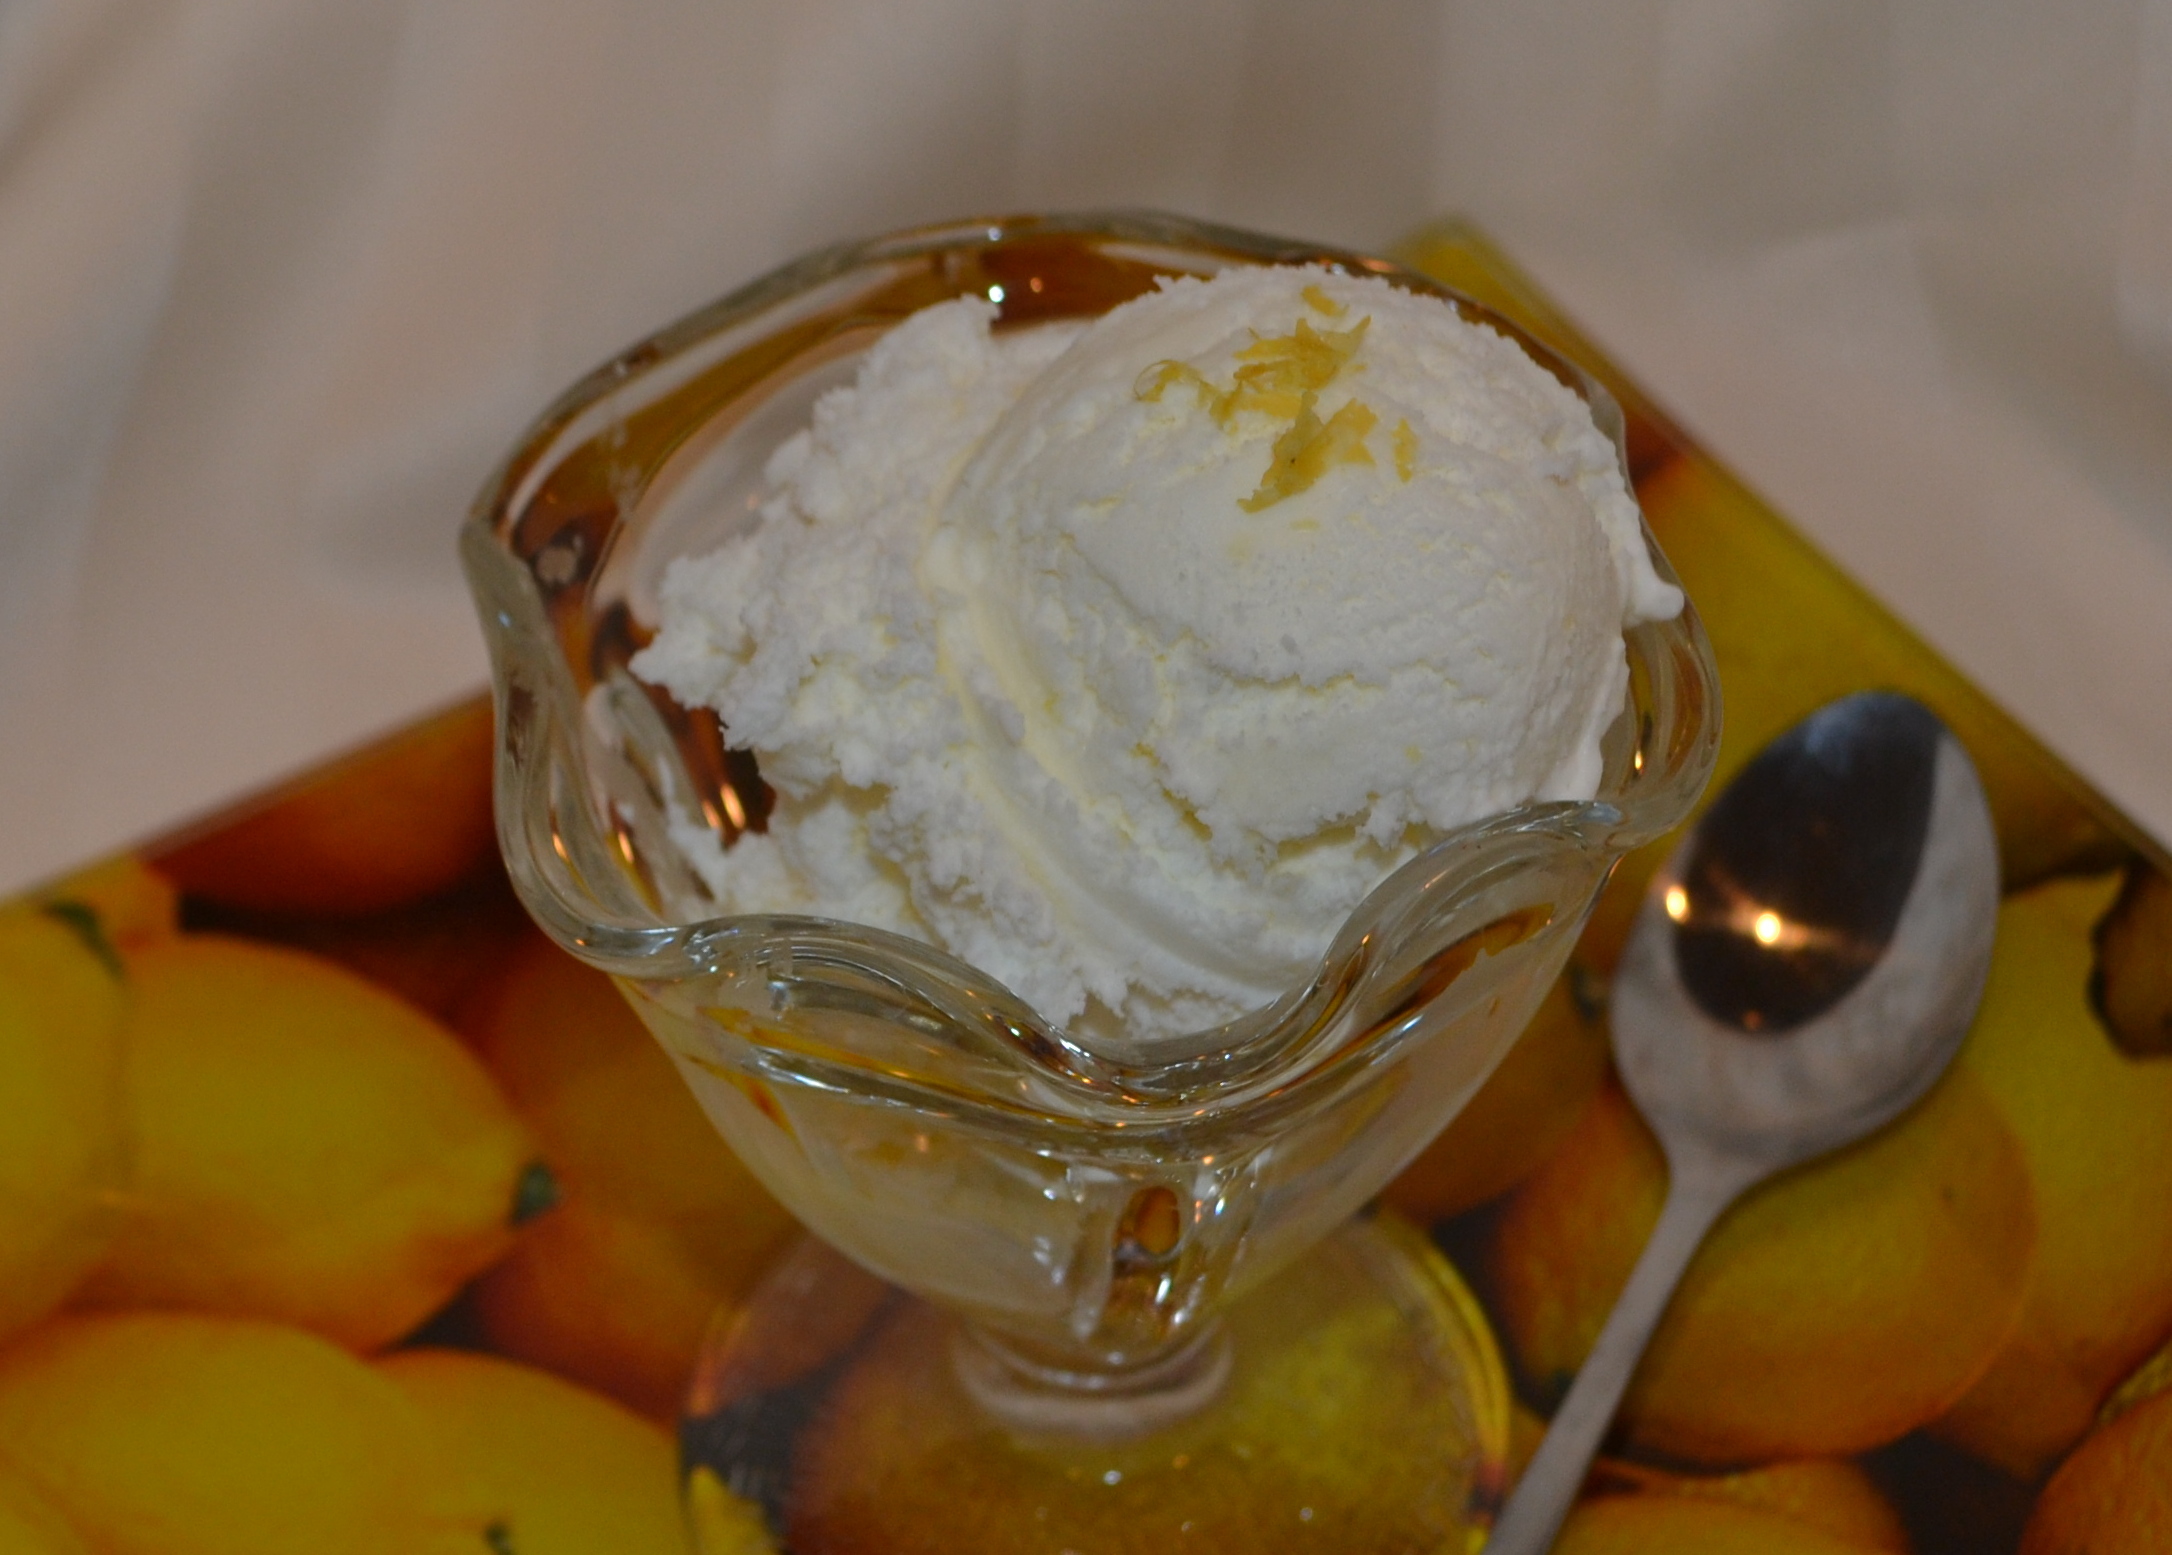
I like to serve this ice cream on fruit pie, crisps and cobblers. My friend Sharon, whom I mentioned above, bought her ice cream maker after I fed her berry crisp with a scoop of this lemon ice cream.  This ice cream is also fantastic as a filling for an ice-cream sandwich.  To make a truly gourmet ice cream sandwich place a small scoop of Lemon Ice Cream between two ginger cookies, squish the sandwich a bit, square the filling up a bit, maybe roll the sides in a bit of chopped chocolate-milk, semi-sweet or white, then put the little bites of heaven in the freezer to firm up.   My pregnant daughter likes to eat  Lemon Ice Cream “as is” straight from a glass bowl with a long spoon.  She downed the sample above in one breath (at 9 o’clock in the morning one week before her due date!).

This recipe was first published in Gourmet magazine in 1999.  I’ve been making it since May 25, 2003.  Yes, I marked the date on my copy of the recipe, with this note, “Delicious and simple!”  “Simple” was written in caps and underlined twice!

Lemon Ice Cream

1 large lemon (zest plus 1/4 cup freshly squeezed lemon juice)

1 cup granulated sugar

1 cup cold milk (I usually only have 2% at home, so that’s what I use)

1 cup well chilled heavy cream


With a vegetable peeler or microplane remove the zest from the lemon, do NOT include any of that bitter white pith in with the zest.  Put the sugar and the lemon peel in a food processor or blender and whirl until the sugar is finely ground and the lemon zest has been incorporated into the sugar. Add in the milk and the cream (On occasion, I have used 2 cups half-and-half instead of the milk and cream mixture).  Blend just to combine.  Stir in 1/4 cup freshly squeezed lemon juice.  Process in ice cream maker for about 20 minutes.  Place soft ice cream in a freezer safe bowl, and set in freezer to harden up a bit (a few hours).  Ice Cream will keep at least a week, if not more, in the freezer but I doubt you will have to test the outer limits.

Thanks for stopping by my kitchen today!  Looks like the next few days are going to be scorchers.  Stay cool. Squeeze lemons. Make ice cream. By the way, I think the picture above is one of the best so far for this blog.  My webmaster, Ratty, fixed it up real nice, didn’t she?

23 Feb 2013 Cold Brewed Iced Coffee (for the Yummiest Iced Lattes)

Iced Coffee with Whip

I like coffee.  I loooooove coffee.  Not that hot, black and bitter brewed coffee, but that expensive stuff brewed by the tablespoonful and mixed with steamed and foamed milk.  I have lived with an espresso machine since my ex-husband moved out.  It was a good switch. I am on my fourth one now (fourth espresso machine, not fourth ex-husband!).  Three had to be  retired (again, the three espresso machines not ex-husbands) and one  was fired for making terrible, horrible, no good, very bad lattes.  In addition to hot lattes, from spring through fall I really, really enjoy an Iced Latte in the afternoon, and, for Iced Lattes, with this recipe  no espresso machine is  required! Is there dancing in the aisles?

To make the Cold Brewed Iced Latte base, just get 12 oz of good quality coarse ground coffee beans, 7 cups of water, and a bowl that can be covered.  Are Toffee Nut Iced Coffee’s your little bit of heaven?  Not a problem. Vanilla Iced Coffee’s?  Easy peasy…

My friends and I are loading up my Minnie Winnie (small RV) and heading off to Palm Springs for the Camel & Ostrich Races and the Blessing of the Dates.  (Nooooo, I don’t know why we thought that would be a good idea!!! And no, I am not making this up, both are real events, held yearly, in Palm Springs and, from what I understand, in Arizona, too).  It’s become a tradition for us to load Iced Coffee Base (decaf)  into the Minnie Winnie when we head out.  Iced Lattes every afternoon while touring the US, what a nice way to live!  Don’t be jealous…raise your hand! You can come on the next trip!

Cold Brewed Iced Coffee Concentrate

  • 7 cups water (you could go gourmet and use bottled water…)
  • 12 oz. favorite rich coffee (coarse  or drip grind, decaf or regular)
  1. Pour the entire 12 oz of coffee into a bowl that can be covered (with a lid…or a plate)
  2. Pour the water over the coffee. Stir to make sure all grounds are saturated with water. Cover the bowl.
  3. Let the coffee and water sit, covered and undisturbed, for 24 hours.
  4. Now comes the messy part.  Strain the coffee.  I put a coffee filter in a mesh strainer, balance it on top of a pitcher, and pour cups of the mixture through the filter. The Iced Coffee base collects in the pitcher and  I throw the used coffee grinds away as I go.  You might need to use two coffee filters.  The decanting takes awhile, but it’s definitely worthwhile–messy but easy.
  5. Once all the coffee concentrate has been filtered, put a lid on the pitcher, and store it in the refrigerator for up to three weeks. (Handy Tip: write dates on the container with an erasable marker.  For example:  Made 2/13/13. Good until 3/6/13.  When the container is empty, wash the dates off!  I mark all my plastic containers with erasable markers now.  It’s so handy.)

Iced Latte

  • ¼ cup* of Cold Brewed Iced Coffee Concentrate (above)
  • ¾ cup of milk (If you want, you could experiment with the milk.  I use 1 or 2%, but I have heard of others using coconut milk, almond milk, chocolate milk, and of course soy milk. Some even like evaporated milk with a splash of sweetened condensed milk).
  • 4 or 5 ice cubes
  • Optional: sugar (white or raw), Splenda, Torano Syrup (Vanilla and Toffee Nut are favorites), Bailey’s Irish Creme, Kahlua, 1-3 Tablespoons chocolate syrup, Sprinkles (Trader Joe’s has a “Sugar, Chocolate, Coffee Bean Grinder” that’s fun), a chocolate covered espresso bean or mini chocolate chips…
  • whipped cream and a straw (I think these are musts, but some people are a bit more serious and go without!)
  1. Pour the concentrate into the glass.
  2. Add the milk and stir.
  3. Stir in any optional ingredients (sweetener or syrups)  Stir well.
  4. Plop  in some ice cubes. Stir again.
  5. Top with whipped cream, and sprinkles if you’d like (sprinkles, grated chocolate, a dusting of cocoa powder or cinnamon, or even a squirt of chocolate or caramel syrup), and, of course, a straw.

* ¼ cup of concentrate plus ¾ cup of milk seems to please most of my friends (A LOT!), but I do have one friend who doubles the coffee.  She has ½ cup concentrate and ¾ cup of milk. She’s German.  She likes strong coffee.

Thanks for stopping by my kitchen today!  You have in your hands one my favorite recipes. I hope you’ll be enjoying warm weather and iced lattes very soon!

P.S  If you’d like to get an email notifying you of the next recipe I post, please enter your email address in the box to the left. Don’t worry!  I won’t abuse your email address (I don’t know how to, for starters…) or use it for anything other than an occasional, short email notification of a new posted recipe.

04 Sep 2011 Sparkling Watermelon Lemonade

Last family BBQ of the season?  I wish I had posted this recipe as a season opener so that we could have had enjoyed this drink throughout the summer, but at least it is posted in time for the last BBQ of the summer. So toast the summer good-bye and pack away the white shoes with a glass of this sparkling Watermelon Lemonade.

This is  a summery, refreshing drink that’s lightly bubbly. No artificial colors, no artificial flavorings, no preservatives; just all natural ingredients! (…and it will use up all of that H-U-G-E watermelon you just bought!  My local grocery store had BIG ‘UNs for $2.49 yesterday.  How could I resist? Now, with this recipe for Watermelon Lemonade, none of that BIG ‘UN is going to waste!)

You could easily use this recipe and make a watermelon concentrate to freeze for future use.  Just mix the watermelon puree, the lemon juice, and the simple syrup, stir to blend. and then freeze (a quart Ziploc bag would work fine).  When ready to serve remove concentrate from freezer, defrost, add water and sparkling water, and stir until blended.

The kids are going to love this.  In fact, I think it will be their favorite. Go ahead and make some concentrate.  You know there is going to be a kid oriented event in the next few weeks.  Better to serve them good-for-you Watermelon Lemonade than a can of fizzy artificial flavorings and colorings.

This recipe has a long pedigree.  I found it here, http://traceysculinaryadventures.blogspot.com/2011/07/watermelon-lemonade.html (Tracey has posted a much better picture of the Watermelon Lemonade), where it was adapted from from Smitten Kitchen who adapted it from  Bubby’s.  I added the recipe for 8 servings  (why not make a pitcher  full?) and changed the ratio of bubbly water to straight water. You could make either version with all still water, or with all bubbly water.  Do what suits you. Make this recipe yours! Enjoy!  Here’s look to next summer, when we can have glass after glass after glass of this Sparkling Watermelon Lemonade.

Sparkling Watermelon Lemonade

For two glasses:

  • 1/4 cup freshly squeezed lemon juice (usually one lemon)
  • 1/2 cup fresh watermelon puree (Put cubes of seedless watermelon in blender and whirl until smooth.  Strain to remove seeds and pulp. )
  • 3-4 tablespoons simple syrup (recipe below, make first and let cool!)
  • 1/2 cup cold water
  • 1/4 cup sparkling water

Add all of the ingredients to a small pitcher and stir to combine.  Divide between two glasses and serve over ice.

For Eight Servings:

  • 1 cup freshly squeezed lemon juice (4-5 lemons)
  • 2 cups fresh, strained watermelon puree (about 1/2 a medium watermelon)
  • 1 cup simple syrup (recipe below, make first and let cool!)
  • 1  1/2 cups cold water
  • 1  1/2 cups sparkling water

Add all of the ingredients to a small pitcher and stir to combine.  Pour into ice filled glasses and serve.

Simple Syrup:

To make the simple syrup: Combine equal parts water and sugar in a small saucepan and bring to a simmer, stirring occasionally.  (1/4 cup of sugar and water for 2 servings, 1 cup of sugar and water for 8 servings). Continue simmering until the sugar has dissolved.  Turn off the heat and let the syrup cool to room temperature.  Leftover syrup can be stored in the refrigerator for up to one month.

Thanks for stopping by my kitchen today.  I hope I’ll be back cooking up a storm tomorrow.  Fingers crossed, I’ll see you then!

Polly


19 Jul 2011 Corn Dogs

I am sooooo bad.  I KNOW I shouldn’t cook like this.  I know it. I know it. I know it.  But I did.  And my little experiment turned out wonderfully well.  Who knew homemade corn dogs were so easy to make?   I guess there is no need to go to the fair now, or to make that once every other year stop at the Hot Dog On A Stick outlet in the mall.

I made mini corn dogs, so that counts for something, right?  I cut each bun length hot dog into 3 pieces, speared each piece with a good quality toothpick, rolled it around in the cornbread batter, and then placed it in the <gasp> hot fat to <gasp, gasp> deep fry.

Bad girl, BAD girl.

Delicious outcome though.

We–my son, my daughter, my grandson, and my houseguest–ate them standing at the stove, putting the mustard and ketchup on the paper towel I was draining the corn dogs on.Dip, bite, mmmm, dip, bite, mmmmm, dip, bite, mmmmmm…

Tes At Home led me astray. Her Tastespotting picture showed up in my RSS feed right at lunch time. I followed her directions exactly.  The only thing I have added in is a suggested temperature for the hot oil (I know, I know, it’s a sin that I know such things), and I did increase the salt a bit <gasp>, and I rewrote the directions just a bit, just to make them sound more like me…, BUT! The recipe is ALL Tes At Home 🙂

Mini Corn Dog

  • 6-8 hot dogs, your choice…all beef, turkey, Kosher, vegan, super premium, ultra bargain discount, regular length or bun length, it doesn’t matter…, whatever you prefer or have on hand
  • 1 cup corn meal
  • 1 cup flour
  • additional flour for coating the hot dogs (2-3 tablespoons)
  • 4 tsp baking powder
  • 2 1/2 tbsp sugar
  • 1 tsp salt
  • 1 egg
  • 1 cup milk
  • Oil for deep frying
  1. Cook the hot dogs in boiling water for few minutes.  (I know they are already precooked, but do it anyway so they can get all that plumping business out of the way.) Remove cooked hot dogs from the water, drain,  and set aside.
  2. Combine corn meal, flour, salt and baking powder in a mixing bowl.
  3. In another bowl, whisk egg and sugar until sugar is dissolved,  then stir in milk.
  4. Add the milk mixture to the flour mixture and stir well.  Let the batter rest in the refrigerator for 10-15 minutes.
  5. Heat oil in the deep fryer over the medium heat.
  6. If desired, cut hot dogs into halves or thirds. Spear each piece with a good quality toothpick.
  7. Roll  hot dog pieces in flour and then dip into the corn bread batter, coating well.  (The cornbread batter coats surprisingly well.  No worries here!)
  8. When the oil reaches 365 degrees, place the cornbread covered, toothpick skewered, hot dog into the hot oil. (I have a small pan for deep frying, so I could only cook two mini dogs at a time.)
  9. Deep fry until golden brown. Serve hot, with ketchup and mustard for dipping, of course.

Note: I had enough batter for six bun sized hot dogs cut into thirds, 18 mini hot dogs–and I put the batter on pretty thickly (the corn bread batter is my favorite part).

Aren’t you glad you stopped by my kitchen today?  Just what you needed to know…, how to coat a hot dog in a corn bread batter and deep fry it!  Deeeeeelicious!!!  Serve with a green salad and a glass of orange juice.  My daughter sees no reason why these can’t be frozen and then reheated in the oven as needed.  I don’t either.  Costco sells them twenty four to a box just that way!

Now for all my Facebook, “Polly, Julie and Julia” friends.  YES,  to make matters WORSE I then cut some Reese’s Peanut Butter cups in half , wrapped each half in that roll out crescent roll stuff, baked at 375 for 10 minutes, sprinkled with powdered sugar, and ate.  Ummm, no.  That refrigerated crescent roll stuff is bad news.  The rolls tasted and smelled like chemicals. That being said, of the eight I made guess how many are left?  ZERO.

Now, aren’t you glad to know you can make killer corn dogs at home any time you want?!  I’ll try to post something a little more sane tomorrow….