Still buying granola bars? There’s no need! This is an easy recipe for granola bars and you can make them to fit your flavor profile. What kind of nuts do you like? Peanuts, pecans, almonds, cashews or a nice mix? What kind of dried fruit suits you? Apricots, raisins, cherries, cranberries, mango, blueberries? Do you like your granola bars with chocolate? Dark chocolate, milk chocolate, or no chocolate? What about peanut butter? Want to add in some seeds? Would you prefer sunflower seeds, flax, sesame, chia, or pepitas?
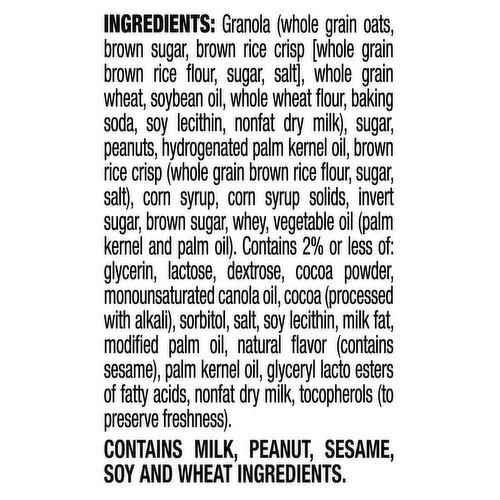
This is what you’ll find in a Quaker Oats Granola Bar:
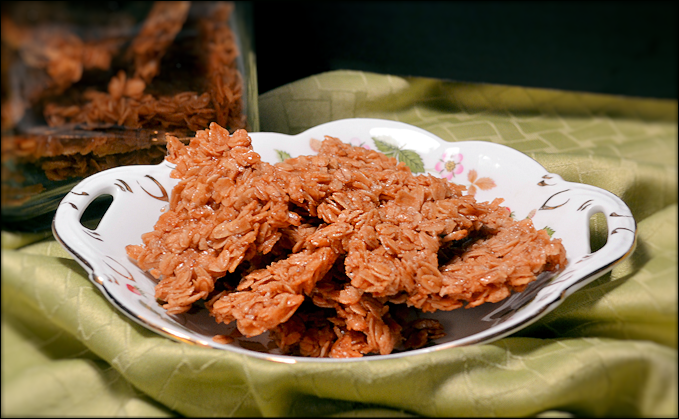
Would you like to get 30 granola bars in a batch or 8 to a box? Would you like to skip all those nasty preservatives and additives? Then I have a quick and easy recipe for you! (If you prefer a crunchy granola bar, check out this recipe!)
But what if you don’t need 30 granola bars? Well, of course you probably don’t, at least not right now. Keep out as many as you need this week, and put the rest in the freezer—they freeze very well. I almost always have some in the freezer; they’re very enjoyable with my morning coffee, and are my favorite travel snack. I put a few in my purse for airplanes, airports, for the first morning in a new place, and for the middle of a tour with no lunch spot in sight! Kids and commuters will appreciate having them in their lunch boxes and snack bags, too. Take them on a hike, too! They travel well 🙂
This is what’s in a Homemade Granola Bar:
I don’t do nuts, so I leave them out. I’m sure you are thinking WHAT?! No NUTS?! Like I said, these bars are completely customizable. If you don’t do dried fruit, leave that out. If you do both, you will loooove this recipe! It enables you to create your own favorite version of granola bars 🙂
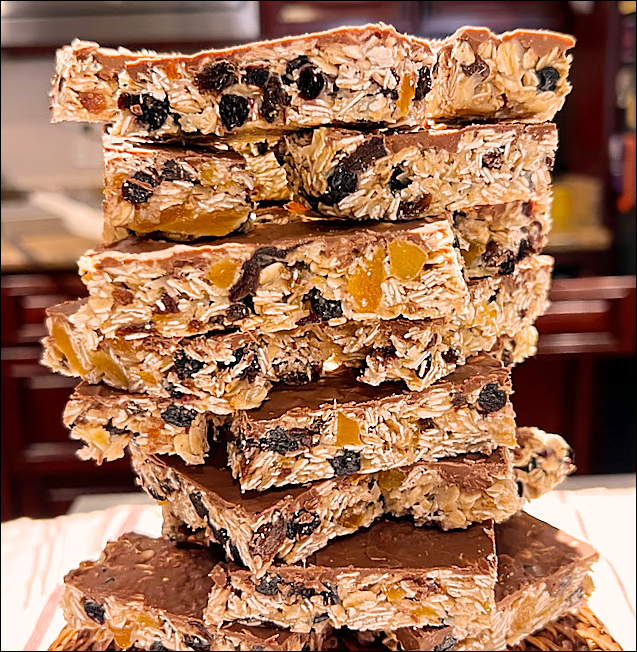
I use dried apricots, cherries, blueberries and either cranberries or raisins in my bars, but it varies depending what I have on hand—Trader Joe’s has a good variety of nice, reasonably priced, dried fruits. I like chocolate on the top, but others like chocolate in the bars, which works just as well.
The recipe below is based on Nigella Lawson’s Breakfast Bars. I’ve changed it up a little bit though. I’ve put her version first, and then my personal mix below. Are you excited to create your own granola bar yet? I was, and I continue to be pleased with this tasty recipe 🙂
BTW, this is a fun recipe to make with kids, also easy enough for older kids to make by themselves.
Homemade Granola Bars
Nigella’s Version
- 250 grams (2¾ cups) rolled oats—not the instant packets!
- 75 grams (1 cup lightly packed) shredded coconut
- 100 grams (2/3 cup) dried cranberries
- 125 grams (¾ cup) mixed seeds—pumpkin, sunflower, sesame, etc.
- 125 grams (1 cup) natural unsalted peanuts
- 1 can sweetened condensed milk—not evaporated!
Polly’s Version
- 350 grams (about 4 cups) rolled oats
- 75 grams (1 cup lightly packed) shredded coconut—sweetened or unsweetened, flaked or shredded
- 300 grams (1½ cuos) mixed dried fruit OR your favorite combination of dried fruit, nuts, seeds and chocolate or peanut butter chips
- 1 can sweetened condensed milk
- 1 large bar of chocolate, chopped, optional—for those who like chocolate on top, with the goodies inside—I use a 4.4 oz bar of Lindt Milk Chocolate
For all Versions
- Preheat oven to 250°.
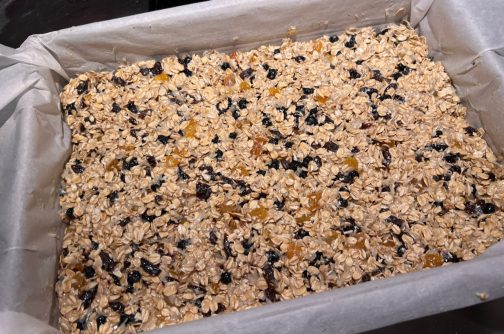
- Line a 9×13″ pan with parchment paper
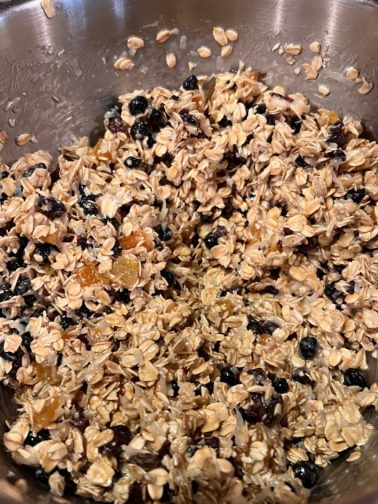
- Measure all the chosen ingredients into a large mixing bowl, either for a stand mixer, or to mix by hand.
- Open the can of sweetened condensed milk and pour into a microwave safe container, then warm the mixture slightly, until it’s easily pourable and mixable—just warmed, not boiling hot! In my microwave this is about 1 minute, but every microwave and every container is different, so time might be a bit more or a bit less in your microwave.
- Pour the slightly warm sweetened condensed milk over the ingredients in the mixing bowl, and stir to combine. I do this in my electric mixer, but I am careful not to overmix. Mix until all ingreidents are incorporated and glisten from being covered in the sweetened condensed milk.
- Pour mixture into prepared 9×13″ pan. Press into corners and smooth over the top—see picture above, it’s my pan before baking.
- Place in 250° oven for 1 hour.
- If adding chocolate to the top, remove pan 5 minutes before the time is up, sprinkle the chopped chocolate on top, and replace pan in oven for the last five minutes.
- Remove bars from oven—if you have chocolate on top, spread evenly over the bars with an offset spatula.
- Let bars cool in the pan.
- Remove bars from pan by lifting the parchment paper, and place on a cutting board.
- Cut bars into desired shape and size—Nigella suggested 4 cuts down and 4 cuts across to make 16 bars, I found these to be way too big. I freestyle, cutting long thin columns, about 1½-2″ perpendicular to the long side (about 10 rows), then cut 3 rows across of about 3″. I usually get 30+ bars approximately 1½” x 3″.
Thanks for stopping by my kitchen today! BTW, if you don’t have a kitchen scale, get one! I weigh most of my ingredients now, and I usually weigh in grams. My newer recipes will probably reflect that change. It’s a good change, much more precise with a more reliable outcome 🙂