Herby Flatbread for the Grill!
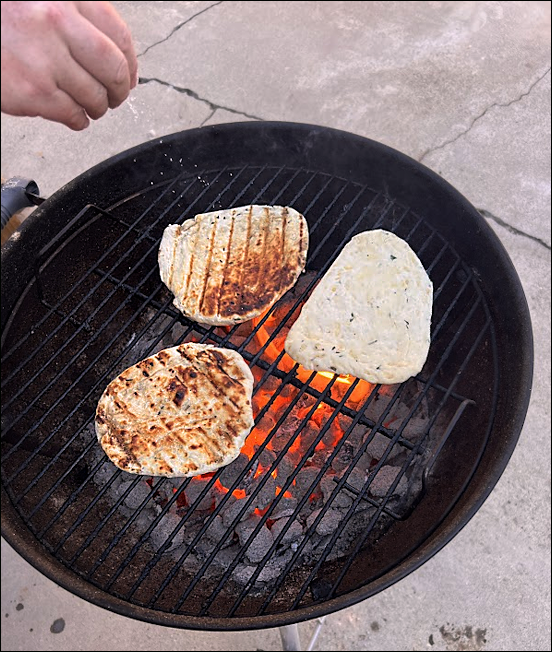
We love this! It does take a bit of finesse to cook the flatbread over a fire, and we are not always successful, but it’s a fun project to do while the BBQ’d meat is resting and the coals are…
"It's all about the recipe!"
We love this! It does take a bit of finesse to cook the flatbread over a fire, and we are not always successful, but it’s a fun project to do while the BBQ’d meat is resting and the coals are…
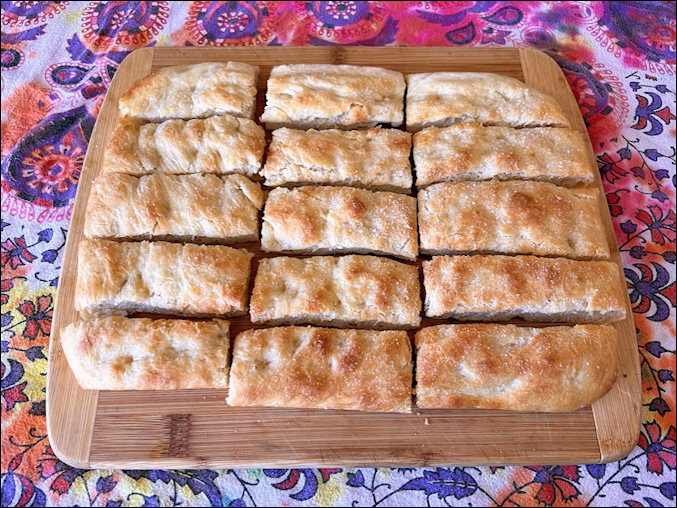
When my kids were little they used to call this “salty bread”. When Abby’s college friends asked for it they called it “Fa-fa-fa” (this was before Focaccia was a “thing” in the US). I’ve been making this for years, from…
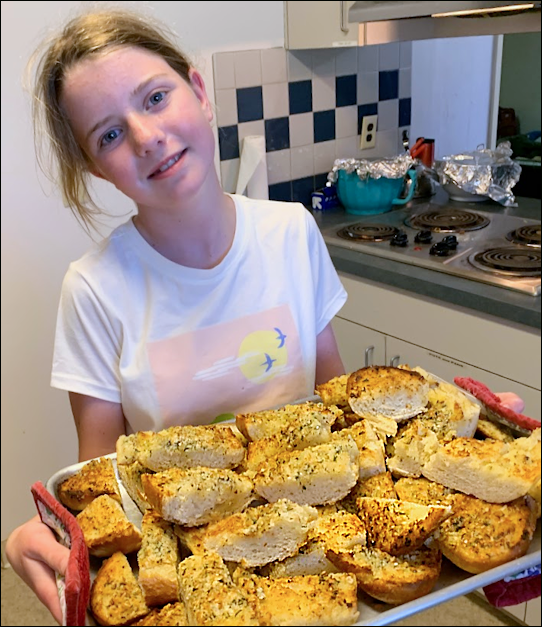
Say what now? No-Garlic Garlic Bread? I guess I could’ve called it Parmesan Onion bread, but there are so many ideas of what Parmesan Onion Bread might be, I don’t think that anyone will have a clear idea of what…
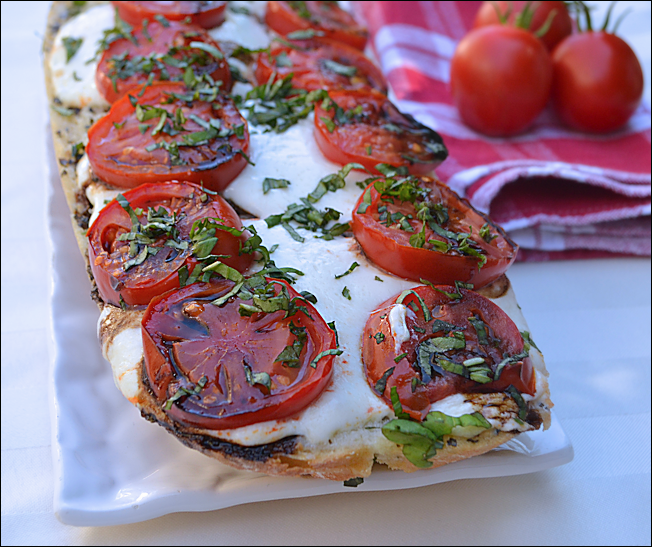
It’s just garlic bread, folks, but it’s garlic bread with an upgrade! There are tomatoes, mozzarella and basil! After running across this recipe at Two Peas and their Pod, I decided I needed to make it—now! I quickly sent texts to a few friends…
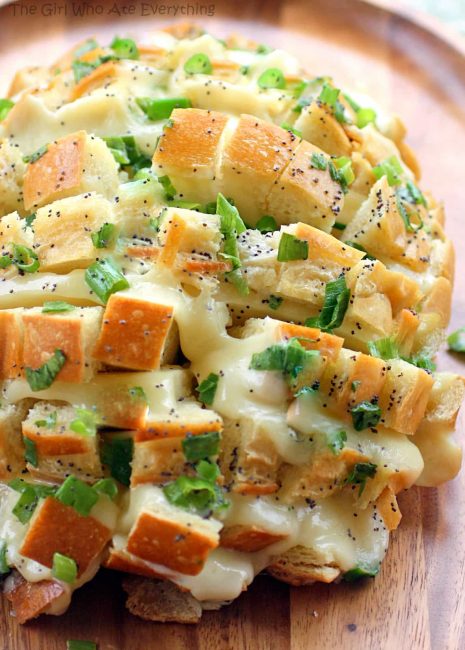
You know how you read a recipe and you just KNOW it’s going to be good? This was one of those recipes—a Sourdough bread round, cheese, butter, green onions and a sprinkling of poppy seeds, baked. What’s not to like?…
Bread baking is my Everest—meaning I haven’t conquered it yet! I’m not even at base camp so the bread recipes that appeal to me are easy and pretty much foolproof 🙂 Here’s one of my favorites! The recipe is so…
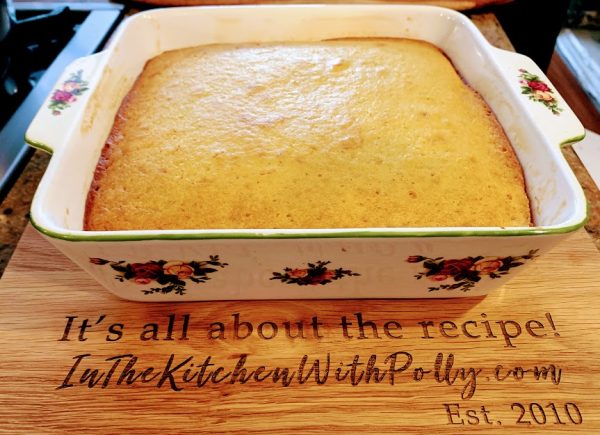
As a young kid, Jiffy brand cornbread was my favorite and because it was cheap—about fifteen cents a box—it fit into my family’s budget. The mix only required one egg and a ¼ cup of milk or water to make…
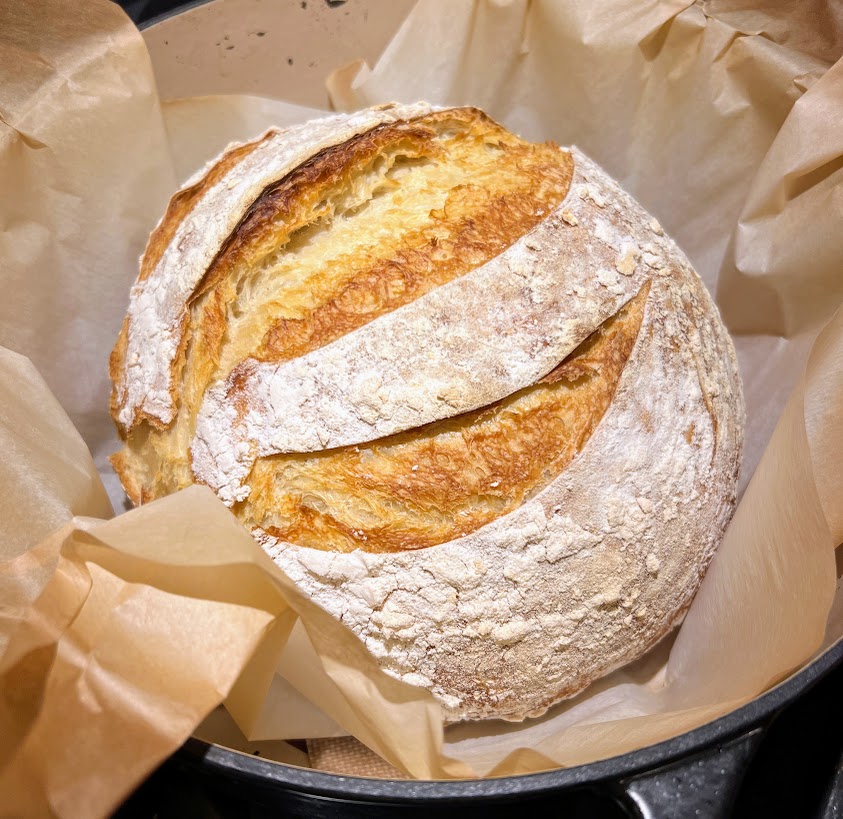
Recently, I have gotten into making Sourdough bread. I have posted my recipe below. I’m not pro! I probably don’t have the optimal crumb, air pockets, “ear” and what all, but the recipe is reliable and the bread is delicious.…