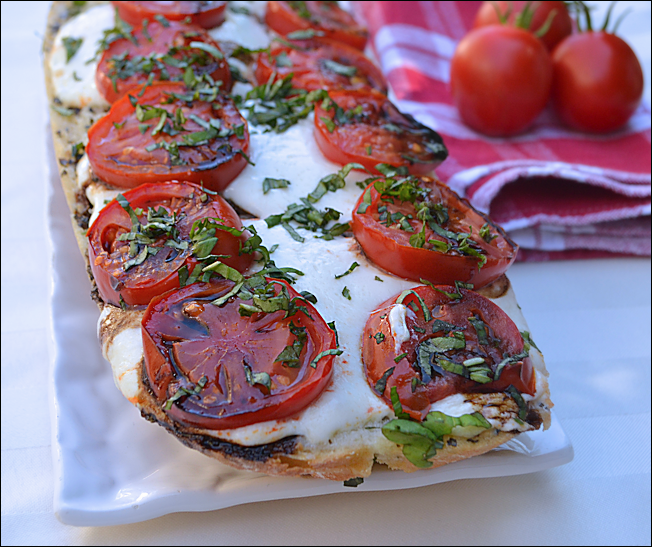
Caprese Garlic Bread
It’s just garlic bread, folks, but it’s garlic bread with an upgrade! There are tomatoes, mozzarella and basil! After running across this recipe at Two Peas and their Pod, I decided I needed to make it—now! I quickly sent texts to a few friends…