Tag-Archive for ◊ Summer ◊

26 Jul 2020 Homemade Ketchup
-:: Fresh Homemade Ketchup ::-

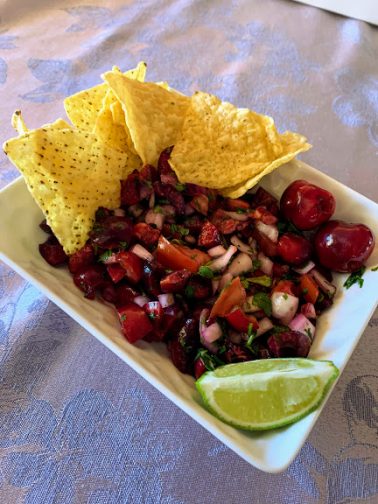
Every year I plant tomatoes and every year, for a period of a few weeks, I have more tomatoes than any one family could ever use. I have some recipes on this blog that call for a lot of homegrown tomatoes: Fresh Tomato Lasagna and Tomato Tart jump to mind because we make them every summer. This year we have added two wonderful new recipes, Homemade Tomato Ketchup and Tomato Jam.

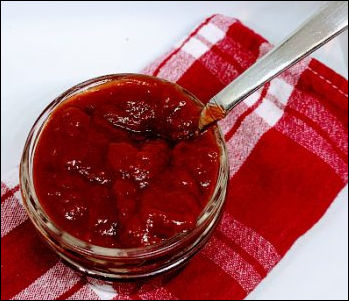
This is my recipe for Tomato Ketchup. The recipe originated with Saveur Magazine, was adapted by someone, and then adapted again by myself. I switched from using whole spices wrapped in cheesecloth to ground spices stirred in at the beginning. So much easier!

This ketchup is DELICIOUS. We even taste-tested, side-by-side with Heinz ketchup, this ketchup, and McDonald’s fries. Eight testers, and not one chose the Heinz over this ketchup. One tester even complained about the gluey texture of the Heinz ketchup, something she had never noticed before (OK, so that tester was me)… ?

The ketchup is EASY to make, but it does involve a lot of dishes and utensils: cutting board, sharp knife, stockpot, wooden spoon, a blender, a sieve, measuring spoons, and small bowl. But really…, that’s not too much for a six month’s supply of delicious homemade ketchup with no preservatives, no artificial flavourings, and no chemical thickening agents, is it?

Homemade Tomato Ketchup

INGREDIENTS

  • 4 pounds homegrown tomatoes, roughly chopped
  • 1 large onion peeled and chopped
  • 1-2 Anaheim chilies, seeded and chopped, optional
  • 2 garlic cloves, crushed or diced
  • 2 bay leaves
  • 1/8 teaspoon ground cloves
  • 1/4 teaspoon ground cinnamon
  • 1/2 teaspoon celery seeds
  • 1/4 teaspoon ground allspice
  • 1 tablespoon kosher salt
  • 1/4 -1/2 teaspoon chile flakes, optional
  • 1 cup apple cider vinegar
  • 4 oz. (125 grams) light brown sugar

To finish, optional:

  • 1 ½ tablespoons cornstarch
  • 2-3 tablespoons cold water

INSTRUCTIONS

  1. Place all ingredients, except for the cornstarch and cold water, in a large stockpot.
  2. Simmer mixture over medium heat until tomatoes and chiles are soft and onions are translucent and limp, about 45-60 minutes.
  3. Turn off heat, and let mixture cool (because blending hot liquids can be dangerous and messy). Remove bay leaves.
  4. In batches (probably 3 batches, depending on the size of your blender and temperature of tomato mixture), place tomato mixture into a blender and blend until very smooth.
  5. Strain the ketchup through a fine-mesh strainer and return to the cooking pot (straining removes seeds and peels). Press on the solid pieces to extract as much liquid as possible. Discard the solids.
  6. Once all the pureed liquid has been returned to the pan, cook over medium-low heat for an additional 30-45 minutes or until thickened to your preference.
  7. OPTIONAL: If your ketchup doesn’t thicken to your liking (some tomatoes have more liquid in them than other tomatoes), mix a slurry of cornstarch and cold water. Bring tomato mixture to a rapid boil and, stirring constantly, pour in the cornstarch slurry.  Continue to boil and stir for a full minute.
  8. Remove ketchup from heat and let cool.
  9. Ketchup can be stored in a sealed container (preferably glass) in the refrigerator for up to 3 weeks and frozen for 6 months or more.

Thanks for stopping by my kitchen today. Tomato Jam will be up soon!

27 May 2020 Fresh Cherry Pie

INGREDIENTS

  • 1 double crust pie dough

Cherry Filling:

  • 2 red plums
  • 2 pounds (6 cups) sweet cherries, pitted and halved
  • ½ -1 cup sugar, to taste (½ cup sugar usually results in a slightly tart pie)
  • ¼ teaspoon salt
  • 1 tablespoon freshly squeezed lemon juice
  • 2 tablespoons bourbon
  • 2 ½ tablespoons cornstarch
  • ¼ teaspoon ground cinnamon
  • 2 tablespoons unsalted butter, cut into ¼ inch cubes
  • 1 large egg + 1 teaspoon water (for egg wash)
  • Approx. 1 teaspoon sugar

INSTRUCTIONS

  1. Roll out a generous ½ of pie crust dough and place in bottom of 9-inch pie pan. Wrap pie pan containing bottom pastry with plastic wrap in place in refrigerator.
  2. Roll out remaining pastry for top crust. Place flat onto a baking sheet, cover with plastic, and place in refrigerator. Meanwhile, prepare cherry filling.
  3. Pit the cherries, and cut them in half.
  4. Cut plums in half and remove the pit.
  5. Place plum halves and 1 cup of cherries to food processor and process for 1 minute or until smooth.
  6. Strain the plum-cherry mixture through a fine-mesh strainer over a large bowl. Press down and extract as much liquid as possible, discard the solids and retain the juice in the bowl.
  7. Add the remaining 5 cups of pitted and halved cherries, sugar, salt, lemon juice, bourbon cinnamon and corn starch into bowl containing the puree. Stir to combine. Let mixture stand for 15 minutes to meld flavors.
  8. Remove bottom crust from refrigerator. Pour cherry mixture into to dough-lined pie plate. Scatter 1/4? butter cubes evenly over filling.
  9. Remove the top pie crust from the refrigerator and place on top of pie.  Using thumb and forefinger, flute edges or use the tines of a fork to seal the two pie crusts together.
  10. In a small bowl, lightly beat egg and 1 teaspoon water together. Using a pastry brush, brush egg all over the top pie crust.  Sprinkle a small amount of sugar over the egg wash. Use a sharp knife to make 4-8 evenly spaced vents in top of pie.
  11. Freeze prepared pie for 20 minutes.
  12. Preheat oven to 400 degrees. Place a foil lined baking sheet in oven to preheat.
  13. Remove pie from freezer and transfer to pre-heated baking sheet. Bake for 30 minutes at 400 degrees. Then reduce temperature to 350-degrees and continue to bake for another 30-40 minutes or until the juices bubble around the edges and crust is deeply golden brown.
  14. Allow pie to cool on wire rack for 4 hours before serving. Serve with a side of ice cream or sweetened whipped cream, if desired.

Enjoy!

27 May 2020 Fresh Cherry-Limeade
 |  Category: Drinks, Fruits, Seasonal  | Tags: , , ,  | One Comment

I am fortunate to live in an area with some remaining cherry orchards. For a few weeks each year, these orchards are open for U-Pick cherries.  Seeing as how we are in the midst of a pandemic (80 days of Shelter-In-Place and counting), and U-Pick Cherries being a relatively safe outdoor activity (with masks in place), we’ve been twice in two weeks. That’s a lot of cherries!

Caution #1: U-Pick cherries are not cheap, they might even be a bit more than you’d pay in the grocery store, but they’re good, and fresh, and last a surprisingly long time.

Caution #2: If you go cherry picking, you will undoubtedly come home with more cherries than you would if you bought a bag of cherries at the grocery store or farmer’s market. So bookmark a few of our very favorite cherry recipes: Fresh Cherry Salsa, Cherry-Limeaid, and Fresh Cherry Pie!

As a non-drinker of anything alcoholic, compounded by being a non-soda drinker, and not being especially thrilled about water, I am excited when I find something special to drink. This is one of my favorite special drinks, Cherry Limeade! It’s made with fresh cherries and freshly squeezed lime juice, mixed with sparkling water or club soda.

Fresh Cherry Limeaid

  • 2 cups (about 385 g/ 3/4 lb.) fresh cherries, pitted
  • 2/3 cup (133 g) sugar
  • 2/3 cup water
  • 1/2 cup freshly squeezed lime juice (from about 4 limes)
  • 2 cups (473 ml) chilled sparkling water (more or less to taste)
  1. Combine the sugar and the water in a small saucepan and bring to a boil. Simmer for approx 5 minutes. Then turn off heat and let sit.
  2. While sugar and water are simmering, pit the cherries and juice the limes.
  3. Place 2 cups pitted cherries into a food processor or blender and whirl until smooth.
  4. Strain the pureed cherries with a mesh strainer. Reserve the juice, and discard the solids. Don’t panic! The cherry juice will be an awful brown color, things will improve with the addition of the lime juice. (Cherry juice is not red! Now you know how much red food coloring goes into commercial cherry juice.)
  5. Combine the sugar-water, the lime juice, and the cherry juice into a large pitcher. Place in refrigerator and chill completely.
  6. Just before serving, stir in the sparkling water or club soda.
  7. To get really fancy, top with a slice of lime and a frilly straw!

Enjoy!

27 May 2020 Fresh Cherry Salsa

I am fortunate to live in an area with some remaining cherry orchards. For a few weeks each year these orchards are open for U-Pick cherries.  Seeing as how we are in the midst of a pandemic (80 days of Shelter-In-Place and counting), and U-Pick Cherries being a relatively safe outdoor activity (with masks in place), we’ve been twice in two weeks. That’s a lot of cherries!

Caution #1: U-Pick cherries are not cheap, they might even be a bit more than you’d pay in the grocery store, but they’re good, and fresh, and last a surprisingly long time.

Caution #2: If you go cherry picking, you will undoubtedly come home with more cherries than you would if you bought a bag of cherries at the grocery store or famer’s market. So bookmark a few of our very favorite cherry recipes: Fresh Cherry Salsa, Cherry-Limeaid, and Fresh Cherry Pie.

First up, Fresh Cherry Salsa. It’s surprisingly good. I ate it with tortilla chips, layered on top of grilled tri-tip, and the last was layered on top of chicken in a chicken taco. So, so good!

Fresh Cherry Salsa

  • 3 cups (575 grams/1 ¼ lbs) fresh cherries, pitted and coarsely chopped
  • 2 ½ cups tomatoes, chopped (453 grams/1 lb./2 large)
  • ½ cup very finely chopped red onion (OK to sub sliced green onion, if preferred)
  • 1-2 jalapeños, seeded and minced (adjust to taste)
  • 1 bunch fresh cilantro, chopped (about ½ cup)
  • ¼ cup fresh lime juice (2 limes)
  • Salt to taste

Chop everything up, combine with the fresh lemon juice and salt. Adjust the lime, salt and jalapeños to taste.  Pour into a pretty bowl and serve with tortilla chips or on ladled on top of grilled meat, or layered in a taco.

One of these might make your cherry-picking life easier. I’ve had this one for years, there might be better models out there now.