Archive for the Category ◊ Grilling ◊

06 Jul 2013 Turkey Burgers with a Greek Flair

Turkey Burger

Want a new, different and totally tasty burger to add to your repertoire?  Here it is! A Turkey burger with a Spanakopita Flair.  This recipe was inspired by Rachael Ray’s, Spanakopita Burger from her book, 365: No Repeats.  I made her recipe “as is” last year, and it was good, but this year I made it my way (below), and loved it.  I grill these burgers, but pan frying works, too.  I am sure some cucumber raita would go well on these burgers but we ate them the traditional American way, on a good bun with sliced homegrown tomatoes, a bit of crunchy lettuce and ketchup. Make the patties as big or as little as you want. I made 8 patties, approx 6 oz. each, but I love those little slider buns that are available now and think hosting a BBQ and serving a variety of burgers would be fun.  You could make slider sized regular hamburgers, these 
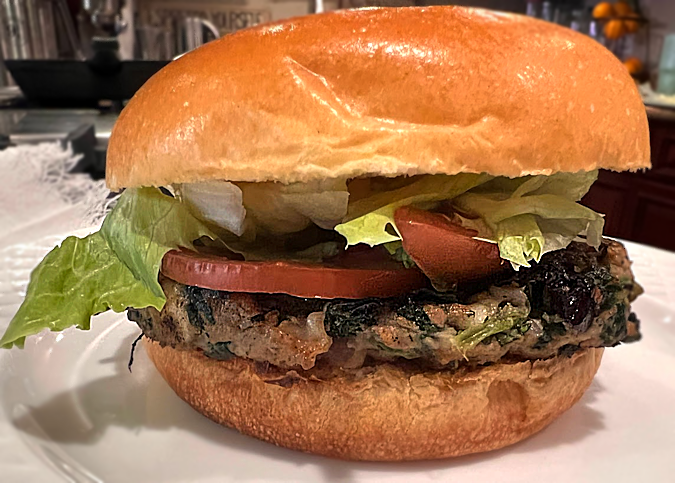
Greek Turkey Burgers, and maybe a Salmon burger. Don’t forget the sides of watermelon, corn, and a pasta salad, and grill some of that zucchini that I know is taking over  your garden.  S’mores for dessert, of course.  How about my Peach Iced Tea or Blueberry Lemonade to drink? Done!  Send out the e-vite!

My son’s girlfriend just took a bite of my his leftover and warmed up Turkey burger.  Her exact words were, “WOW. That’s fantastic!” Yup 🙂  And she scored big points with the boyfriend’s mama!

Turkey Burgers with a Greek Flair

  • 1  1/2 lb – 1  1/3 lb ground turkey
  • 1 box (10 oz) frozen spinach, thawed and squeezed dry
  • 1 cup (4 oz) crumbled feta cheese
  • 18-24 (2-3 oz) Kalamata olives, diced
  • 1/2 cup very finely diced or grated red onion
  • 1/4 cup chopped fresh basil or parsley, if you have some on hand
  • 1 tsp. minced garlic
  • 1 tsp dried oregano
  • 1/2 tsp. – 1 tsp. black pepper
  • 1/2 tsp. salt (the feta and olives are already salty so you can skip the added salt if you are salt sensitive)
  • 4 oz. applesauce (1 individual serving cup) OR 1/2 peeled apple, grated
  • 1/4 cup seasoned breadcrumbs (any breadcrumbs or Panko will work)
  • 1 egg, beaten

To serve: Buns, and choice of toppings.

  1. Place the ground turkey in a large bowl.
  2. Remove the defrosted spinach from the box and squeeze, and I do mean s-q-u-e-e-z-e ALL the water from the spinach.  I did not say drain, I said squeeze.  Take about 1/3 of the spinach into your hand and squeeze, squeeze, squeeze until totally dry.  Repeat until all the spinach is in little tight balls.  Fluff the balls up and add to the ground turkey in the bowl.
  3. Add to the turkey mixture the feta, olives, red onion, garlic, oregano, basil or parsley, salt and pepper, applesauce or grated apple, and the bread crumbs.  With a fork lightly mix the ingredients until everything has been uniformly distributed.
  4. Divide the mixture into 8 equal parts. Pat each part into a flat patty, just slightly bigger than your hamburger buns.
  5. Grill, or pan fry until done, about 3 minutes on each side, but this all depends on how hot the grill/pan is.
  6. Toast the buns!  (I love toasted buns)
  7. Serve with your choice of condiments–ketchup, mayonnaise, mustard, riata, tomatoes, lettuce, grilled red peppers…

Thanks for stopping by my kitchen today!  I hope you enjoy these burgers, we sure did!  They’re VERY tasty 🙂

Print Friendly, PDF & Email
23 Jul 2011 Beef Skewers

Meat on a stick! Is there anything better?  When I was pregnant with my first child, my cravings were iced tea, tomato soup, and “tasty chunks of beef”!  Twenty-six year later, I still crave tasty chunks of beef!

This is a very easy recipe, resulting is some mighty fine, Asian accented, “tasty chunks of beef”.  Chill the meat for 30 minutes, marinate for 30 minutes, grill and eat.  For a special treat serve with corn-on-the-cob, grilled veggies or a salad and some Bloomin’ Onion Bread!

When I was a single full time working mother of three children I was a master of freezer food.  This was one of my favorites.  Homebaked Chicken Nuggets were another.  I would buy two flank steaks and some skewers.  I’d unroll the flank steaks and then freeze for 30 minutes to make it easier to slice. At the same time I would soak the skewers in cold water.  Then I’d probably sit down with my feet up, an iced coffee and a good book while the the meat chilled and the skewers soaked, LOL!  A sense of humor is a wonderful thing!  More than likely during that thirty minutes I’d finish putting the groceries away, wipe up a spill, ask a telemarketer to put me on the no-call list, solve a kid dispute, feed the dog, move the laundry over, eat lunch and load the dishwasher …  ANYWAY, after thirty minutes I’d slice the beef and thread it onto the skewers.  Then I would layer the skewers into a shoe box sided plastic container.  I’d put wax paper between the layers, and freeze the whole box.  One box would last two or three months and provide plenty of yummy and quick week night main dishes…easily expandable to however many people were home.  Just take out 3-5 skewers per person.  Mix up the marinade.  Marinate the desired number of skewers for 30 minutes, then grill or broil!

Oh, and I often omit the sesame seeds, as I don’t care for them 🙂

Beef Skewers

  • 1 flank steak, approx 1.5 lbs, (unrolled) and slightly frozen (for about 30 min or so)
  • 30 bamboo skewers (soaked in water for 30 minutes)

Marinade

  • ¼ cup soy sauce
  • ¼ cup sugar
  • 2 Tablespoons Sake (an opened bottle will keep 1 year in refrigerator)
  • 2 cloves garlic, smashed
  • 1 ½ teaspoons grated ginger (keep any leftover fresh ginger in baggie in freezer, when ready to use no need to defrost, just peel and grate!)
  • 2 tablespoons toasted sesame seeds (toast in dry frying pan until fragrant)
  • 3 green onions sliced

  1. Slice flank steak, across the grain, into thin strips.  Thread meat slices onto skewers, accordion style. It’s easy!  Child’s play!  (NOTE: Meat on sticks can be frozen at this point. When ready to use, just remove from freezer.  Let defrost for as long as it takes to make marinade.  Then continue with recipe.)
  2. Combine soy sauce, sugar, and sake; stir well to dissolve sugar.  Add in garlic, ginger, sesame seeds, and green onions.
  3. Pour over meat on sticks.  Marinate 30 minutes.
  4. Remove skewers from marinade.
  5. Grill over hot fire or broil for 2-3 minutes on each side.  Good hot, room temperature, and cold! I’ve served these as appetizers and as a main dish.

    Thanks for stopping by my kitchen today!  I hope I have given you an idea for this weekend’s BBQ and for busy school night meals, too!

    Print Friendly, PDF & Email
    28 Jun 2011 Grilled Vegetable Platter

    I love veggies, as long as they are cooked.  If they are grilled, even better.  I started grilling veggies a few years back.  I just sliced and grilled.  Except for loosing a significant number of veggies through the grill, they worked out great.  I grilled carrots, zucchini, asparagus, onions and sweet potatoes.  Now I am working on fancier grilled veggies; a little marinade, a little glaze, grill marks…

    Last week I received an email, “Top Ten Recipes of June 2011”.   This email came from Taste of Home magazine.  I am not a huge fan of Taste of Home, too many of their recipes start out with a mix, but I am a sucker for Top Ten lists. So I opened the email.  The picture of the  Grilled Vegetable Platter looked good, the recipe had five stars out of five stars with twelve reviews, so I clicked away.  The recipe sounded good and looked simple enough, so I tested it…, winner, Winner, WINNER!

    Don’t feel like you have to stick to the veggie combo listed.  Grill what you have and what you like.  I left out all the bell peppers.  I. don’t. like. bell. peppers.  I didn’t add in any mushrooms because I just posted that fabulous recipe for Grilled PortobellosTaste of Home reviewers also reported adding green beans, snow peas, sweet potato rounds, and halved cherry tomatoes  into the mix.

    My change to the Taste of Home recipe is to make two marinade mixtures.  Use one to marinate the veggies in prior to grilling (and then discard that marinade with the Ziploc bag), and then use the second one to drizzle over the veggies after grilling, the second marinade is just slightly different from the first. I also substituted freshly minced garlic for the garlic powder in the first marinade.

    Now for my number one tip on grilled veggies… Grill the veggies first, before the meat or the fish.  Veggies are grill hogs, taking up an entire grill, and some of them take a surprisingly long time to grill, onions especially. The asparagus will cook most quickly, then the squash, then the carrots, and the onion will probably still be cooking when you start in on the meat.  Just remove each veggie when done and, when your veggie platter is mostly complete, drizzle with the second marinade, and place the whole platter in a warm oven.  Another reason for cooking the veggies first?  You can be in the middle of cooking them when  your guests arrive, and I haven’t met a guest yet who is not impressed by a grill covered in marinated mixed veggies, some with nice char marks!

    Grilled Vegetable Platter

    For the pre-grilling marinade

    • 1/4 cup olive oil
    • 2 Tablespoons honey
    • 1 Tablespoon Balsamic Vinegar
    • 1 teaspoon dried oregano
    • 1 clove garlic, minced or 1/2 teaspoon garlic powder

    For the post-grilling drizzle

    • 2 Tablespoon olive oil (this is the time to use your best tasting/most expensive olive oil)
    • 1 Tablespoon honey
    • 1/2 Tablespoon (which is equivalent to 1 1/2 teaspoons) Balsamic Vinegar
    • 1/8 teaspoon pepper
    • 1/4 teaspoon salt

    Veggie Mix (mix it up to suit what you have on hand, what you like to eat, and how many people you are serving…keeping in mind grilled veggies make great leftovers and are almost as good eaten at room temperature as they are when they are eaten fresh from the grill)

    • 1 pound fresh asparagus, trimmed
    • 3 small carrots, cut in half lengthwise
    • 3 small zucchini, cut in half lengthwise
    • 1 large sweet red, yellow, or green bell pepper, cut into 1-inch strips
    • 2 medium yellow summer squash, cut into 1/2-inch slices
    • 1 sweet potato (I prefer Garnet Yams), peeled and cut into slices
    • 1 medium red onion, cut into four wedges (I used a sweet Vidalia onion)
    • other possible add ins or substitutions: mushrooms, halved tomatoes, green beans, snow peas…
    1. Combine the olive oil, honey, Balsamic vinegar, oregano and minced garlic or garlic powder for the marinade. Pour into a large resealable plastic bag; add the vegetables. Seal bag and turn to coat; refrigerate for 1-1/2 hours.
    2. Combine the ingredients for the drizzle; cover and set aside.
    3. Place vegetables on a grilling grid (I don’t do this…I place the veggies directly on the grill, and loose a fair number of asparagus spears, skinny carrots and zucchini).  Grill, covered, over medium heat for 4-6 minutes (adjust for each veggie) on each side or until crisp-tender. Note: The onion wedges will probably fall apart.  That’s OK.  Just grill the slices (the slices that don’t fall through the grill, that is).  As soon as each slice is nicely brown and feels soft, transfer to platter and drizzle with some of the second marinade mixture.
    4. Transfer to a large serving platter. Drizzle with the second “marinade” mixture.
    5. Serve, or if desired, place in warm oven (250 degrees) to stay warm until needed

    So now you know what you will be grilling, what should you have for dessert?  S’mores (or S’mores Bars?), Frozen Bananas (always fun), or my personal favorites, Fresh Blueberry Pie or a Mixed Berry Pie?? Have some fun and search my recipes!

    Outdoor grilling rocks! Hope you are enjoying both cooking and dining outside.  Next up, grilled artichokes! Thanks for stopping by my kitchen again today.  I love it when you pop in!


    Print Friendly, PDF & Email
    09 Jun 2011 Marinated and Grilled Portobello Mushrooms

    The best Marinated and Grilled Portobello Mushrooms I’ve ever had were served at my 30th high school reunion. (Yes, I am that old. Dang it.)  The mushrooms were served at room temperature, they were “meaty” (as Portobellos are known to be), tangy, smokey, and a bit salty.  Of all the things to remember about a high school reunion, I remember the mushrooms?  There’s something seriously wrong with me…

    Most unfortunately,  I don’t have that particular Helix High School 30th Reunion recipe for mushrooms, but I have finally found a recipe and method  that seems to come pretty darn close.  For this I have to thank Cook’s Illustrated, which was a starting point for this recipe.   I adjusted their method just a bit to ensure some nice grill marks on the Portobello slices, and to make it a bit more convenient to prep ahead of time.  The original recipe is from the 2010 “Summer Grilling” publication (page 61).

    These Portobellos are marinated, grilled, sliced, grilled a second time, marinated a second time, and served.  Yes, another recipe that is a bit of a bother, but the steps are easy, and can be done ahead of time, and the final step can be done while the guests stand around ohhh-ing and ahh-ing and wishing they knew how to make such marvelous mushrooms.  You’ll feel so accomplished. Trust me on this.

    Marinated and Grilled Portobello Mushrooms

    4 large Portobello mushrooms (between 5 and 6 inches in diameter, about 6 oz., each, in weight)

    Pre-grilling Marinade

    • 1/2 cup olive oil
    • 3 tablespoons freshly squeezed lemon juice
    • 2 tablespoons minced garlic
    • 1/2 teaspoon table salt

    Post -grilling Marinade

    • 2 teaspoons rice wine vinegar
    • 1 teaspoon minced garlic
    • 1 tablespoon chopped fresh tarragon (or 1 teaspoon dried)
    • 1/4 teaspoon table salt
    1. Combine all ingredients for first marinade in a large Ziploc bag.  Add cleaned mushrooms, seal bag, and toss gently. Let mushrooms stand at room temperature for about one hour in this marinade.
    2. Cut four 12-inch pieces of foil.  Remove mushrooms from marinade.  Place one mushroom, gill side up, on each square of foil.  Fold foil edges over mushroom and seal securely.
    3. Grill mushrooms in foil packed, gill side/sealed foil side UP, until mushroom is tender and juicy, about 10 to 12 minutes.  Set aside to cool.
    4. Carefully open foil packets.  Remove mushrooms and slice, on the diagonal, into long thick slices.
    5. Combine all the ingredients for the second marinade in a large bowl and set aside.
    6. 20 minutes before dinner, return sliced mushrooms to grill.  Grill each slice until nicely grill marked.  Depending on the heat of your grill this could take anywhere from 1-3 minutes on each side.
    7. Place grilled mushroom slices in bowl with marinade and toss to coat.  Cover bowl with plastic wrap and let mushrooms marinate for 15 minutes (and up to 30 minutes).
    8. Remove mushrooms from marinade and place on serving platter. Enjoy!

    Thanks for stopping by my kitchen today.  If you would like to receive a quick 2-line email when I post my next recipe, please enter your email address in the “subscribe” box in the right-hand column 🙂

    Happy Grilling!

    P.S. This grilled recipe is being added to the summer grilling link party at Family Fresh Cooking! Let’s get Grillin’ with Family Fresh Cooking and Cookin’ Canuck, sponsored by Ile de France Cheese, Rösle, Emile Henry, ManPans and Rouxbe!

    Print Friendly, PDF & Email