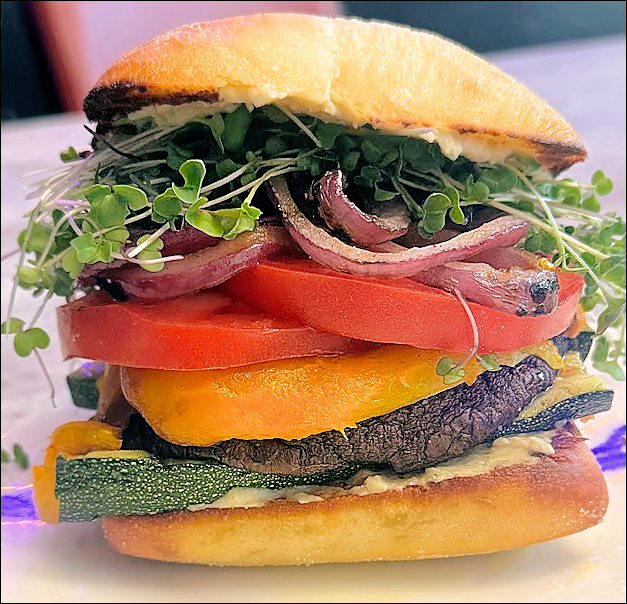
The Missed-Steak Burger
This is my daughter Hannah’s creation from her cook book The Good ‘Witch 🙂 It’s a super yummy veggie option at BBQs, and it’s a hit with a lot of people, not just vegetarians! This particular version looks a bit…

"It's all about the recipe!"
This is my daughter Hannah’s creation from her cook book The Good ‘Witch 🙂 It’s a super yummy veggie option at BBQs, and it’s a hit with a lot of people, not just vegetarians! This particular version looks a bit…
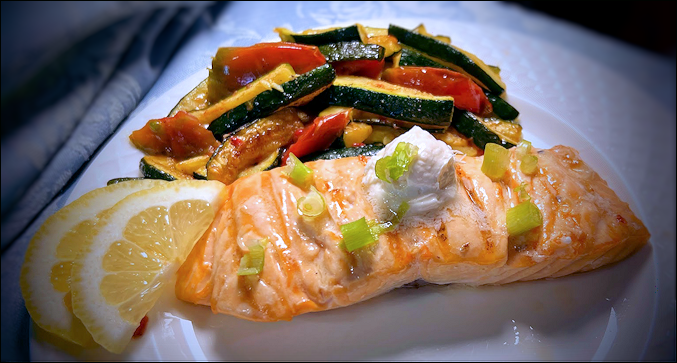
Photo: I forgot the chives, so had to sprinkle a few green onions on top 🙂 The recipe below is for four 5oz salmon steaks. These days though, I cook for one. So I make the Lemon-Ginger-Chive-Butter, using what I…
Every good English roast dinner needs Yorkshire Puddings and gravy. My aunts made Yorkshire Puddings like it was nothing. They just whipped them out, popped them in the oven, and every one turned out perfectly. Not so for me. To…
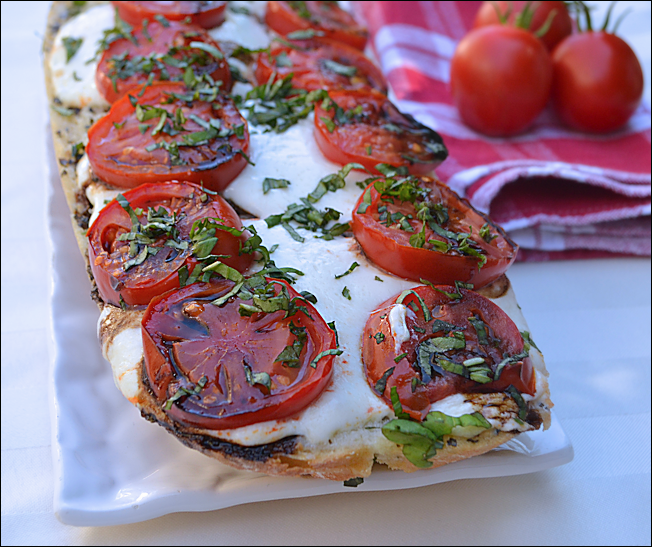
It’s just garlic bread, folks, but it’s garlic bread with an upgrade! There are tomatoes, mozzarella and basil! After running across this recipe at Two Peas and their Pod, I decided I needed to make it—now! I quickly sent texts to a few friends…
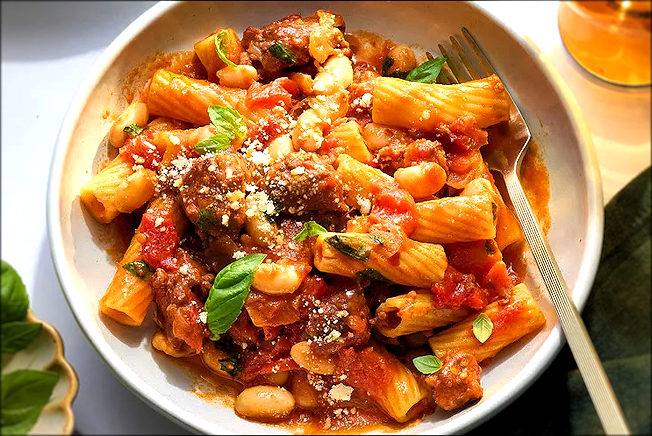
I’ve been making this pasta dish for a number of years. I think I found the original recipe in a Food and Wine Magazine because that’s where I found this photo—mine vanishing into thin air with the recent website malfunction…
When asked what his favorite kind of pie is, my son always answered, “Meat!” and then gets those raised eyebrow, are-you-kidding-me looks from Americans not familiar with Great British cooking 🙂 Meat pies are one of the delicious cornerstones of…
I’ve been making this for about three years now and I really have no recollection of where I got the recipe. It’s good and it’s quick, and you just might have most of the ingredients on hand. It checks all…