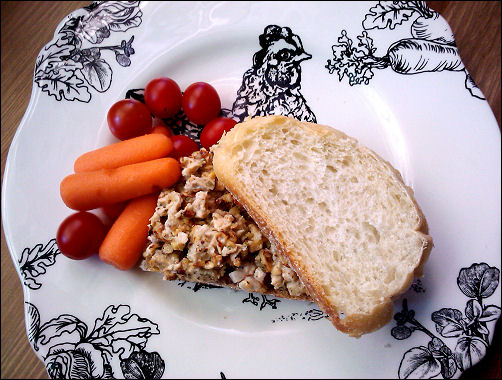
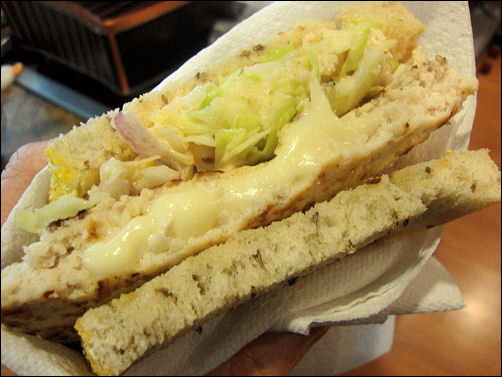
Tag-Archive for ◊ lunch ◊

08 Mar 2014 Kipferls (Vanilla Hazelnut Butter Cookies)

kipferl2

I had never, ever heard of Kipferls before.  Then, in two weeks they came into my life twice!  First, my friend Priscilla made some in the Culinary School Pastry Arts program she is enrolled in. I didn’t try one because I don’t like nuts.  I dislike nuts so much that the name of the cookie didn’t even register.  Then I read “The Book Thief” and Kipferls are important in one chapter.  Since I was hosting book club this month and since the author had contributed his mother’s recipe for Kipferls to “The Book Club Cookbook” that my friend Kayte  gave me for my birthday last year, I decided to make the cookie. I had to do a Google image search to see what they looked like! Then came the hunt for Hazelnut Flour.  It’s out there. I found it at Sprouts.  I was shocked by the price.  I told the cashier that there must have been a mistake.  She said she doubted it.  I asked her to call for a manager for a price check.  YEP.  She was right.  There was no mistake.  It’s $16.95 for a 14 oz. packet of Hazelnut Flour (aka Hazelnut Meal). After creating such a fuss, and with my book club in less than seven hours, I bought the dangblasted expensive and pitifully small bag of Hazelnut Flour. BTW, you don’t have to buy this flour to make these cookies.

How to avoid using expensive Hazelnut Flour:

1. Make your own.  Preheat oven to 350°F. Place 6 ounces (1 1/4 cups) of shelled hazelnuts on a baking sheet in a single layer. Bake 8–10 minutes, stirring occasionally until the hazelnuts are fragrant and brown. Remove the nuts from the  oven and let cool slightly. While still warm, though, fold the nuts inside a clean kitchen towel and rub vigorously to remove their skins. Place skinned nuts in a food processor fitted with the stainless-steel blade, and process until they are finely ground.

2. Substitute Almond Flour or Almond Meal for the Hazelnut Flour.  Almond Meal is about one-third the price of Hazelnut flour.  My German friend Karin said she always makes her Kipferls with Almond Meal, but her German relatives grind their own nuts.

To continue with my saga…Upon returning home with my $16.95 package of Hazelnut Flour, I got out the recipe and got started.  No! Two vanilla beans?  TWO?  For 36 cookies?  It is now clear to me that I am making World’s Most Expensive Cookie and I am thinking these better be good.  (They were, thank goodness. So good I might have to make them again, and again, and again…)

This recipe is based upon Markus Zusak’s recipe for Kipferls as published in The Book Club Cookbook.  I made some changes to the method and to the ingredients.  Mr. Zusak’s mother mixed her dough by hand, I tried it for a bit, then resorted to my electric mixer.  I split the use of the vanilla beans, putting one in the cookie and one in the powdered sugar, Mr. Zusak put both in the powdered sugar. I had to quadruple the amount of powdered sugar to cover all the cookies, and I covered the cookies with the powdered sugar while the cookies were still warm* so get a crackly, almost melted sugar coating on the cookies. (*Let the cookies cool a little, to firm up a bit.  If you toss hot cookies in powdered sugar, the cookie will break.)

Kipferls

Crisp German Vanilla Hazelnut Butter Cookies

For the cookies

  • 1 ¾ cups all-purpose flour
  • 1 ¼ cups Hazelnut Flour or Hazelnut Meal or alternative (see above)
  • 2/3 cup granulated sugar
  • 14 tablespoons (1 ¾ sticks) butter, at room temperature
  • 1 whole vanilla bean, split in half, and insides scraped off with a knife.  Discard the outside of the vanilla bean

For the vanilla sugar

  • 1 1/3 cup powdered sugar
  • 1 whole vanilla bean, cut crosswise into 1-inch pieces (different preparation than above)
  1. Make the vanilla sugar first.  Place the powdered sugar with the chopped up vanilla bean in the bowl of a food processor fitted with a metal blade.  Process until the vanilla bean has been incorporated into the powdered sugar, several 10 second bursts.  Place a fine meshed sifter over a small bowl and sift the powdered sugar to remove the unblended pieces of vanilla bean.  Pour vanilla sugar into a large Ziploc bag. Set aside.
  2. Preheat oven to 350°F. Spray two baking sheets lightly with cooking spray or line with parchment paper.
  3. Combine all purpose flour, hazelnut flour/meal, and granulated sugar in a large bowl. Cut butter into 1/2-inch pieces and add to flour mixture. Scrape the inside out of the split vanilla bean and add to bowl.  With an electric mixer, mix dough for 3-4 minutes or until a soft dough is formed.
  4. Pinch off small pieces of dough (1 T; 1/2 oz; 15 grams) and mold gently between your palms to form 3-inch ropes, thicker in the middle and tapered at the ends.   This took a bit of doing to master.  I rolled the dough to the length of my three middle fingers.  I rolled the dough a bit more firmly with my ring and index finger so the ends of the dough would be thinner. Fashion each piece of rolled dough into a crescent shape and place onto the prepared trays, see picture above.
  5. Bake in preheated 350º oven for 15-20 minutes or just until the cookies are beginning to turn brown.  Mr. Kusak says that once the Kipferls are brown, they are over cooked.
  6. Remove cookies from oven.  Cool just slightly and then toss into the Ziploc bag with the vanilla sugar–tossing the cookies while they are still hot creates a slightly melted-on, and truly special coating.  Toss  cookies in vanilla sugar.
  7. Remove cookie to a cooling tray and repeat with remaining cookies and vanilla sugar.  If you have vanilla sugar left over, you can re-coat the cookies.
  8. Let cool completely before eating. The cookies will crisp up as they cool.

 Yield: About 3 ½ dozen cookies

Kipferls1

I hope you enjoy the World’s Most Expensive Cookie!  They ARE good and worth the cost and the effort. Thanks for stopping by my kitchen today!

PS…I am making another batch of these cookies to take to a Tahoe retreat this weekend.  One bag of that dangblasted expensive Hazelnut Flour does make three batches of these cookies…AND, Costco sells vanilla beans now.  Note my friend Sally’s point, put the vanilla beans in the powdered sugar as soon as you get them.  Once you are ready to make the cookies, remove the beans and use as outlined above.  The benefit is that some of the essence of the vanilla beans will have soaked into the sugar…yummmmm.

06 Oct 2013 Espresso Rice Krispie Treats

espresso RKT bright1

As most of you know, I can’t be left in a room with a Rice Krispie Treat, or as my #1 grandson calls them, “Rice Christmas Treats”. Unfortunately, now he can’t be left alone in a room with a Rice Krispie Treat either, but it’s a problem that seems to run in the family.  His mother,  aunt and uncle can’t be left in a room with a RKT either (probably bad parenting).  We’re a Rice Krispie Treat crazed family which is odd, considering we don’t eat cereal (well, Abby eats cereal, but it’s a secret!).  I hate all boxed cereal.  Yes, I know that is a strong word, but I do.  I don’t think I have had a bowl of cereal in 40 years or more.  Yucky stuff, but stir in some processed marshmallows and a bit of butter and everything is magically transformed!

So! Now, I’ve finally found a GOOD recipe for an Espresso Rice Krispie Treats! I’ve tried some others over the years, including one epic fail using butterscotch pudding, but this one is a winner.  Where did I find it?  In the October 2013 edition of Cooking Light!  Are you shocked?  Me, too! This issue has NINE recipes for Rice Krispie Treats!  I am not inclined to make any of the other recipes, one of which is…, wait for it…, drum roll…, Maple Bacon!! Really? Really!?!  A  Maple Bacon Rice Krispie Treat?  (In Cooking Light?!) Ummm, no. But, if you do make them, you have GOT to let me know how they turned out, OK?  Are they supposed to be a breakfast food?!

Here, on In the Kitchen with Polly, I have four more recipes for Rice Krispie Treats: Salted Brown Butter Rice Krispie Treats (the all time favorite, the classic recipe made even better); Coconut Rice Krispie Treats and Chocolate-Chocolate Cherry Rice Krispie treats (which are both deeeeelicious–I don’t know which one I like better!) and Milky Way Rice Krispie Treats (which have a great taste but come in 4th place because they suffer a teeny-tiny bit in texture and are a bit, and just a bit, dense/hard… Not as ooey-gooey as the other four recipes).

This recipe calls for “toffee bits” which are Heath Bar Bits. Normally, I don’t like Heath Bar Bits because they taste a bit old and stale, but in this recipe they  complement and enhance the espresso powder perfectly (truth be told, I  made these the first time because I had half a bag of Heath Bar Bits in the refrigerator and didn’t know what to do with them).  Since then though, I’ve made these Espresso Rice Krispie Treats several times, always to rave reviews, except by #1 grandson, age: not-yet-five, who doesn’t like the coffee flavor (YET).  SCORE! More for ME! But it does mean that I have to make two batches of RKTs when I make these… 🙂

Espresso Rice Krispie Treats

  • 2-3 tablespoons butter
  • 10 oz. miniature marshmallows (check your package, you might have a 16 oz package of marshmallows and in that case, make 1 ½ times this recipe, which fits nicely in a 9″ x 13″ pan)
  • 1 tablespoon espresso powder (can be found in most grocery stores now, next to the instant coffee, gourmet stores carry it too, but at double the price)
  • 1 cup toffee bits (Heath Bar bits, the ones without the chocolate)
  • 6 cups crispy rice cereal (Rice Krispies, or one of the generic brands–which I usually use because they are so much cheaper and they work out fine)
  1. Melt the butter in a saucepan or large skillet over medium high heat.
  2. Stir in the espresso power.  Stir to blend.
  3. Lower the heat. Stir in the marshmallows. Continue cooking and stirring until the marshmallows are melted and the espresso powder has been evenly dispersed. Turn off the heat.
  4. Stir in the 6 cups of Rice Krispies and the toffee bits.  This is the only (slightly) difficult and messy part of the recipe.  Keep stirring until marshmallow mixture has been evenly distributed through the cereal.
  5. Transfer the mixture to an 11″ x 7″ pan (if you don’t have one, don’t worry, use the nearest size pan you have…or use a 9″ x 13″ pan.  In the larger pan, the squares will just be a bit thinner)
  6. Press the mixture evenly into the pan, you have to press down slightly to get the right consistency in your finished Treats.  The mixture will be sticky, and a bit hot, so use the wrapper from the butter to press the mixture down, or butter your fingertips and press down, some people wet their fingertips to do this, but I am always afraid I’ll make the top layer soggy.
  7. Let Rice Krispie Treats set and cool on counter before slicing and serving. Cut into any size or shape bars that you prefer.

That’s it!  Now you have a truly grown-up flavored Rice Krispie Treat!

Thanks for stopping by my kitchen today!

11 Sep 2013 Caprese Garlic Bread (with Tomatoes, Mozzarella and Basil)

caprese bread

It’s just garlic bread, folks, but it’s garlic bread with an upgrade! After running across this recipe at Two Peas and their Pod,  I decided I needed to make it! I quickly sent texts to a few friends and invited them to come over for a light supper and four replied “YES”!  I served this bread, a platter of cold shrimp, some sliced melon, iced tea and lemon meringue pie. It’s  great having friends who are good with spur-of-the-moment things 🙂

The bread was very good!  The Balsamic Reduction highlighted the simple tomato, cheese, and basil topping.  I made a few changes to the original recipe:  I used my own garlic bread base, I adjusted the cooking time for the balsamic reduction and I baked the tomatoes on the bread instead of laying them on after cooking.  BTW, do not skip the balsamic reduction, it’s fabulous!

I hope you have some backyard (or farmer’s market)  tomatoes on hand, because store bought tomatoes just aren’t invited to this party! And the photo above shows a bit too much cheese.  I bought fresh mozzarella from Costco and it came pre-sliced, so I just went with it.  Turns out I used double the cheese!  Oooops!  No one complained though 🙂  The recipe below has the correct amount of cheese listed but if you want to up it a bit, that’s up to you. One other piece of advice, the tomatoes shrink when baked, so pile them on the bread.  I think I could have added another slice of tomato to each row!

Caprese Garlic Bread

AKA: Garlic Bread with Tomatoes, Mozzarella and Basil

  • 1 loaf sourdough bread, horizontally cut in half (french bread would work, too.  The original recipe called for ciabatta, but I am in the SF Bay Area and sourdough rules around here!)
  • 4 tablespoons salted butter, softened
  • 3 cloves garlic, minced
  • 1/4 cup grated Parmesan cheese (plus and extra tablespoon or so for garnish)
  • 3 Tablespoons dried onion, if you have it
  • 2 teaspoons dried basil (or 2 Tablespoons fresh)
  • 2 teaspoons dried parsley (or 2 Tablespoons fresh)
  • 12 oz. fresh mozzarella cheese, sliced
  • 1/2 cup balsamic vinegar
  • 2-3 medium tomatoes, sliced
  • Salt and freshly ground black pepper, to taste
  • 1/3 cup chopped fresh basil
  1. While you are getting all the ingredients together and doing the prep work, make the balsamic reduction. Place 1/2 cup balsamic vinegar in a small saucepan. Bring the vinegar to a boil, decrease the heat to low, and simmer, stirring occasionally, until the mixture is reduced by about half. How do you know when the vinegar has been reduced by half? Keep the measuring jug near the pan.  Every once in awhile pour the hot vinegar into the measuring cup.  If it’s not at 1/4 cup yet, pour it back in the pan and continue boiling. Keep doing this until the vinegar has been reduced to 1/4 cup. This will take about 10-15  minutes. Set the reduction aside to cool.  You won’t  need to use it until just before serving.
  2. Preheat oven to 400 degrees F.
  3. In a small bowl combine butter, garlic, dried onion, basil, parsley, and parmesan cheese.  
  4. Cut the loaf of bread in half horizontally. Place both sides of the loaf on a large baking sheet with the cut side up. Spread the garlic butter mixture over both sides of the cut bread.  Spread to all the corners and completely to the outer edge of the bread.
  5. Place the mozzarella cheese slices on top of the bread, making sure the cheese covers the bread completely.
  6. Top the cheese with the sliced tomatoes.  Sprinkle tomatoes with salt and pepper, to taste. If desired, sprinkle a bit of parmesan cheese over the tomaotes.
  7. Bake the bread at 400 degrees for 12-15 minutes or until the cheese is melted.
  8. Remove the bread from oven.  Sprinkle fresh basil over the top of the bread and drizzle with balsamic reduction.
  9. Cut into slices and serve.

That’s all there is too it!  Enjoy the last of your summer tomatoes!  They are special, aren’t they? And thanks for dropping by today!

06 Sep 2013 Pavlova

pavlova1

In England, Australia, New Zealand and my house Pavlova is  a very popular dessert.  I am not sure why it’s not only not popular in the US but it’s not even well known.  Pavlova is a  quick, light, inexpensive, impressive, and utterly delicious dessert.  Pavlova is usually served during summer months since fresh berries are an important component.

Legend has it that Pavlova was named after the Russian ballet dancer Anna Pavlova sometime in the 1920’s. But there the agreement ends. There is a huge and controversial issue around the country of origin of this dessert.  Both Australia and  New Zealand claim it.  Pavlova is a popular dish and important part of the national cuisine of both countries–as it is England (but England doesn’t claim to be a country of origin). Ok, ok! I can hear you all hollering but, what IS  “Pavlova”?

Pavlova is a meringue dessert with a crisp outer shell and a soft, light, fluffy center.  The meringue crust is  topped with lightly sweetened whipped cream and fresh berries–and kiwi– to serve.

I make two versions of this dessert.  Version #1, and the most traditional is below.  In Version #2, I mix a little lemon curd into the whipped cream, and I use blueberries instead of the more traditional raspberries and strawberries.  Trader Joe’s carries a very good and inexpensive lemon curd.  If you have a lemon tree, you can make your own lemon curd in the microwave with my recipe.

Pavlova doesn’t keep!  Don’t assemble the Pavlova until JUST before serving, and don’t expect to enjoy they leftovers (they’ll be soggy).  Make sure this is eaten all up all at once.  The good news is that the meringue base can be made ahead and stored for a few days in an airtight container before assembling and serving, which makes this a great showstopping dessert to make for guests.

High humidity might negatively affect this dessert. It’s best not to attempt to make this on a humid, wet, rainy day.

Pavlova

  •  4 extra-large egg whites, at room temperature
  • Pinch of salt (about 1/8 tsp)
  • 1 cup sugar
  • 2 teaspoons cornstarch
  • 1 teaspoon white wine vinegar
  • 1/2 teaspoon vanilla extract
  • Sweetened Whipped Cream, recipe follows
  • fresh raspberries, strawberries, kiwi or combination (see above for a blueberry version)
  1. Preheat oven to 200 degrees F.
  2. Place a sheet of parchment paper on a baking pan. Draw a 9-inch circle on the paper, using a 9-inch plate as a guide.  Turn the paper over so the drawn circle is on the reverse side of the paper. (This way you won’t get a pencil mark on the meringue.)
  3. Place the egg whites and salt in the bowl of an electric mixer fitted with a whisk attachment. (Be SURE the bowl and beaters are very, very, very clean–with not one bit of oil, butter or fat residue.)
  4. Beat the egg whites on high speed until firm, about 1 minute. With the mixer still on high, slowly add the sugar, in slow steady stream or 1 T. at a time and beat until it makes firm, shiny peaks, about 3 minutes. Remove the bowl from the mixer.
  5. Mix vanilla, cornstarch and vinegar together then fold that mixture lightly into the egg white mixture using a very clean rubber spatula (there should be no oil, fat, butter, residue on the spatula).
  6. Pile the meringue into the middle of the circle on the parchment paper and smooth it within the circle, making a rough disk. Then, make a crater or a bowl in the middle of the flat meringue pile. (So the meringue looks like a rimmed soup bowl or large saucer.  This “crater” will hold the whipped cream and fruit at serving time.
  7. Bake at 200 degrees for  1 1/2 hours. Turn off the oven, keep the door closed, and allow the meringue to cool completely in the oven, at least 1 hour, overnight is better. (The meringue will deflate if exposed to cold air before it’s cool).  Store in an airtight container until ready to serve. Do not refrigerate.
  8. Place meringue disk onto a serving plate and JUST BEFORE SERVING spread the top completely with sweetened whipped cream. Spoon the berries and the traditional Kiwi, if you can get it, carefully into the middle of the Pavlova, leaving a border of cream and meringue. Serve immediately.

Sweetened Whipped Cream:

1 cup cold heavy cream
2 tablespoons sugar
½ – 1 teaspoon vanilla

Whip the cream in the bowl of an electric mixer fitted with a whisk attachment (you can also use a hand mixer). When it starts to thicken, add the sugar and vanilla and continue to beat until firm. Don’t overbeat!  If using a Kitchen Aid, make 1 ½ or 2 cups cream, any less and the whisk won’t get it all up from the bottom.

You’ll love it!  Practice this once for the family, and then WOW your guests with it the next time!

Thanks for stopping by my kitchen today!