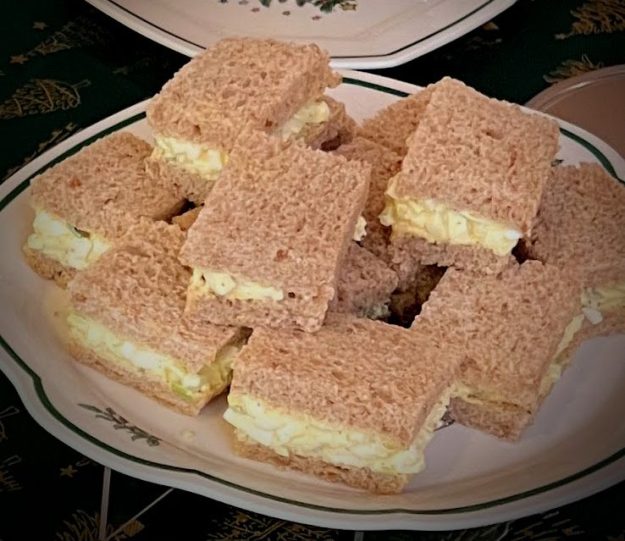
Tag-Archive for ◊ lunch ◊

13 Mar 2018 British Pork Pie

Finally!  A Pork Pie recipe that is pretty darn good (and not that hard to produce)! My Dad, a traditional Yorkshire-man, loved pork pies. I really, really wish he were still here to taste my version. To my mind, this Pork Pie favorably rivals the famous Melton Mowbry Pork Pies, but that might just be a braggadocious assertion 🙂

I have modified a recipe by new wave British chef, Richard Bertinet, for my version of Pork Pie. I have used Chef Bertinet’s version of hot-water crust pastry, unchanged (hot-water crust pastry is only used for making savory pies that are eaten cold). I made some substantial changes to his filling recipe though. First, I changed the meats and the ratios.  Then I added onion (which is so not traditional). I upped the spices and added a few different ones. I added eight hard boiled eggs (which are optional) and, to the “jelly”, I added a good shot of bourbon, which has been in no recipe I’ve ever seen, but I did it for my Dad and, in my mind, it will remain the magical addition to this very tasty version of a British Pork Pie.

Pork Pie is a traditional picnic, quick meal, or bar snack in England. It’s a firm solid pie, nothing drips out of a Pork Pie.  Instead of gravy moistening the meat, there’s a jelly-like substance. Don’t be afraid of it! It’s delicious. In my version the “jelly” is broth, bourbon and a little unflavored gelatin (see recipe for notes on making the broth).

This recipe requires a 9″ Springform pan. You will also need a meat grinder or a food processor. Have neither? You can still do this, just chop everything very, very finely. A food syringe would be wonderful to have, too, but not to worry if you don’t have one. Above all, you will also need a plan! The recipe has three components: hot water crust pastry, pork filling, and a broth based “jelly”. Cooking time will be approximately 2 ½ hours. Before baking, the pastry will need approximately 90 minutes to “rest”. The filling can be made while the pastry is resting. Make Pork Pie at least one day before serving. The meat and jelly need at least 8 hours to settle, set, and chill before serving.

The British like to spread condiments on their pork pies, so serve your pork pie with a jar of Branston’s Pickle*, Piccalilli Relish*, Mango Chutney or coarse mustard (*available on Amazon, some Indian markets and some supermarkets with large international sections).

Polly’s English Pork Pie

For the Hot-water Crust Pastry:

  • 175g/ 6 oz lard (or, if you can afford it/find it, use goose or duck fat like Richard Bertinet suggests)
  • 175ml/6 fluid oz. water
  • 1 tsp salt
  • 1 tsp sugar
  • 450g/16 oz all-purpose flour
  • 1 egg , lightly beaten with a fork
  1. Put the lard, water, salt and sugar in a pan and bring to a boil, stirring as the lard melts. When it comes to a boil, count to 30 seconds and immediately take the pan off the heat.
  2. While the lard is melting, put the flour into a large bowl. Make a well in the center of the flour and stir in the beaten egg.
  3. Pour the hot liquid mixture into the flour mixture, stirring continuously with a wooden spoon.
  4. When the mixture forms quite a dough, cover the bowl with a clean kitchen towel and let rest and cool for 1 hour.
  5. While the dough is resting, make the filling.

For the Three Porks Filling

  • 1 onion, diced
  • 1 bunch of green onions, sliced
  • 3 garlic cloves, minced
  • Salt and pepper, to taste
  • Olive oil, as needed OR use the oil from the can of anchovies
  • 1 small can (2 oz) anchovy fillets, drained and chopped
  1. Heat oil in a medium frying pan. Add in chopped onion, and sauté until soft and translucent.
  2. Add in green onion and sauté for another 2-3 minutes.
  3. Add in garlic and sauté for 1 minute. Do not let garlic darken.
  4. Turn off heat and stir in diced anchovies. Set mixture aside to cool.
  • 1 ¼ lbs pork chops, with some fat (pork shoulder or country style pork ribs can be used, too)
  • 8 oz diced pancetta
  • 8 oz bacon, diced
  • Salt and pepper, to taste
  • 1 teaspoon dried sage
  • 1 whole nutmeg, grated OR approximately 2 teaspoons of ground nutmeg
  • ½ teaspoon mace
  • 8 hard-boiled eggs, shelled (the eggs just need to be softly hard boiled, the eggs will have additional cooking time in the oven) – optional
  • 1 egg, lightly beaten
  1. Prepare meat for food processor (large chunks) or meat grinder (long strips). Include some fat! Take your time to season each piece of meat with salt and pepper (heavy on the pepper), crumbled sage, mace, and freshly grated nutmeg.
  2. Combine seasoned pork with diced pancetta, diced bacon, and the reserved onion mixture. Make sure everything is well combined.
  3. Grind the three pork and onion mixture with a meat grinder on a coarse setting or briefly process with short burst in food processor (do not over process, you don’t want a paste, you want chopped meat).
  4. Set ground meat aside and turn attention to pastry now.

To Fill Pie

  1. Turn the pastry onto a lightly floured work surface.
  2. Roll pastry into a rectangle. Fold the dough into thirds by taking one side into the center and then bringing the opposite side over the top. Flatten the dough into a rough oblong shape. Cover with plastic wrap and place in refrigerator for 30 minutes (or longer, if needed)
  3. Prepare 9″ springform pan by lightly greasing and flouring bottom and sides.
  4. Preheat oven to 400° Fahrenheit.
  5. Remove pastry from refrigerator.
  6. Cut off ¼ of pastry and set aside for top.
  7. Roll remaining ¾ pastry into a large circle to fit along the bottom and up the sides of the 9″ springform pan. Be careful with the rolling out.  Pastry should be thick, and equally thick throughout, the sheet (this pie needs a thick, firm shell on the bottom, sides, and top).
  8. Gently fold pastry to lift into prepared pan. Place pastry in center of pan and ensure it covers all the way up all the sides of the pan. Patch any holes or tears.
  9. Place 1/3 of filling in bottom of pastry case. (If you choose not to use eggs, place all the filling in the pastry case.)
  10. Place shelled hard-boiled eggs in a ring on top of filling in bottom of pan, optional.
  11. Lightly spoon remaining filling over the ring of eggs. Be sure eggs are completely covered and the top is evenly smoothed.
  12. Roll out remaining pasty into circle to fit on top of filling.
  13. Firmly adhere top to side pastry. Trim excess crust.
  14. If you have any excess pastry, make decorations for top of pie, if desired.
  15. Beat egg lightly, then brush over top of pastry.
  16. Using the handle of a wooden spoon, make several holes into top of pastry (for steam to escape). Be careful where you poke. Don’t pierce a hard-boiled egg!
  17. Place pie in oven. Bake at 400° for 30 minutes.
  18. Reduce heat to 325°, bake for an additional 90 minutes.
  19. Meanwhile, make the “jelly”

For the “jelly”

  • 7 oz really good quality pork or chicken stock (I make my own. If your pork came with bones, boil the bones with a bit of extra meat, even throw in an extra pork chop, if you have one. Add in some diced veggies for taste. I like onions, carrots, celery and a bay leaf, simmer for at least an hour. Taste the broth, it should taste good and rich. If you don’t say “mmmm”, keep simmering until you do. Add salt and pepper if needed. If you have more meat, bones, or veggies, add them too. If you have homemade chicken stock, use that. If you have only canned stock, jazz it up a bit. Pour broth into a pan and add in a piece of chicken or some chicken bones if you have them, and any veggies you have on hand plus a bay leaf. Simmer and taste. Once you get a really good taste, strain, throw out the veggies, bones, etc. retain the broth).
  • 4 oz bourbon
  • 1 pkt unflavored gelatin
  1. About 15 minutes before pie is done, put 2 tablespoons of cold broth or water in a small bowl, sprinkle gelatin on top, and let sit until gelatin is soft.
  2. Meanwhile, heat broth to a light simmer. Remove from heat.
  3. Stir in softened gelatin and 4 oz bourbon.
  4. When cooked, remove pie from oven.
  5. If you have a baking syringe, fill it with the gelatin mixture and inject pie with stock mixture, avoiding eggs, all over the top of the pie. If you don’t have a syringe, with wooden spoon, re-punch holes in pastry and punch 3-5 additional holes (avoiding the eggs, of course). Pour gelatin mixture into all the holes. Let mixture settle, then add more liquid. Keep doing this until all the gelatin has been added.
  6. When pie has cooled, cover and refrigerate, preferably overnight but for at least 8 hours.
  7. Remove from refrigerator 2 hours before serving. Serve in wedges with jars of Branston Pickle, Piccalilli, Mango Chutney, and whole grain mustard on the side.

Thanks for stopping by my kitchen today!

26 Jan 2018 Potatoes Baked in Cream (Potato Gratin)

potatoes-baked-in-cream-with-abby

Did the name of the recipe entice you click on this?! Well then, that makes us friends forever!

When my friends from Southern France were staying with us, they offered to make a side dish for dinner.  They didn’t use a recipe. They sliced up a few potatoes, sprinkled them with salt and pepper, poured a carton of cream over the top, and put the whole thing in the oven. Sixty minutes later my family’s love affair with Potatoes Baked in Cream began.

Last year I found an actual written down recipe, one that I can pass on, one with precise quantities and directions.  The recipe is from David Tanis’ cookbook, “Market Cooking”. I made one change to Chef Tanis’ recipe, I cut out an additional four tablespoons of butter! Chef Tanis calls his recipe “Classic Potato Gratin”, but to me and my family it will always be “Potatoes Baked in Cream”.

I think you will be surprised at how delicious this very simple dish is. I certainly was. Sublime. After you taste Potatoes Bake in Cream, that will be your word of the day. Sublime.

An important note:  Leftovers don’t reheat well, so make sure you eat all of the potatoes in one sitting (invite friends over, take the dish to a potluck, serve these potatoes for a holiday meal…). I haven’t tried reheating leftovers in the oven, so that might work (see David Tanis’ *note below). I have tried reheating leftovers in the microwave.  Don’t do it on 100% power!  I had so-so results reheating on 50% power. I wouldn’t serve them to anyone else, but I was able to eat them!  I have also had so-so results from throwing a handful of diced ham into a hot frying pan, dicing up a serving of leftover casserole, and reheating over medium heat. It made for a good breakfast, but nothing-nothing-like the original casserole served hot from the oven.

Another important note: The potatoes need to be sliced thinly and evenly. 1/8th inch or 3/16ths an inch is about right. You can do this with a very sharp knife and by working slowly and carefully, like my French friends did. I use a mandolin to slice the potatoes. If you don’t have one, I’d suggest getting one.  I bought mine on Amazon after looking at all the reviews and selecting the highest rated one. Later I started seeing mandolins at Savers/Goodwill for about $6.  I bought used mandolins for my daughters. Go to Savers.

Potatoes Baked in Cream (Potato Gratin)

  • 3 pounds russet potatoes
  • butter to coat the baking dish (Chef Tanis uses 4 more tablespoons butter to dot top of casserole, I don’t)
  • Salt and pepper
  • 2½ cups heavy whipping cream (don’t even think about substituting anything for the cream, such as half and half or whole milk, it just won’t work!)
  1. Pre-heat the oven to 375°. Peel the potatoes and put them in cold water (to prevent them from turning brown while you finish the prep work. Slice only one layer of potatoes as a time. Keep the other potatoes in the cold water. The browning happens fast when the potatoes are so thinly cut).
  2. Smear a baking dish thickly with butter. (I use a 9×13 dish but I am looking for a dish that’s the same size and a bit shallower since the quantity of potatoes only come half way up the sides of the 9×13 pan. The waste of space bothers me a bit as I’d like to have a dedicated Potatoes Baked in Cream pan because, after all, this is a dish I will be making over and over! That being said, I’ve been using the same 9×13 pan for a few years now, so it’s really not a problem.)
  3. Drain and dry one peeled potato at a time. Using a mandolin or a very sharp knife, slice one potatoes at a time as thinly as possible. Quickly lay the potato slices in the bottom of the baking dish, overlapping them just slightly to make a “roof tile” style pattern. Sprinkle each layer of potatoes lightly with salt and pepper. Slice more potatoes and make another layer. Continue in this fashion, seasoning each layer, until all the potatoes are used. You should have at least 3, but no more than 4 layers.
  4. Pour the cream over the potatoes and tilt the pan to distribute well. With your hands, push down on the top layer to even out the pile (I don’t do this, but Chef Tanis says to). The cream should just barely cover the potatoes; add a little more if necessary.
  5. Cover the casserole dish tightly with foil and place in oven. Bake for 30 minutes at 375°.
  6. After 30 minutes remove the foil from the casserole, and return to the oven for another 30-35 minutes to finish cooking the potatoes and turn the top of the gratin to a crispy, deep golden brown.
  7. Let the gratin rest for 10 minutes before serving.

*Note from David Tanis: The gratin can also be cooled and left at room temperature for several hours, then reheated in a moderate oven. (I haven’t tested this)

Thank you for stopping by my kitchen today, what is cooking for tomorrow, hmmmm…. Pork and Tomatillo Stew?

24 Feb 2017 Italian Wedding Soup

italian-wedding-soup

Italian Wedding Soup is easy to make, and is good as soon as it’s made (no need to sit overnight to intensify the flavors).  Not being Italian, I can’t claim this is just like my Nonna made. Nor can I claim to know the origin of the name, “Italian Wedding Soup”, but I did do a bit of Internet research.  Contrary to what some think, this soup is NOT served at Italian Weddings (although, because of it’s name, it is served at some Italian-American weddings in…Pennsylvania!).  Another theory is that the soup is a good “marriage” of ingredients, possibly green vegetables and meat. The most common story is the soup is easy enough for a new bride (or new groom) to make as one of their first home-cooked meals.  My non-Italian, non-traditional thought it that it’s great for a couple to make together.  One person could make the meatballs while the other makes the vegetable broth base.  Throw the vegetable broth and the meatballs together, simmer for a few minutes, and then sit down to enjoy a bowl or two of heart-warming Italian Wedding Soup.

This recipe is based upon one by Ina Garten, but I have changed Ina’s recipe somewhat.  The major change is I cook the meatballs in the broth, rather than bake them in the oven as Ina directs. I also make my meatballs out of ground beef instead of Ina’s ground chicken/ground chicken sausage combo.  I like a tastier meatball, and I think beef goes better with the Parmesan in the meatball than chicken does. I also added basil to the meatball. I don’t know why Ina forgot that!

I love soup. I can eat it for breakfast, lunch or dinner. One tip, every time I make a pot of soup, I freeze one or two individual servings.  It’s wonderful to have a ready-made, wholesome bowl of soup in the freezer for those days when you are rushing from points A to Z with no time to spare.  A bowl of soup in the freezer can keep you away from those fast food places. Honest.

Now go on, try it…Italian Wedding Soup!

Italian Wedding Soup

For the soup base

  • 2 Tablespoons olive oil
  • 1 cup chopped onion
  • 1 cup chopped celery
  • 1 1/2 cups sliced carrots
  • 2 teaspoons dill
  • 1/4 cup chopped fresh parsley (use more of the parsley in the meatballs)
  • 10-12 cups chicken broth (homemade is the best, of course)
  • 1/2 cup dry white wine
  • 1 cup small pasta (orzo, tubetini, small stars, mini shells..)
  • 1 batch of meatballs (recipe below)
  • 12 oz. baby spinach, stems removed and leaves coarsely chopped
  • salt and pepper, to taste
  • additional grated Parmesan, optional (for serving)

Heat the olive oil in a large, heavy bottomed soup pan.  Add the onion and saute until slightly caramelized, about 6 minutes.  Stir in chopped celery and saute for another 3 minutes. Stir in carrots, dill, parsley, chicken broth, and wine and bring to a boil. While soup is boiling, stir in pasta and meatballs.  Simmer for 8-10 minutes. Stir in chopped spinach and simmer for an additional 2 minutes.  Turn heat off. Taste broth.  Add salt and pepper as needed. Ladle soup into bowls and sprinkle with additional grated Parmesan, if desired.

For the Meatballs

  • 1 1/4 – 1 1/2 lbs lean ground beef (can substitute ground turkey or ground chicken, but the meatballs won’t taste as good!)
  • 2/3 cup fresh breadcrumbs (2 slices of bread, crusts removed, whirled in food processor OR, in a pinch, stir in bought bread crumbs or Panko)
  • 2 teaspoons dried basil, crushed
  • minced garlic, to taste (1 or 2 cloves, minced OR 1/2 teaspoon garlic OR onion powder)
  • 3 tablespoons chopped fresh parsley
  • 1/2 cup grated Parmesan
  • 3 Tablespoons milk
  • 1 egg
  • salt and pepper, to taste

Place ground beef, breadcrumbs, basil, garlic, parsley, cheese, and desired amount of salt and pepper in a bowl. Mix lightly with a fork (don’t use hands because the resulting meatballs will be too dense).  In another bowl, combine the milk with the egg and beat lightly.  Stir the egg/milk mixture into the meat mixture, again, using your fork. When all ingredients are evenly distributed, use a small scoop or a tablespoon to portion meat and form into about 40 meatballs. Roll the scooped meat gently in palm of your hand to form into a ball. Use meatballs as directed above.


24 Jul 2014 Curried Chicken Meatballs with Apricot Rice Pilaf

curriedmeatballs01

I have a love-hate relationship with America’s Test Kitchen (and their related publications, Cooks Illustrated and Cooks Country).  I buy a LOT of their special interest publications. I like to read, and I enjoy reading recipes, and I like trying out new recipes. I like the pictures of each recipe and I like the all the notes that go along with each ATK recipe.  I have made some good things from ATK recipes, but I’ve made some not so good, too.  On the other hand, I hate, hate, hate, hate, hate that I cannot access any of the ATK recipes online without paying for them.  The only way around this is to get the name of the recipe you are interested in and Google it, or look on foodgawker or TasteSpotting for a hit, then go to a food blog, similar to this one, to get the actual recipe.  Compare this to Bon Appetit and Epicurious.  I subscribe to Bon Appetit, but even if I didn’t I could access all of their recipes for free on the Epicurious website, most of which have some wonderfully helpful comments.  I love being able to search Epicurious‘ recipe archives for any recipe they have published over the past years. I often find terrific recipes that way, searching on words such as “soup”,  “blueberries” and “brownies” and then scrolling through all the recipes with that key word. I don’t know why America’s Test Kitchen cannot do the same 😛

Anyways…, enough of my rant and onto my latest America’s Test Kitchen find!

The original recipe (by the same name) was from one of America’s Test Kitchen 30-minute Meals cookbooks.  The meatballs, although very simple with a very plain list of ingredients, are quite tasty and virtually perfect! I wanted to up the curry powder just a bit, but my offspring vetoed that idea,  saying they were good just as they are, so I left the meatball recipe alone (but I did “heap” the 1 T. of curry powder!).  I always make these meatballs with ground chicken, but I see no reason why ground turkey, ground beef, or ground lamb couldn’t be used. The 1 lb. of ground meat makes about 30-36 small meatballs.

I did change the pilaf recipe a quite bit, as ATK’s was much too bland. (Pilaf, by definition, contains rice cooked in broth, ATK version was cooked in water, and only got worse after that.) I substituted butter for vegetable oil, broth for the water and added a bit  more variety, and taste,  with additional veggies, herbs, and garnishes.  I also added a bit of salt and spice…, and the magical touch, a bay leaf and a long piece of lemon peel (both of which are fished out before serving).

I didn’t think it was true, but it was! I was able to make this, from start to finish, in 30-minutes…, AND it was a mighty tasty, spur-of-the-moment dinner!   Serve with a side of veggies, if you want, steamed broccoli would be good… 🙂

Curried Chicken Meatballs with Apricot Rice Pilaf

For Pilaf

  • 1 T butter (approx)
  • ½ -1 cup finely chopped onion (your favorite variety)
  • ½ -1 cup finely chopped mixed vegetables (celery, carrots, bell peppers…)
  • 1 cup long-grain white rice
  • 1 ¾ cups hot chicken broth (or water). OK to sub abut ¼ cup of liquid for ¼ cup white wine (another option: add one long strip of lemon, lime or orange peel-with no white pith attached, to the rice mixture when adding the liquid)
  • 2 bay leaves
  • ½ -1 teaspoon salt (if your broth is salted, you might not need to add too much additional salt)
  • ½ – 1 cup chopped dried apricots or mixture of apricots and other dried fruits (raisins, cherries, cranberries)
  • 1/2 cup toasted slivered almonds or other nuts (pistachios, pine nuts, chopped pecans)
  • 1/4 cup minced cilantro, parsley, basil, green onion, frozen peas, sautéed mushrooms or mint for last minute stir-in and garnish (choose one, maybe two…or three)

 For Meatballs

  • 1 pound ground chicken (or turkey)
  • ½ cup very finely minced raw onion (grated onion works well, too)
  • ½ cup panko bread crumbs
  • ¼ cup chopped fresh cilantro
  • 1 tablespoon curry powder (maybe a bit more…)
  • 1 teaspoon salt and ½ teaspoon pepper, or to taste

From start to finish: about 30 minutes

  1. In large saucepan, heat butter over medium-high heat until shimmering.
  2. Add chopped onions and cook until softened, about 4 minutes.
  3. Add rice and cook until mostly opaque, about 4 minutes.
  4. Stir in choice of mixed veggies
  5. Add broth and bring mixture to a boil. Reduce heat to medium-low, cover and cook until rice is tender, about 20 minutes. When cooked, remove from heat and let rice stand and steam until needed.
  6. Meanwhile, in large bowl, combine chicken, onions, panko, cilantro, curry powder, salt and pepper. Mix with fork until well blended.  Don’t overwork the meat mixture.
  7. Using wet hands (or a small scoop), shape mixture into 1-inch meatballs. (Depending on size, of course, makes about 30-36 meatballs)
  8. Heat a bit of oil in a large frying pan until hot.
  9. Add meatballs and cook until browned on all sides, about 5 minutes, shaking pan as needed.
  10. Cover the pan and steam meatballs over medium heat for an additional 5 minutes.
  11. Now turn your attention back to the rice. Take lid off the pan and gently fluff rice with a fork. Pick out the bay leaves and the optional lemon or orange peel.
  12. Add apricots/dried fruit mixture, toasted almonds/nuts and choice of stir ins to rice (reserve about 1 tablespoon, each, of nuts and green stir-ins). Stir to thoroughly incorporate all ingredients.
  13. Transfer pilaf to a serving platter, top pilaf with hot, browned meatballs, and then sprinkle the reserved 1 T. of  nuts and cilantro, parsley, mint or green onion over the top. Add a serving spoon and . . . .
  14. Dinner is ready! YUM!

curriedmeatballs02

Thanks for stopping by my kitchen today 🙂  I hope that you make  and enjoy these and I hope they become a family favorite, as they have in my house!