
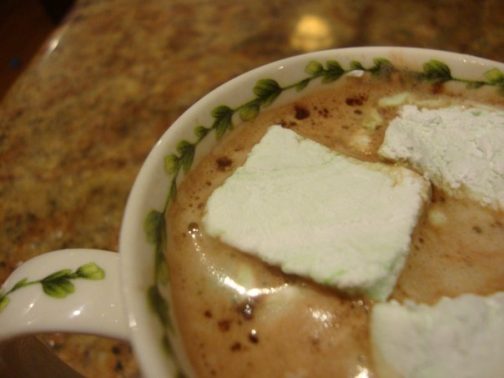
Today I was transported back to my childhood, when it was just fun to play in the kitchen! The mess was fun, the creation was fun, and if the product was edible, it was magic! I made magic today—along with a big mess—I made marshmallows! It wasn’t hard, just different. And the product really was magic! Now I know why marshmallows are put on top of a cup of hot chocolate—real marshmallows transform hot chocolate into a creamy cup of heaven, sigh. Dump the processed imitators, what are they doing in a cup of hot chocolate anyway?
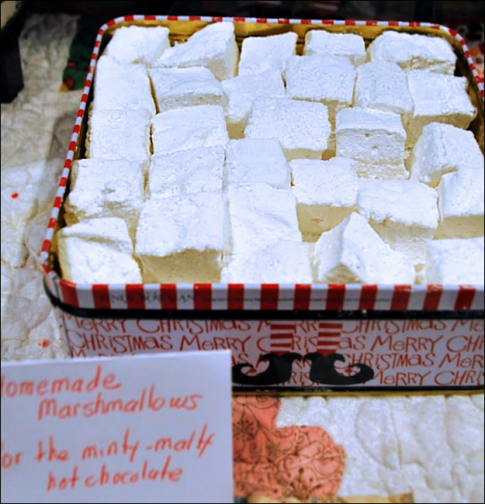
You will need a heavy duty stand mixer and a candy thermometer to make this recipe successfully. Also, note that marshmallows need to cure overnight before using…but they will last for a long time. I don’t know how long, but weeks at least. You’re going to love these! Honest! Have fun in your kitchen today—make some magic!
Vanilla or Peppermint Marshmallows
INGREDIENTS
- 3 pkgs. unflavored gelatin
- 1 cup cold water, divided use
- 1½ cups sugar
- 1 cup light corn syrup
- ¼ teaspoon Kosher salt
- 1 tablespoon vanilla OR peppermint extract—I assume any other extract would be ok, too!
- Red or green food coloring—optional, but good to use if you are making mint or peppermint marshmallows—
- Lots of powdered sugar—a pound box or so—this does NOT get beaten into the marshmallows, it keeps the marshmallows from sticking to the pan, and then from sticking to each other!
DIRECTIONS
- Cover the bottom of a 13x9x2″ pan with a layer of powdered sugar—you should not be able to see the bottom of the pan. Using your fingers, also dust the side of the pan with the powdered sugar.
- Combine gelatin and ½ cup of the cold water in the bowl of an electric mixer fitted with a whisk attachment. Let this sit, at least 15 minutes, until the next step is completed.
- Combine sugar, corn syrup, salt, and remaining ½ cup cold water in a small saucepan over medium heat until sugar dissolves, stirring gently.
- Take the spoon away from the pan, raise the heat to high and boil, without stirring, until syrup reaches 244°—soft ball stage.
- Remove syrup from heat—be careful!
- Put the mixer on low speed with gelatin still in the bowl, and slowly pour the sugar syrup over the gelatin.
- When the mix is cool enough and thick enough not to splatter, turn the speed up to high and whip on the highest speed for 15 minutes.
- Add the chosen extract, beat well to combine.
- Add the food coloring, if using, and beat just to swirl.
- Now, here comes the hard part—with a sturdy spatula or spoon that has been dredged in powdered sugar, scoop all the marshmallow batter into the prepared pan.
- Wet your hands. With wet hands, press and smooth the batter to fill the pan. Smooth the top of the batter with your wet hands, and then pour a generous layer of powdered sugar over the marshmallow batter.
- Allow batter to dry and cure, sitting on the counter uncovered, overnight.
- Run a spatula along the sides of the pan, and remove the marshmallow slab to a cutting board.
- Dip knife in powdered sugar in the bottom of the pan. Cut marshmallows into squares of desired size, recoating knife with powdered sugar as needed.
- Roll each cut side of marshmallow in the powdered sugar, then store covered marshmallows at room temperature.
- Marshmallows for plain eating are good for at least a week—marshmallows for hot chocolate last far longer, since a bit of drying out is hardly noticeable 🙂
Thanks for stopping by my kitchen today!


These are TOTALLY awesome in coffee, tooooo! ?