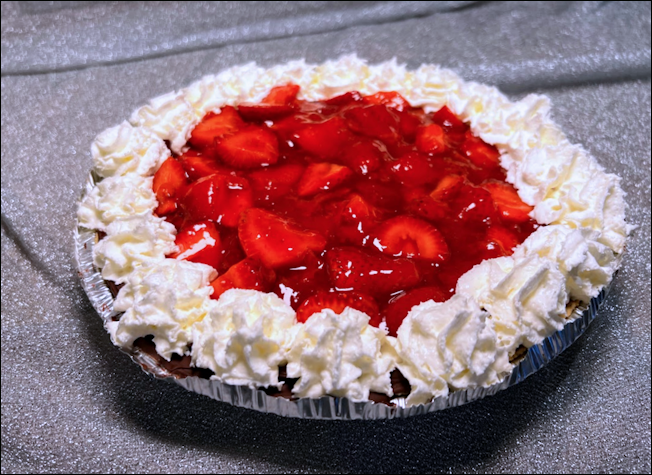
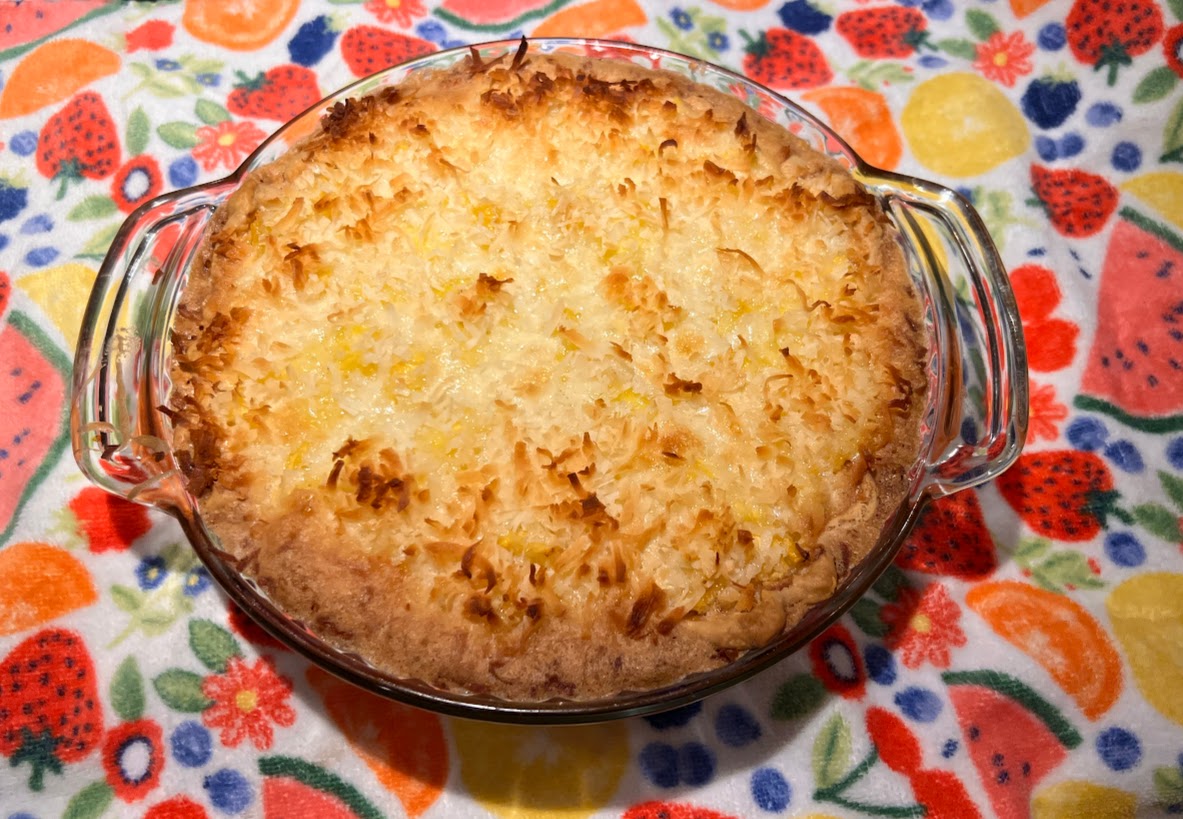
Tag-Archive for ◊ fruit ◊

10 May 2019 Tropical Mango Scones

It takes a lot to get true mango flavor in baked goods.  This scone recipe manages it but it does require mango in three different forms: crushed freeze-dried mango, dried mango, and diced frozen mango. Then throw in a bit of coconut and a bit of lime zest and you have a Tropical Mango Scone. You also have to add an egg. An egg? In a scone? I am usually a scone purist. No eggs! But I’ll make an exception, just this one time, because it works in this recipe.

The original recipe only called for frozen mango, which is interesting in itself. I’d never baked with frozen mango. I didn’t think it would work, but it did! I added the freeze-dried mango (always available at Trader Joe’s, and now starting to show up in main stream grocery stores) and the dried mango (available everywhere) to boost the flavor.

Tropical Mango Scones

  • 2 cups (260g) all-purpose flour
  • approx. 20 grams (less than one ounce) freeze-dried mango crushed to a fine powder
  • ½ cup sweetened flaked coconut
  • ½ cup diced dried mango
  • ½ cup sugar + additional teaspoon sugar (divided use)
  • 2 ½ teaspoons baking powder
  • ½ teaspoon table salt
  • zest of 2 limes
  • ½ cup butter, frozen
  • ½ cup heavy cream + additional 1-2 Tablespoons (divided use)
  • 1 egg
  • 1  teaspoon vanilla
  • ½ cup dried mango, diced
  • 1 cup frozen mango, diced into ¼ inch chunks
  1. Preheat oven to 400 degrees.
  2. Line a baking sheet with parchment paper.
  3. Combine flour, crushed freeze-dried mango, flaked coconut, diced dried mango, sugar, lime zest, baking powder and salt in a large bowl. Stir well to combine.
  4. In another bowl combine ½ cup heavy cream, egg, and vanilla and whisk until combined.
  5. GRATE the frozen butter into the flour mixture then, using a fork, stir the butter into the flour mixture until well combined.
  6. Drizzle the cream-egg-vanilla mixture over the flour-butter mixture. Using the fork, combine the ingredients into a cohesive ball, this may take awhile. If the mixture is too dry, work a little extra cream into the mixture.
  7. Gently fold in the frozen mango mini-chunks.
  8. Divide the dough in half. If necessary sprinkle with a bit of flour. Shape the dough into a circle about the size of a salad plate.
  9. Place onto one side of prepared baking sheet
  10. Using a sharp knife or a pizza cutter, divide dough into six equal pieces.
  11. Repeat with remaining dough in bowl (SEE NOTE BELOW).
  12. Brush tops of scones with the additional 1-2 heavy cream, then sprinkle with additional 1 teaspoon sugar.
  13. Bake for 18-20 minutes.
  14. Remove from oven and share 🙂

NOTE: The second half of the dough can be placed on a plate and frozen for later baking. No need to defrost before baking. Just place on a parchment lined baking sheet. Brush with heavy cream and sprinkle with sugar. Might need to bake 2-4 more minutes.

Thank you for stopping by my kitchen today!

04 May 2019 Apricot-Coconut Bars

Feel like baking this weekend? Try these! They are delicious, one of my favorite bar/tray bake recipes. The bars are buttery, crisp, jammy, and coconut-y all at the same time. The dozen or so diced dried apricots sprinkled on top of the apricot jam boost the apricot flavor appreciably.

I’ve been making these bars for at least a decade. The original recipe was made with raspberry jam (and no diced apricots, obviously), but I think my apricot jam version with the addition of diced dried apricots takes the cake…, the bar…, the tray bake!

Apricot-Coconut Bars

1 ½ cups sweetened flaked coconut, divided use

1 ¼ cups all-purpose flour

¾ cup packed light brown sugar

½ teaspoon salt

¾ cup cold, unsalted butter, cut into small pieces

1 ½ cups old-fashioned oats

¾ cup apricot jam

10-12 dried apricots finely diced

  1. Prepare a 9×13 pan by lightly greasing bottom and sides or lining with parchment paper.
  2. Preheat oven to 375 degrees F.
  3. Toast the coconut in a dry frying pan until golden. Stir constantly and watch carefully OR spread onto a baking sheet and bake in a 375 degree oven for about 8 minutes. Set aside to cool.
  4. In the bowl of a food processor blend flour, brown sugar and salt. With motor running add butter pieces gradually then blend until a dough begins to form.
  5. Add 1 cup of toasted coconut and all of the oatmeal to dough in bowl, mix lightly but thoroughly, approx. 2-4 short bursts.
  6. Reserve ¾ cup of the dough and set aside.
  7. Press remaining dough into bottom of a prepared 9×13 inch baking pan.
  8. Sprinkle chopped dried apricots over dough.
  9. Spread jam evenly over dried apricots and the dough layer (It might help to heat jam briefly in the microwave to make it easier to spread).
  10. Crumble reserved ¾ cup of dough over jam.
  11. Sprinkle reserved ½ cup coconut over top of bars.
  12. Bake in middle of preheated 375 degree oven for 20-25 minutes.
  13. Cool in pan.
  14. Lift entire slab out of pan, transfer to cutting board and cut into bars of desired size and shape.
  15. Bars can be made 3 days in advance and stored in an airtight container at room temperature.

Thanks for stopping by my kitchen today!

06 Sep 2013 Pavlova

pavlova1

In England, Australia, New Zealand and my house Pavlova is  a very popular dessert.  I am not sure why it’s not only not popular in the US but it’s not even well known.  Pavlova is a  quick, light, inexpensive, impressive, and utterly delicious dessert.  Pavlova is usually served during summer months since fresh berries are an important component.

Legend has it that Pavlova was named after the Russian ballet dancer Anna Pavlova sometime in the 1920’s. But there the agreement ends. There is a huge and controversial issue around the country of origin of this dessert.  Both Australia and  New Zealand claim it.  Pavlova is a popular dish and important part of the national cuisine of both countries–as it is England (but England doesn’t claim to be a country of origin). Ok, ok! I can hear you all hollering but, what IS  “Pavlova”?

Pavlova is a meringue dessert with a crisp outer shell and a soft, light, fluffy center.  The meringue crust is  topped with lightly sweetened whipped cream and fresh berries–and kiwi– to serve.

I make two versions of this dessert.  Version #1, and the most traditional is below.  In Version #2, I mix a little lemon curd into the whipped cream, and I use blueberries instead of the more traditional raspberries and strawberries.  Trader Joe’s carries a very good and inexpensive lemon curd.  If you have a lemon tree, you can make your own lemon curd in the microwave with my recipe.

Pavlova doesn’t keep!  Don’t assemble the Pavlova until JUST before serving, and don’t expect to enjoy they leftovers (they’ll be soggy).  Make sure this is eaten all up all at once.  The good news is that the meringue base can be made ahead and stored for a few days in an airtight container before assembling and serving, which makes this a great showstopping dessert to make for guests.

High humidity might negatively affect this dessert. It’s best not to attempt to make this on a humid, wet, rainy day.

Pavlova

  •  4 extra-large egg whites, at room temperature
  • Pinch of salt (about 1/8 tsp)
  • 1 cup sugar
  • 2 teaspoons cornstarch
  • 1 teaspoon white wine vinegar
  • 1/2 teaspoon vanilla extract
  • Sweetened Whipped Cream, recipe follows
  • fresh raspberries, strawberries, kiwi or combination (see above for a blueberry version)
  1. Preheat oven to 200 degrees F.
  2. Place a sheet of parchment paper on a baking pan. Draw a 9-inch circle on the paper, using a 9-inch plate as a guide.  Turn the paper over so the drawn circle is on the reverse side of the paper. (This way you won’t get a pencil mark on the meringue.)
  3. Place the egg whites and salt in the bowl of an electric mixer fitted with a whisk attachment. (Be SURE the bowl and beaters are very, very, very clean–with not one bit of oil, butter or fat residue.)
  4. Beat the egg whites on high speed until firm, about 1 minute. With the mixer still on high, slowly add the sugar, in slow steady stream or 1 T. at a time and beat until it makes firm, shiny peaks, about 3 minutes. Remove the bowl from the mixer.
  5. Mix vanilla, cornstarch and vinegar together then fold that mixture lightly into the egg white mixture using a very clean rubber spatula (there should be no oil, fat, butter, residue on the spatula).
  6. Pile the meringue into the middle of the circle on the parchment paper and smooth it within the circle, making a rough disk. Then, make a crater or a bowl in the middle of the flat meringue pile. (So the meringue looks like a rimmed soup bowl or large saucer.  This “crater” will hold the whipped cream and fruit at serving time.
  7. Bake at 200 degrees for  1 1/2 hours. Turn off the oven, keep the door closed, and allow the meringue to cool completely in the oven, at least 1 hour, overnight is better. (The meringue will deflate if exposed to cold air before it’s cool).  Store in an airtight container until ready to serve. Do not refrigerate.
  8. Place meringue disk onto a serving plate and JUST BEFORE SERVING spread the top completely with sweetened whipped cream. Spoon the berries and the traditional Kiwi, if you can get it, carefully into the middle of the Pavlova, leaving a border of cream and meringue. Serve immediately.

Sweetened Whipped Cream:

1 cup cold heavy cream
2 tablespoons sugar
½ – 1 teaspoon vanilla

Whip the cream in the bowl of an electric mixer fitted with a whisk attachment (you can also use a hand mixer). When it starts to thicken, add the sugar and vanilla and continue to beat until firm. Don’t overbeat!  If using a Kitchen Aid, make 1 ½ or 2 cups cream, any less and the whisk won’t get it all up from the bottom.

You’ll love it!  Practice this once for the family, and then WOW your guests with it the next time!

Thanks for stopping by my kitchen today!

31 Jul 2013 Blueberry Heaven


Do you ever go into a bakery?  Of COURSE you do!  Do you ever buy a pastry that looks delicious, but then are seriously disappointed in the taste…? And then, to top it off, are you overwhelmed by the amount of  fat you’ve just consumed for something that really wasn’t that all that great?  Me, too 🙁 Do you ever wish, on a weekend morning with your second cup of coffee, for that imagined deliciousness, without all greasy pastry and sugary icing?  Me, too 🙂 Pssssst…  Come here! No, come closer! I am going to tell you how to make a breakfast pastry as delicious as the one you are dreaming of…, and without the load upon load of grease and sugar!

Now. Seriously…, am I your best friend, or what?!

It’s so simple!  You need 2 slices of bread, a bit of cream cheese, and a handful of blueberries. It helps if you have a sandwich maker or a panini press, but if you don’t, use a frying pan and make this Blueberry Heaven just like you would a grilled cheese sandwich.

I found the original recipe here: http://www.fitfromconception.com/2012/06/blueberry-breakfast-grilled-cheese.html  No, I am not pregnant, roflmao.  Neither are any of my children.  I have no idea how I ended up at that website, but I am glad I did.

Blueberry Heaven

[a Stand-in for Fat and Sugar Laden Blueberry Pastries]

For each serving:

  • 2 slices of bread, any kind.  Make it whole wheat if that’s the way you roll.  I use Orrowheat Country Buttermilk Bread.  Cinnamon bread would probably be delicious, as would almost any kind of homemade bread (don’t use homemade rye bread or anything like that!).
  • Plain cream cheese, enough to spread on two slices of bread.
  • a sprinkling of sugar, less than 1/4 tsp, optional
  • a handful of fresh blueberries, about 24 (jam can be substituted)
  • Butter, optional, unless you are using a frying pan


  1. Preheat sandwich maker, panini press, or frying pan.
  2. Spread each slice of bread with cream cheese, no measurements here, just coat the slices of bread to your preference. (If you are using a frying pan, spread the other side of the bread with butter)
  3. Sprinkle a bit, and I do mean a bit, less than 1/4 tsp of sugar over the cream cheese, just to sweeten up the cream cheese a little bit. (I’ve made this without the sugar, and it’s just not the same.)
  4. Arrange blueberries on one slice of the cream cheese covered bread.  Use as many as you want, but I think 24 is about perfect.  I like to evenly space the blueberries on the bread so I get an equal number of  blueberries in every bite.
  5. Put the other slice of cream cheese covered bread onto of the blueberries, cream cheese to cream cheese.
  6. Put the sandwich in the press, latch close, and cook for 2 minutes. (If using a frying pan, put the sandwich, butter side down on the preheated frying pan.  When the first side is golden brown, flip, and cook the second side until it is golden brown too.)
  7. Remove sandwich from the press or the pan and let cool a bit, the filing will be mad hot right out of the press. Be careful.
  8. Enjoy! It’s a little slice of heaven, isn’t it?
  9. Repeat.  You’ll want to make one for someone else… 🙂

Thanks for stopping by my kitchen today! Aren’t you glad you don’t have to drive over to the Olde Time Bakery for a pastry that will only make you feel badly about yourself? Hooray!!