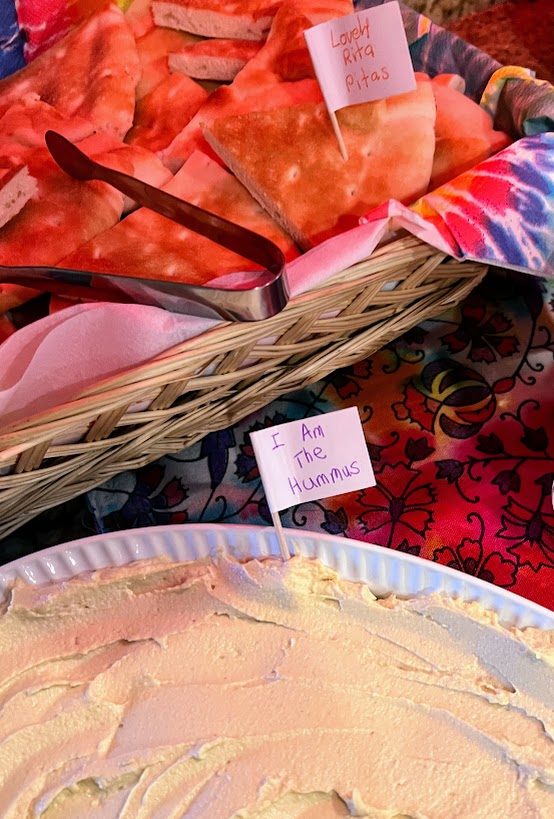
Tag-Archive for ◊ Picnic ◊

07 Dec 2012 Peanut Brittle

Three years ago, maybe four, I made some peanut brittle for some end-of-the-year gifts for my children’s teachers and coaches.  No problem.  Two months ago I made some peanut brittle as samples for a craft fair.  No problem.  Two days before the craft fair I made two batches of peanut brittle.  LOTS of problems. Both batches were big flops.   Crisis!  I needed some peanut brittle to sell, I needed it fast, and I needed it to be fabulous.

Thank goodness for the Internet!  I spent a few hours reading everything I could about making peanut brittle.  I took notes.  I highlighted.  I found sites that swore microwaved peanut brittle was the way to go.  I was all for it, but as (my) luck would have it, my microwave died the same day as the peanut brittle flopped.  (Where is my guardian angel!?)   I abandoned my old recipe, and went with a recipe that seemed to have the best chance of success (and that I could cook the “old fashioned” way, on the top of the stove), a twenty year old recipe from Bon Apetite, found on Epicurious.com.

I got out my heaviest pans. I hooked up my candy thermometer.   I also hooked up my instant read thermometer.   I put on my lucky apron.  I banished the grandchildren from the kitchen. I put on Christmas music. I was going to be double extra careful.  This was do or die day. I had to get two batches of really good peanut brittle into the cute boxes with the cute bows and the cute tags ASAP.

It worked.  PHEW.  I am glad to share with you the winning recipe, with all the hints and tips.  Good Luck!  As long as you don’t make this on an especially wet/humid day–and follow these direction and all my hints and tips–you should be OK.  But please note, this is important, the times are approximate.  I have a very powerful gas range, and I am an aggressive cook, so the times noted are the ones that worked for me.  If  you have an electric stove and/or are a cautious cook, your times might be twice as long.  Trust your candy thermometer (and your back up thermometer)  and pay attention to color.

One batch of this will make about 3 ½ lbs of peanut brittle.  That’s a lot of peanut brittle. I made two batches and was able to put 7 lbs of peanut brittle up for sale, to benefit my favorite organization, Dining For Women, YAY!

Totally Nuts Peanut Brittle

  • 3 cups sugar
  • 2 cups water
  • 1 ½ teaspoons salt
  • ¾ cup light corn syrup
  • ¾ cup dark corn syrup
  • 3-4 cups salted cocktail peanuts (whole or coarsely chopped–I left mine whole)
  • 2 tablespoons butter
  • 1 tablespoon baking soda
  • 1 teaspoon vanilla
  1. Stir the sugar, water, light and dark corn syrup, and salt together in a large saucepan over medium heat until sugar dissolves.  (TIPS:  Use a really large, heavy pan (mixture will foam up, a lot, in the last step).  I used a five quart stock pot.  The dark corn syrup is for color.  You can use all light corn syrup if you want. The sugar isn’t be dissolved until you can see the bottom of the pan.)
  2. Take your spoon out of the mixture and leave it out for this entire step.  Clip your candy thermometer to the edge of the pan.  Be sure the tip of the thermometer is not touching the bottom of the pan. Increase the heat to high, and BOIL the mixture, without stirring, until the candy thermometer registers 280 degrees F, about 40 minutes. (TIPS:  The mixture will stay at 220 degrees for about 30-40 minutes, don’t worry about it, your thermometer is not broken.  The temperature will go up a bit faster after passing the 220 degree F. mark.  To reassure yourself, use a second thermometer, if you have one.)
  3. Preheat your oven to 225 degrees.  Put two (or three) large rimmed cookie trays into the oven to warm.  Just before your mixture reaches the 295 degree mark (next step) take the pans out of the oven and lightly grease with a bit of butter.
  4. Pour the nuts and the butter into the boiling mixture (this will cause a temperature drop).  Use your spoon now, and keep your eye on the thermometer/s.  Stir the mixture constantly until it reaches 295 degrees F., about 15 minutes.  (TIPS:  I prefer to use 3 cups of nuts, because I like more brittle than nuts, 4 cups of nuts makes a very nutty brittle.  Watch the color, you want that deep rich amber color.  One or two degrees over 295 will be fine–if you work quickly in the next step, but don’t go much higher than that.  The temperature will move fast now, and you could easily burn a batch! On the other hand, under no circumstances should you stop cooking before reaching 295 degrees–or you’ll have “Peanut Bendy and Sticky” instead of “Peanut Brittle”.)
  5. Yell for help. A child should not answer this call.
  6. Remove the pan from heat.  Stir in baking soda and vanilla and stir briskly.  Mixture will foam up.  Keep stirring. (TIPS: This is why you used a large pan. If you didn’t use a large pan your mixture might bubble out of the pan and onto the counter.  This is not a good thing. Under no circumstances should you touch the hot, Hot HOT mixture.)
  7. Being very careful and using your best hot mitts to protect your hands and arms, immediately pour mixture onto the warm and greased cookie trays.  If anyone answered your call for help have them spread the peanut brittle as thinly as possible across the trays. (TIPS: Do not get burned.  Do not burn your helper.  Banish all pets and children from the area. Do not touch the pan. Do not touch the peanut brittle.)
  8. Put the pans of peanut brittle in the warm oven for 2-3 minutes. This should help the peanut brittle spread evenly over the bottom of the pans.
  9. Remove pans from oven and let sit until cold and hard.
  10. Break brittle into pieces and store in airtight containers at room temperature for a month or more.
  11. Pat yourself on your back for a job well done.
That’s IT!  I hope this recipe helps you make the most delicious Peanut Brittle ever!
Thanks for stopping by my kitchen today!

14 Sep 2012 Chocolate Peanut Butter Sandwich Cookies

ChocPB cookies good Stack

I have been meaning to post this recipe forever, I just never had a good picture of the cookie.  The recipe only makes 32 cookies, and around here 32 cookies lasts approx 32 seconds.  My friend Josee made these for a Christmas Cookie Exchange two years ago (that’s how long I have wanted to post this recipe). I gave a dozen of these to a friend, Becky,  for a “Craft it Forward” exchange and I promised the recipe to her ONE year ago. (Bad Polly, bad, bad, bad, bad.)  But finally, I  made a batch that didn’t get scarfed immediately.  I made them for my Yoga Group, and they are too polite to eat a half dozen each at one sitting (but it could have been that I had them so busy bagging stuff for an upcoming fundraiser and they didn’t have any hands free to eat cookies!)  They did sing praises for the cookies they did eat though and encouraged me to post the recipe ASAP.

Now getting back to the first time I encountered this cookie.  It was my favorite cookie that year, maybe my favorite cookie in all the years of our exchange (of which there have only been three).  Oddly enough, I made my cookie that year from same cookie magazine Josee used, and I never even considered making these!  Even now, if I just looked at the recipe, I would not be inclined to make it. This is one cookie that tastes much, much better than it’s list of ingredients.  It tastes much, much better than it looks, too and, no matter how good the picture looks above  (do you like it?  I got a new camera!), it still doesn’t do the cookie justice.  Take a bite!  There’s a layer of peanut butter inside!  As one of my friends said, who shall remain nameless, “So how did you get the peanut butter IN there?”

So here it is, at long last, the recipe for Chocolate Peanut Butter Sandwich Cookies (originally published as “Peanut Butter Munchies” in the Better Homes and Gardens “100 Best Cookies”, 2009).

One more note,  I often loose track of how many balls I have, so now I line up a chocolate ball with a peanut butter ball before I start rolling.  One time I ran out of peanut butter balls! I have no idea how that happened.  So I just cracked open another bottle of wine and made another half batch of the peanut butter batter, and all was fine. Hic.  (Just kidding.  I don’t drink.  Ever.  Really!! No, REALLY, I don’t!!!)

Chocolate Peanut Butter Sandwich Cookies

For Chocolate Cookie

  • 1 ½ cups all-purpose flour
  • ½ cup unsweetened cocoa powder
  • ½ teaspoon baking soda
  • ½ cup butter (one stick, 4 oz), softened
  • ¼ cup peanut butter (I always use creamy)
  • ½ cup granulated sugar
  • ½ cup packed brown sugar (I use light brown sugar)
  • 1 egg
  • 1 tablespoon of milk or cream
  • 1 teaspoon vanilla

For Peanut Butter Filling

  • ½ cup peanut butter
  • 3/4 cup powdered sugar

For Sparkle

  • 2 tablespoon granulated sugar
  1. Preheat oven to 350 degrees F.
  2. In a bowl, combine flour, cocoa powder, and baking soda and set aside.
  3. In a large bowl of an electric mixer combine butter and peanut butter.  Beat for a minute or so. Add in both sugars and beat for another minute or so.  Beat in egg and milk.
  4. Slowly add the flour-cocoa powder mixture to the butter-peanut butter mixture and beat just until combined.  Roll ball into a snake shape and refrigerate for a short while (to make it easier to handle) while you mix up the peanut butter filling.
  5. Beat peanut butter and powdered sugar together until well combined.  Roll dough into 32 equal balls.
  6. Divide cookie dough into 32 equal portions.
  7. For each cookie, flatten a piece of chocolate dough and top with a peanut butter filling ball.  Wrap Chocolate cookie dough around the peanut butter filling, making a ball in the process.  Place balls on a cookie sheet, about 1 inch apart.
  8. Rub a bit of leftover dough or a very slight bit of butter onto the bottom of a glass.  Dip glass in sugar.  Press cookies flat with sugar coated glass. (redip glass in sugar before pressing down on each ball).
  9. Bake cookies in preheated 350 degree oven for 8-10 minutes, until the sides are just slightly cracked.  Cool on cookie sheet for a minute or so and then transfer to a wire rack to cool.

Becky, I hope you are reading this…, I’m sorry that I took so long.  Josee, thanks for introducing me to this excellent cookie! Everyone else, ENJOY!  This is one great cookie!

Thanks for stopping by my kitchen today, come back again soon!  Now that I am learning how to master an SLR camera, I will probably be posting more frequently 🙂  I have a terrific parchment wrapped salmon recipe and a long time favorite gazpacho recipe just waiting in the wings!

04 Sep 2011 Sparkling Watermelon Lemonade

Last family BBQ of the season?  I wish I had posted this recipe as a season opener so that we could have had enjoyed this drink throughout the summer, but at least it is posted in time for the last BBQ of the summer. So toast the summer good-bye and pack away the white shoes with a glass of this sparkling Watermelon Lemonade.

This is  a summery, refreshing drink that’s lightly bubbly. No artificial colors, no artificial flavorings, no preservatives; just all natural ingredients! (…and it will use up all of that H-U-G-E watermelon you just bought!  My local grocery store had BIG ‘UNs for $2.49 yesterday.  How could I resist? Now, with this recipe for Watermelon Lemonade, none of that BIG ‘UN is going to waste!)

You could easily use this recipe and make a watermelon concentrate to freeze for future use.  Just mix the watermelon puree, the lemon juice, and the simple syrup, stir to blend. and then freeze (a quart Ziploc bag would work fine).  When ready to serve remove concentrate from freezer, defrost, add water and sparkling water, and stir until blended.

The kids are going to love this.  In fact, I think it will be their favorite. Go ahead and make some concentrate.  You know there is going to be a kid oriented event in the next few weeks.  Better to serve them good-for-you Watermelon Lemonade than a can of fizzy artificial flavorings and colorings.

This recipe has a long pedigree.  I found it here, http://traceysculinaryadventures.blogspot.com/2011/07/watermelon-lemonade.html (Tracey has posted a much better picture of the Watermelon Lemonade), where it was adapted from from Smitten Kitchen who adapted it from  Bubby’s.  I added the recipe for 8 servings  (why not make a pitcher  full?) and changed the ratio of bubbly water to straight water. You could make either version with all still water, or with all bubbly water.  Do what suits you. Make this recipe yours! Enjoy!  Here’s look to next summer, when we can have glass after glass after glass of this Sparkling Watermelon Lemonade.

Sparkling Watermelon Lemonade

For two glasses:

  • 1/4 cup freshly squeezed lemon juice (usually one lemon)
  • 1/2 cup fresh watermelon puree (Put cubes of seedless watermelon in blender and whirl until smooth.  Strain to remove seeds and pulp. )
  • 3-4 tablespoons simple syrup (recipe below, make first and let cool!)
  • 1/2 cup cold water
  • 1/4 cup sparkling water

Add all of the ingredients to a small pitcher and stir to combine.  Divide between two glasses and serve over ice.

For Eight Servings:

  • 1 cup freshly squeezed lemon juice (4-5 lemons)
  • 2 cups fresh, strained watermelon puree (about 1/2 a medium watermelon)
  • 1 cup simple syrup (recipe below, make first and let cool!)
  • 1  1/2 cups cold water
  • 1  1/2 cups sparkling water

Add all of the ingredients to a small pitcher and stir to combine.  Pour into ice filled glasses and serve.

Simple Syrup:

To make the simple syrup: Combine equal parts water and sugar in a small saucepan and bring to a simmer, stirring occasionally.  (1/4 cup of sugar and water for 2 servings, 1 cup of sugar and water for 8 servings). Continue simmering until the sugar has dissolved.  Turn off the heat and let the syrup cool to room temperature.  Leftover syrup can be stored in the refrigerator for up to one month.

Thanks for stopping by my kitchen today.  I hope I’ll be back cooking up a storm tomorrow.  Fingers crossed, I’ll see you then!

Polly


02 Aug 2011 Fried Chicken

Frying chicken wasn’t just another hedonistic pursuit you know.  I had a good reason.  A very good reason.  My friends and I have started an M&M group.  LOL!  I crack myself up. A Movie & Meal group. We are going to go to movies together and after the movie dine on food inspired by the movie.  We SO know how to have a good time!  BUT…, our first movie pick is “The Help”.  Now how could we have a “The Help” movie meal without fried chicken?   I HAD to start frying chicken.  Had to.

I didn’t expect to end up making the best fried chicken on the planet though.  Truth be told, I haven’t eaten much fried chicken in my  life.  I’ve had the occasional KFC, once or twice a decade, perhaps.  Never been to Popeye’s.  Had a few pieces from Safeway’s deli when my son was in middle school. There are no southern cooks in my family, so I have had no home fried chicken. Until now.  So perhaps I am not the most qualified person to declare this chicken “the best fried chicken on the planet”, but it is certainly the best fried chicken on MY planet.

This recipe came from Epicurious in 1998 and it’s called “Deviled Fried Chicken”. The chicken needs to marinate a day or two before frying, so plan ahead. I reduced the chili powder quite a bit, and it still has a bit of a bite.  The original recipe called for 4 teaspoons cayenne pepper.  YIKES.  The first batch I fried up was hunks of boneless, skinless chicken breasts.  The next time I had a hankering for some bones,  so I fried up a mess of drumsticks.  Drumsticks were harder.  They had to be finished off in the oven.  For “The Help” party, I am going back to big juicy hunks of chicken breast.

I have to tell you the rest of our menu for “The Help” dinner!  It’s going to be goooood!  Cucumber Sandwiches and Deviled Eggs for appetizers, Crab Bisque for the soup. Fried Chicken and a Pineapple Ham for the main dishes.  Southern Biscuits (we tested several recipes), Mashed Potatoes and Gravy, Collard Greens or Green Beans, and a Jell-O salad (a MUST have!) for side dishes.  Caramel Cake (we tested several recipes) and Chocolate Cream Pie (with no off-putting ingredients) for dessert.  Lots of Sweet Tea, too. I’ll wear my “pearls”, of course.  One of my friends is getting out her cinch waist dress.  Another has her gloves ready.  I hope there are a few hats, too!

Fried Chicken

2 cups buttermilk (the non-fat stuff won’t work)
1/4 cup Dijon mustard
3 tablespoons garlic powder (divided use)
5 teaspoons salt (divided use)
2 teaspoons dry mustard (divided use)
2 teaspoons cayenne pepper (divided use)
2 1/2 teaspoons ground black pepper (divided use)
4 or 5 chicken breasts, cut into 8-10 pieces, skinned or about a dozen drumsticks, or one frying chicken cut into 8 pieces.
3 cups all purpose flour
1 tablespoon baking powder

5 cups (or more) oil, for frying (recipe suggested peanut oil, but vegetable oil and canola oil will work, too)

In 1-gallon resealable plastic bag, mix buttermilk, Dijon mustard, 1 tablespoon onion powder, 1 teaspoon salt, 1 teaspoon dry mustard, 1 teaspoon cayenne and 1 teaspoon black pepper.

Add chicken pieces. Seal bag, eliminating air. Turn bag to coat chicken evenly. Refrigerate at least 1 day and up to 2 days, turning plastic bag occasionally.

A bit more than one hour before you want to start to fry chicken…whisk flour, baking powder, garlic powder, remaining 1 tablespoon onion powder, 4 teaspoons salt, 3 teaspoons dry mustard, 1 teaspoon1 cayenne and 1 1/2 teaspoons black pepper in 13 x 9 x 2-inch glass dish. With marinade still clinging to chicken pieces (do not shake off excess), add chicken to flour mixture; turn to coat thickly.

Let chicken stand in flour mixture for 1 hour, turning chicken occasionally to recoat with flour mixture.  (The chicken will look ugly at this point,. The flour mixture should cling thickly to the chicken.)

Pour oil to depth of 1 1/4 inches into deep 10- to 11-inch-diameter pot. Attach deep-fry thermometer. Heat oil over medium-high heat to 350°F.

Add 4 pieces of chicken to oil.

Reduce heat to medium-low and fry 5 minutes, adjusting heat to maintain oil temperature between 280°F and 300°F (oil should bubble constantly around chicken).

Turn chicken over. Fry 7 more minutes. Turn chicken over again. Fry until deep golden brown and cooked through, about 3 minutes longer. (I think I had my oil too hot, because my chicken was getting too dark, so when the chicken was the right color, I put it on a wire rack over a cookie sheet and baked in preheated 250 degree oven for approx. 20 minutes to thoroughly cook the drumsticks.  I had no problem with the boneless chicken breasts.)

Reheat oil to 350°F. Repeat frying with remaining 4 pieces of chicken.

Serve chicken warm or at room temperature (within 2 hours), or chill up to 1 day and serve cold.

Reheating has been a bit of an issue. My son has reheated pieces in the microwave, but this does not result in the coating getting re-crispy.  I have reheated pieces in 350 degree oven for 15-20 minutes, and the coating gets almost recrisped.  Two day old fried chicken reheated in the oven is STILL better than Safeway’s fresh from the deli counter!

Thanks for stopping by my kitchen today.  It’s always a pleasure.  Maybe you will have your own Southern dinner after finishing “The Help”, either the book version or the movie version, or maybe you will just fry chicken for the hedonistic thrill of it!  Either way, I hope you try this recipe.  It’s a keeper!