Caramel Corn
Ooooh, Caramel Corn! Isn’t it lovely? You know I am not talking about that stale, pale, powdery stuff out of a bright and cheerful tin, right? I am talking about real Caramel Corn, the homemade variety! Here’s the recipe I use—I think…
"It's all about the recipe!"
Ooooh, Caramel Corn! Isn’t it lovely? You know I am not talking about that stale, pale, powdery stuff out of a bright and cheerful tin, right? I am talking about real Caramel Corn, the homemade variety! Here’s the recipe I use—I think…
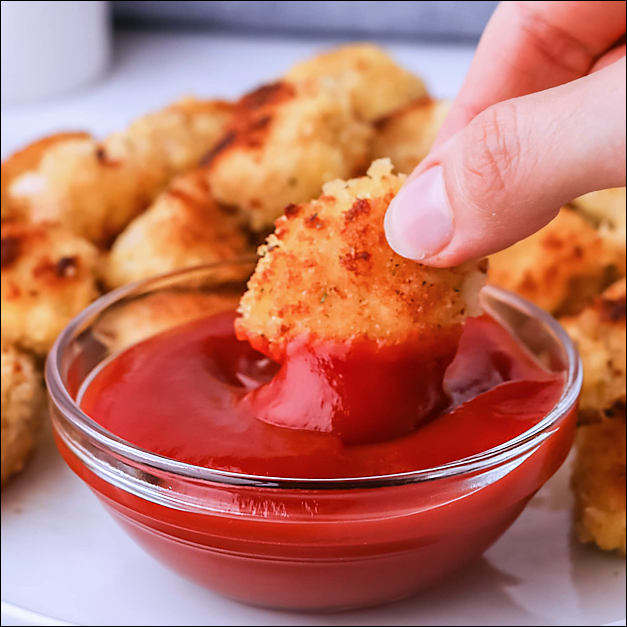
I know a thing or two about chicken nuggets as I have been making them for two decades with a recipe very similar to the one Sara Moulton contributed to The 150 Best American Recipes. Sara calls her version Garlicky Baked…
One of our family favorites has always been our oven baked fries. My friend Mary first made these for me about 25 years ago—I had been so impressed to arrive at her house for lunch and find a basket of home…
I haven’t posted many appetizers—I’ve always been a bit appetizer challenged. I am much more focused on side dishes, main dish and dessert! This holiday season, I tried three of Ina Garten’s appetizer recipes from her most recent cookbook, How Easy is That? Two…
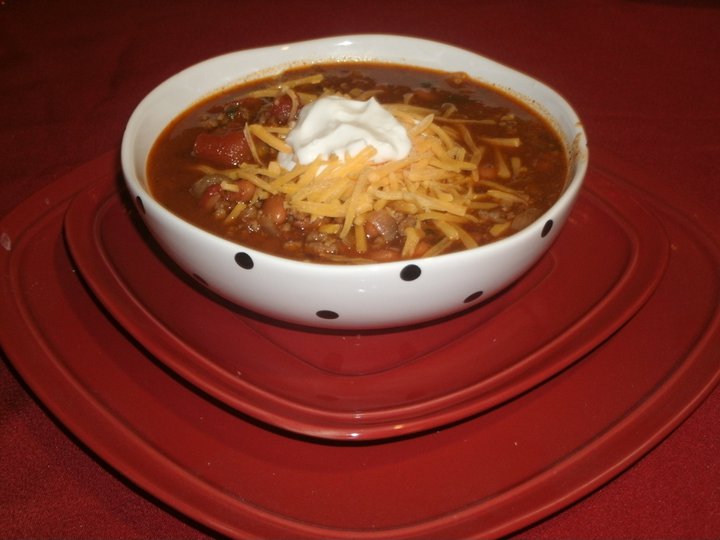
Gingo Grandma’s chili! That’s me! This is my chili! You’ve probably guessed that this is NOT serious cook-off chili. This is big pot, throw-it-all-together, family friendly, low-budget chili—chili that everyone likes! Chili with ground meat! And beans! Oh, my! A recipe…
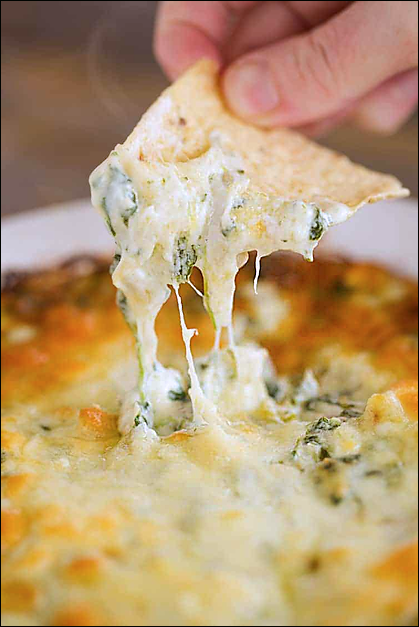
I remembered my friend Candace had swooned over a Warm Spinach and Artichoke dip she had ordered at Applebee’s recently, then I stumbled upon a recipe that I thought might be similar. And it was from one of my favorite recipe…
If Jett can make pretzel bites, so can you! Time to play in the kitchen again! I am not a newbie to homemade soft pretzels. My favorite bread machine cookbook Bread Machine Magic has a recipe for Special Ed-ible Pretzels on…
Look what I made for my grandson’s Pups and Trucks birthday party, cheddar dog bone crackers! Aren’t they adorable? I think the two-year-olds, and their parents, are really going to enjoy them 🙂 I used a small cookie cutter to cut the bone…