Author Archive

09 Aug 2019 Korean Chicken Wings
 |  Category: Appetizers, Poultry  | Tags: , , , , ,  | Leave a Comment

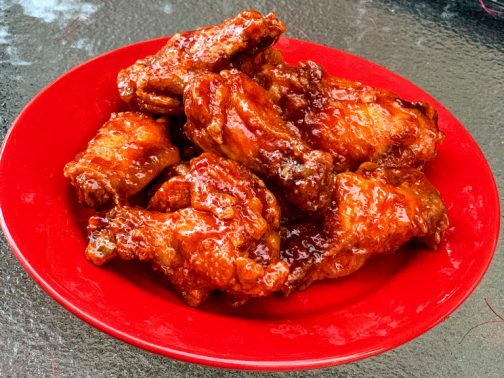
I love these! This recipe is one of my very favorite new recipes this year. I have my daughter, Abby, to thank for it. She’s been to a lot of Korean BBQ restaurants (I’ve been to none) and she fell in love with these wings. She then searched out a fabulous recipe and cooked them for me a few times, then I got addicted, which is odd since I don’t particularly like chicken or chicken wings. This recipe is based on one found in “Our Korean Kitchen” by Jordan Bourke and Rejina Pyo. These little pieces of heaven won me over though! These wings have a little bit of everything yummy, a little bit sweet, a little bit spicy, a little bit crispy, a little bit saucy and a little bit sticky and they are so very addicting. I think I had a dream about them once…

The recipe has a lot of steps, but they are all easy (and well worth it!). You’ll probably need to visit a Korean grocery store for a few items, but once there you’ll find everything and be able too cook multiple batches of these wings before needing a return trip. The wings are very easy to pull together after making them the first time. Honest, they are easy! You’ll want to make them for all your friends.

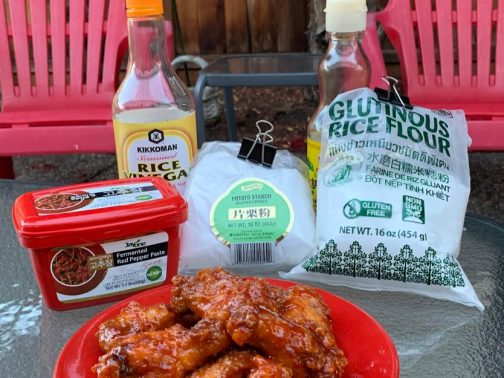
Here’s a picture of the not-so-common items you’ll need for these wings. Helpful note, Glutinous Rice Flour is also known as Sweet Rice Flour.
Korean Fried Chicken Wings

Sauce

  •  2 Tbsp Soy Sauce
  • ¼ cup Rice Vinegar
  • 2 Tbsp Gochujang (available at Korean grocery stores)
  • ¼ cup plus 2 Tbsp Honey
  • ½ cup  Ketchup
  • ¼ cup plus 2 Tbsp Brown Sugar
  • 1 Tbsp vegetable oil
  • 2 garlic cloves
  • 3 Tbsp sesame oil

Flour Coating for Wings

  • ¼ cup potato flour
  • 1/3 cup all purpose flour
  • ¼ cup glutinous rice flour (AKA Sweet Rice Flour-available at most Asian markets)
  • 1 tsp baking powder
  • 2 tsp sea salt
  • 1 tsp ground pepper

To Cook Wings

  • 3 pounds party wings
  • Vegetable Oil for frying 

Garnish (optional)

  • 1 tsp toasted black sesame seeds
  • 1 tsp toasted white sesame seeds

Make the sauce

  1. Combine first six sauce ingredients (except vegetable oil, garlic, and sesame oil) in a medium bowl and set aside.
  2. Place vegetable oil in a medium saucepan, over medium heat. Once oil is hot, add garlic and cook until fragrant, about 30 seconds.
  3. Once garlic is golden, add all the combined sauce ingredients to the pan, and cook until it has thickened and is glossy, approximately 4-5 minutes.
  4. Add sesame oil, mix thoroughly.
  5. Set aside until ready to use.

Make the chicken

Pour vegetable oil into a deep, medium-size pan, with at least two inches between the surface of the oil and the rim of the pot. Place pan over medium-High heat, and using a deep-fat or candy thermometer to guide you, bring oil to 325 F.

  1. Meanwhile, place the ingredients for the flour mix in a bowl and mix thoroughly. Add chicken to the flour mix, coating every part evenly. (Shaking wings with flour mixture in a Ziploc works well)
  2. Shake excess flour off wings and set on a baking rack to dry slightly. If flour soaks into wing and looks a little gummy, shake in flour mixture again.
  3. When oil has reached 325F, add the chicken in batches and fry for about 7 minutes.
  4. Remove and drain on paper towels.
  5. OK to keep cooked wings warm in 250 degree oven until needed.

To Serve

  1. Once all chicken is fried, reheat sauce and toss hot wings in warm sauce.
  2. Sprinkle saucy wings with sesame seeds if using
  3. Share and enjoy!
03 Jul 2019 Italian Butter Cookies

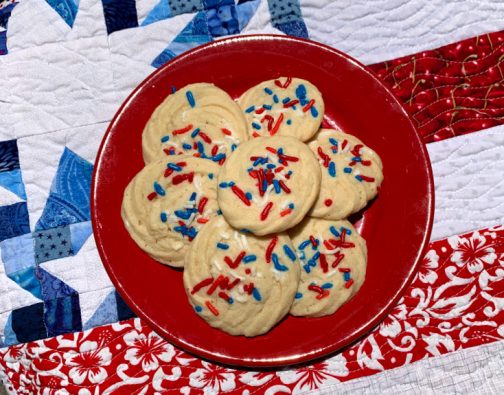
Italian Butter Cookies

I love these cookies. Not the ones in the package. Not the ones from the bakery. These cookies. Made at home. With butter.

I’m sure you’ve all seen these cookies. I swear they are in every bakery and often overlooked because they look at bit plain and basic, and even, in some bakeries, a bit dry and floury. The cookies often appeal to kids though, probably because of the rainbow sprinkles.

This cookie will appeal to kids and grown ups, because it’s not floury, it’s not dry. It’s very buttery and very vanilla and very delicious.

The cookie is pretty straightforward, made from everyday pantry staples plus a package of rainbow sprinkles, but putting the cookies on the baking tray does require a piping bag and tip. It’s an extra step and extra clean up, but it’s not an Italian Butter Cookie without it. The other tricky part is knowing when to take the cookies out of the oven. Do not overbake or underbake. Watch the cookies carefully, look for a very light golden browning So deep breath, you can do it! The results will be worth it.

1 cup unsalted butter, at room temperature (2 sticks)

1 cup sugar

1 teaspoon salt

1 tablespoon vanilla extract

1 tablespoon milk

1 egg, at room temperature

2 ½ cups all purpose flour (313 grams)

½ teaspoon baking powder

Rainbow sprinkles

  1. Preheat the oven to 350 degrees F. and line baking sheets with parchment paper.
  • With an electric mixer, combine the butter, sugar, salt, vanilla and optional lemon or almond extracts.  Beat at medium speed until fluffy, 3-5 minutes.
  • Beat in the egg and milk and combine thoroughly.
  • Mix the baking powder into the flour and then slowly add the flour mixture to the butter-sugar-egg mixture. Beat until a dough forms.
  • NOTE: This dough should be piped right after it’s mixed.  Don’t let it rest for too long or refrigerate, as the dough will become stiff and more difficult to pipe.  If the dough does become too stiff to pipe, add a few drops of milk to loosen it. Fit a pastry bag with an extra-large French or open star pastry tip.  Fill the bag with half of the dough.
  • Pipe the dough into rounds about 2-inches in diameter.  Space the cookies about 1-1/2 inches apart as they do flatten and spread slightly. 
  • Sprinkle cookies rounds with rainbow sprinkles.
  • Bake the cookies for 15-17 minutes, or until they are light golden brown on the very edges and have very light brown bottoms! This is the hardest part of making this cookie: do not under bake the cookies and do not overbake. Do not allow cookies to brown beyond a very light golden brown on the outside edges and bottoms.
  • Cool the cookies on the baking sheets for 5 minutes before transferring them to a wire rack to cool completely.
  • Depending upon size, makes 24-36 cookies. I’ve started doubling this recipe. (Cookies freeze well.)
25 Jun 2019 Raspberry-Ricotta Snack Cake

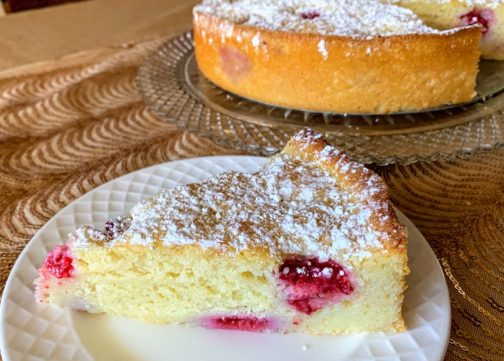
This cake is simply delicious, light and moist, unassuming and satisfying. It’s good for breakfast, it’s good for a light dessert, and it’s good for an afternoon tea or snack. It’s good for company, it’s good for a family treat, and it’s good for just honoring the fact that you are alive, it’s Summer, and having something completely homemade with fresh fruit is the right thing to do.

The original recipe is from Epicurious, which called for using frozen berries. I’ve only ever made this with fresh raspberries, so that is reflected in the recipe below. Others have made this cake with blackberries, blueberries, pitted and halved cherries, diced mango, and *gasp* chocolate chips.

Not being a ricotta lover, I wouldn’t have made this cake if weren’t made for me at a Cookbook Club retreat a few years ago. I loved it, the ricotta wasn’t overwhelming and is important to the character of this cake. The ricotta keeps the cake moist and light, and allows it to stay moist for two days or more.

If there are any leftover slices, wrap and freeze for an on-demand treat later on.

1 1/2 cups all-purpose flour (188 grams)

1 cup sugar (198 grams)

2 teaspoons baking powder

1 teaspoon salt

3 large eggs

15 oz carton ricotta

1 teaspoon vanilla extract

1/2 cup (1 stick) unsalted butter, melted

1 cup raspberries (6 oz carton) divided use (can substitute blueberries, cherries, blackberries, small chunks of mango, or even, *gasp*, chocolate chips) Ok to add a few extra berries on top of batter.

Zest of 1 small lemon (OK to sub lime or orange zest)

Approx. 1 teaspoon white sugar, vanilla sugar, coarse sugar, or raw sugar, optional

  1. Preheat oven to 350°.
  2. Line a 9″-diameter cake pan with parchment paper and lightly coat with nonstick spray.
  3. Whisk flour, sugar, baking powder, and salt in a large bowl and set aside.
  4. With an electric mixer, whisk eggs, ricotta, and vanilla in a medium bowl until smooth.
  5. Stir in dry ingredients, whisk just until blended.
  6. Stir in butter just until combined.
  7. By hand, fold 3/4 cup raspberries (or other fruit), taking care not to crush berries.
  8. Fold in zest.
  9. Pour batter into prepared pan and scatter remaining 1/4 cup raspberries (or other fruit) over top (OK to add more berries to make a pleasing design on top.)
  10. Sprinkle a small amount of sugar, vanilla sugar, or raw sugar on top of cake.
  11. Bake cake until golden brown and a tester inserted into the center comes out clean, 50–60 minutes. Let cool at least 20 minutes before unmolding.
  12. If desired, sprinkle with powdered sugar before serving.

Do ahead: Cake can be made 2 days ahead. Store tightly wrapped at room temperature.

20 Jun 2019 Summer Berry Bars

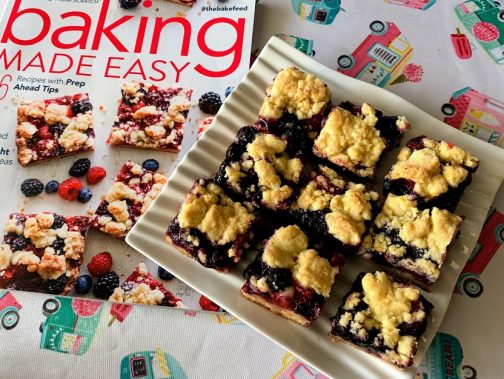
Have you ever made a cover recipe? I’ve made enough of them to figure out that cover recipes are usually a pretty good bet! My daughter saw this cover and said she wanted me to make them for July 4th because of the red, “white” and blue colors. So I tried them, and they were GOOD! They will be on her July 4th dessert buffet.

Mix and match the berries to your preference. Basically, you will need 5 cups of berries. Strawberries usually don’t bake up too well as they tend to release too much liquid and also take on a bit of ugly gray tinge, so don’t use too many strawberries, maybe one cup max. Blueberries, raspberries, blackberries, and even pitted and halved/quartered cherries will all work.

There is no need to top these bars with whipped cream or vanilla ice cream, but… 🙂

Note that these bars need to rest overnight in the refrigerator before serving, so plan accordingly.

Summer Berry Bars

3 cups (375 grams) all-purpose flour

1 1/3 cups (267 grams) granulated sugar, divided use

1 tablespoon (3 grams) lime zest (OK to sub lemon or orange zest)

1 teaspoon (5 grams) baking powder

¾ teaspoon (2.25 grams) kosher salt

1 cup (227 grams) cold unsalted butter, cubed

1 large egg (50 grams), lightly beaten

1½ tablespoons (12 grams) cornstarch

2 cups (260 grams) fresh raspberries

1 cup (147 grams) chopped fresh strawberries

1 cup (160 grams) fresh blackberries

1 cup (170 grams) fresh blueberries

3 tablespoons (15 grams) fresh lime juice (OK to sub lemon juice or orange juice)

1 teaspoon (4 grams) vanilla extract

  1. Preheat oven to 375°F. Line a 13×9-inch baking pan with parchment paper, letting excess extend over sides of pan.
  2. Stir together flour, 1 cup sugar, zest, baking powder, and salt.
  3. Using a pastry blender—or a food processor—add butter to flour mixture and process or cut in butter until pea-size pieces remain.
  4. Stir in egg until blended and mixture is crumbly.
  5. Reserve 1½ cups dough and refrigerate until needed in step 11.
  6. Press remaining 3½ cups dough into bottom of prepared pan.
  7. Bake for 20 minutes.
  8. In another large bowl, stir together cornstarch and remaining ? cup (67 grams) sugar.
  9. Gently fold in berries, citrus juice, and vanilla until combined.
  10. Scatter berry mixture over prepared crust.
  11. Crumble reserved 1½ cups chilled dough over berries, pressing the dough to form small clumps before scattering over berries.
  12. Bake until top is golden, about 30 minutes more. Let cool completely. Refrigerate overnight.
  13. Using excess parchment as handles, remove from pan, and cut into bars.
  14. Store bars in refrigerator.

So, off to the farmer’s market! Thanks for stopping by my kitchen today!