I am fortunate to live in an area with some remaining cherry orchards. For a few weeks each year, these orchards are open for U-Pick cherries. Seeing as how we are in the midst of a pandemic (80 days of Shelter-In-Place and counting), and U-Pick Cherries being a relatively safe outdoor activity (with masks in place), we’ve been twice in two weeks. That’s a lot of cherries!
Caution #1: U-Pick cherries are not cheap, they might even be a bit more than you’d pay in the grocery store, but they’re good, and fresh, and last a surprisingly long time.
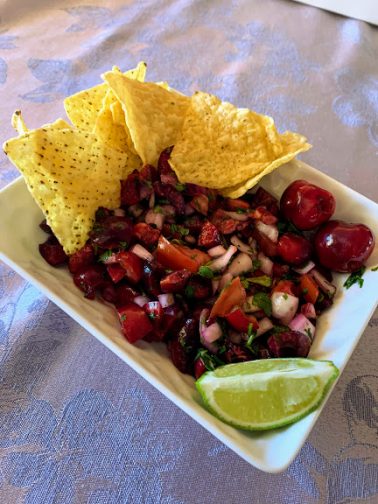
Caution #2: If you go cherry picking, you will undoubtedly come home with more cherries than you would if you bought a bag of cherries at the grocery store or farmer’s market. So bookmark a few of our very favorite cherry recipes: Fresh Cherry Salsa, Cherry-Limeaid, and Fresh Cherry Pie!
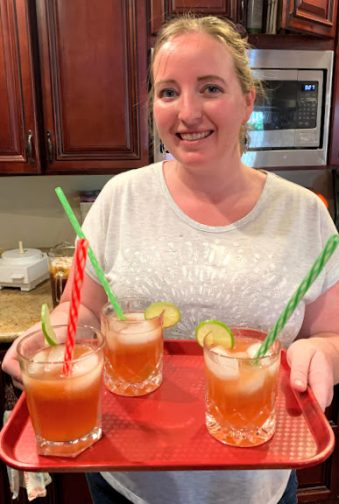
As a non-drinker of anything alcoholic, compounded by being a non-soda drinker, and not being especially thrilled about water, I am excited when I find something special to drink. This is one of my favorite special drinks, Cherry Limeade! It’s made with fresh cherries and freshly squeezed lime juice, mixed with sparkling water or club soda.
Fresh Cherry Limeaid
- 2 cups (about 385 g/ 3/4 lb.) fresh cherries, pitted
- 2/3 cup (133 g) sugar
- 2/3 cup water
- 1/2 cup freshly squeezed lime juice (from about 4 limes)
- 2 cups (473 ml) chilled sparkling water (more or less to taste)
- Combine the sugar and the water in a small saucepan and bring to a boil. Simmer for approx 5 minutes. Then turn off heat and let sit.
- While sugar and water are simmering, pit the cherries and juice the limes.
- Place 2 cups pitted cherries into a food processor or blender and whirl until smooth.
- Strain the pureed cherries with a mesh strainer. Reserve the juice, and discard the solids. Don’t panic! The cherry juice will be an awful brown color, things will improve with the addition of the lime juice. (Cherry juice is not red! Now you know how much red food coloring goes into commercial cherry juice.)
- Combine the sugar-water, the lime juice, and the cherry juice into a large pitcher. Place in refrigerator and chill completely.
- Just before serving, stir in the sparkling water or club soda.
- To get really fancy, top with a slice of lime and a frilly straw!
Enjoy!