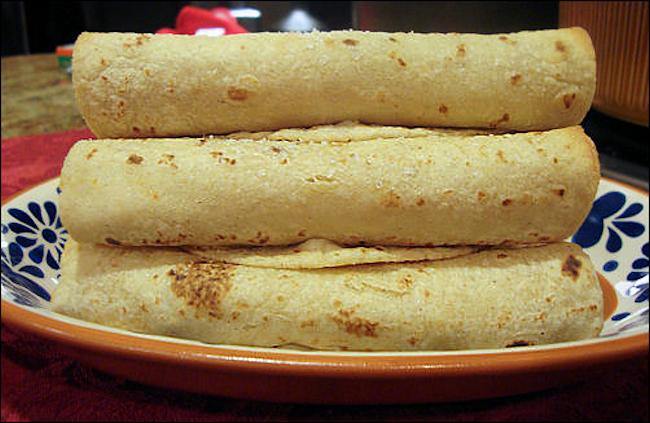
Baked Chicken Taquitos
Yes! You can bake taquitos! Who knew? My kids loved taquitos when they were growing up. They were always happy when there was a box of them in the freezer. I wish I knew then what I know now. I could have made batches of…

"It's all about the recipe!"
Yes! You can bake taquitos! Who knew? My kids loved taquitos when they were growing up. They were always happy when there was a box of them in the freezer. I wish I knew then what I know now. I could have made batches of…
These taste a lot like the lettuce wraps at The Yard House and they are super easy and fast to make. After tasting this, I felt it needed a little heat to contrast with the cool, crispness of the lettuce…
Mmmmm… Hoisin chicken, wrapped in a crispy, iceberg lettuce leaf. I don’t remember where I found the original recipe, it was a few years ago. My daughter and I have tinkered with it a bit over the years and now we think…
I’ve finally found something that the crockpot excels in—excels in! This is not just a recipe that can be cooked in the crockpot, it’s a recipe that should be cooked in a crockpot! Yes, a recipe that tastes best cooked in…
Perfect! Three ingredients, a bit of salt and pepper, then quickly grilled on a skewer! It’s a pretty simple dish, and pretty simple in taste, too. Sometimes, that’s all one wants! It’s fancy enough to serve to guests, especially to…
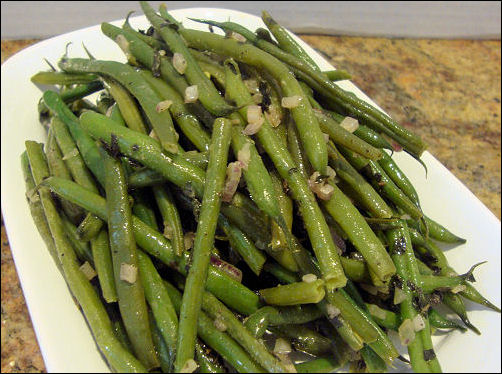
Move over Doritos! Get out of here Bagel Bites! Got you beat, baby carrots! I find these to be quite an addictive finger food. They are a perfect summer appetizer, seasonal, chilled, and good for you. What’s wrong with a…
Super Bowl Sunday is just over the horizon, and for years, I couldn’t care less 🙂 Yet somehow or another, I managed to raise a football crazy girl who actually anticipates and watches football games, playoffs and bowls! So, through…
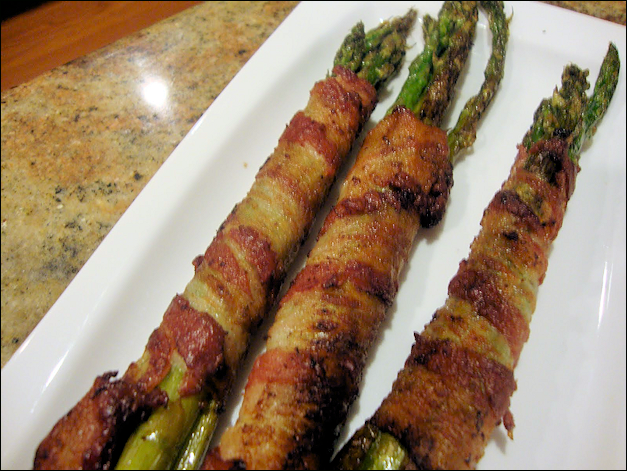
I found this recipe on the Internet this morning, and I ran out to buy some asparagus to try it! Then I hemmed and hawed about posting the link, the recipe, and my pictures. I wasn’t sure the recipe was…