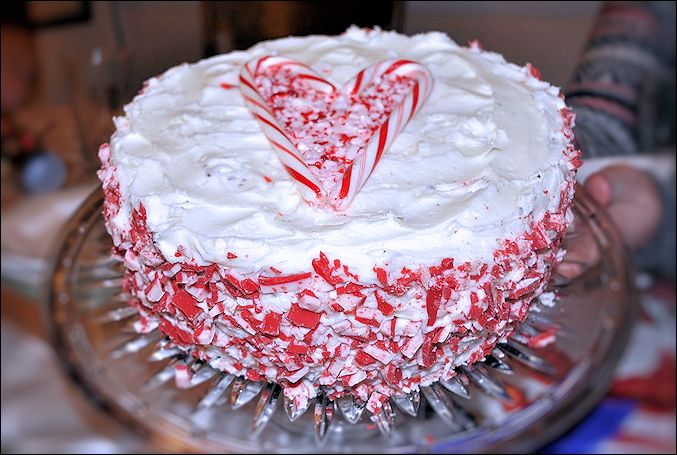
Tag-Archive for ◊ Andes ◊

06 Mar 2013 White Mint Dark Chocolate Layer Cake

chocmintcake

I know, I know, this is a horrible picture.  Don’t let that put you off though.  This is a delicious cake, one of my best!  The reason this picture is so bad, well, aside from me not being a talented photographer, is that everyone ate the cake!  This is the one piece  that was left, and it was left out all night.  It looks like it, too, doesn’t it? Poor cake.  I really should bake this cake again just to get a better picture of it.  Problem with that is, folks are hollering for the recipe! I served the cake at my Dining For Women meeting and had several requests for the recipe.  I told everyone it was on my website, but this morning  I was shocked to find I hadn’t posted it.  Ever. Oops. What have I been doing with my time?

So here is the recipe, finally!  I found the original  recipe on epicurious.com the year that my twins graduated from high school, in 2009, I believe.  I made it for their high school graduation.  See how good this cake is?  I know exactly when I first tasted it! (I was pretty impressed with myself!)

The only thing I changed was making two layers instead of three (I think three layer cakes are pretentious–and who has three matching layer cake pans anyway?).  Don’t change anything else!  Use peppermint extract, not mint.  AND, one more warning:  stick to the Lindt Mint Chocolate bar, or something very similar. My daughter made this cake one year with Ghirardelli Mint Squares (the ones with the liquid-y centers).  Not a good idea. She made the cake for my birthday cake.  The top layer kept sliding off the bottom layer.  Yes, more than once. The cook took it very hard.  I think there were tears.

There shouldn’t be tears served with this cake.

This cake can be dressed up a bit for Christmas.  Andes has Candy Cane mints now.  Those and a few candy canes or peppermints can adorn the sides/top of the cake or the cake platter. Hershey’s Candy Cane Kisses can be melted for the top of each layer, if you want, but they don’t taste nearly as good as the melted Lindt Mint chocolate bar…, and they don’t have the delightful thin crunch that comes from the melted Lindt bar.

Chocolate Mint Layer Cake

For Cake and Chocolate Mint Topping

1 ¾ c. flour
¾ c. unsweetened cocoa powder (use Hershey’s Special Dark)
1 ¼ tsp. baking soda
½ tsp. baking powder
¾ tsp. salt
2 c. sugar
¾ c. butter, at room temperature (1 ½ sticks)
3 eggs
4 tsp. vanilla
1 ½ c. buttermilk
1 large Lindt Mint Chocolate Bar, chopped

Preheat oven to 350 degrees. Butter and flour three 9-inch diameter cake pans. Line bottom of pans with parchment paper. Sift together flour, cocoa powder, baking soda, baking powder, and salt. In another bowl beat sugar and butter together until light and fluffy, at least 5 minutes. Add eggs, one at a time, beating well after each addition. Mix in vanilla. Beat for another 5 minutes. Add dry ingredients alternately with buttermilk in 3 additions each, beating just until blended. Divide batter equally between the three cake pans (a generous 2 cups of batter in each pan). Bake in preheated oven for about 25 minutes, or until cake springs back to touch. Remove cake and sprinkle chopped Lindt Mint Chocolate over tops of each layer. When chocolate melts, spread gently evenly across tops. Let cool in pans for 15 minutes then remove to racks to cool completely. Remove parchment paper.

For Creamy Minty Frosting

1 ½ 1-lb. boxes powdered sugar
½ c. butter, at room temperature
2 tsp. peppermint extract (not mint extract, peppermint extract)
¼ c. milk or cream, approximately
1 box Andes Mints, unwrapped and chopped

Combine powdered sugar, butter, extract, and milk/cream in a mixing bowl. Beat until light and fluffy, adding more milk or cream, 1 tsp. at a time, if needed to bring mixture to spreading consistency. Place approximately 1/5th of frosting on top of each layer cake. Carefully smooth frosting on top of mint chocolate covered cake layers. Place frosted layers on top of each other on a serving plate. Use remaining 2/5ths of frosting to carefully frost sides of cake. Sprinkle chopped mints on tops and sides of cake. Let sit for an hour or two before serving.

Thanks for stopping by my kitchen today!  If you like what you read, sign up.  You’ll get a three line email letting you know when I post another recipe.  I won’t use your email address for anything else, ever, I promise!


10 Jul 2010 Andes Mint Chip Ice Cream

You know I couldn’t make just one, didn’t you?! Here’s ANOTHER really, really good Philadelphia Style ice cream. Philadelphia Style ice cream is, without a doubt, my choice for ice cream. It tastes lighter and it’s sooooo much simpler to make. I have fond memories of Andes Mint Chip Ice Cream. I have only know of one place that made it, and it went out of business years ago. When I was pregnant with Hannah, 26 years ago, I used to take a walk to this ice cream shop…, on a regular basis…, the cool Andes mint and the cold ice cream just seemed RIGHT! How exciting that I can make this at home now and I don’t have to be pregnant to enjoy it!

I found this recipe, and only modified it a little bit, at serving-ice-cream.com

Andes Mint Chip Ice Cream

1 ¼ cups cold whole milk (or 2%, 1%, or non-fat…remembering that each step down in fat content will affect the creaminess/iciness of the finished product)
2 ½ cups cold heavy whipping cream (or half-and-half)
1/2 cup + 2 tablespoons sugar
1 teaspoons peppermint extract (don’t even think of increasing this.  I did a few times and the ice cream base got bitter)
1/2 teaspoon vanilla
few drops of green food coloring, optional
1 box (4.67 oz.) Andes mints, coarsely chopped
½ cup mini chocolate chips OR ½ cup of chopped milk, dark, or mint chocolate

Stir milk, cream and sugar together, using a wire whisk or hand mixer, until sugar has dissolved. Stir in peppermint extract and optional green food coloring. Pour mixture into an electric ice cream maker. Process for about 15-20 minutes, or until mixture is very thick and slushy. Stir in all of the chopped mints and chocolate. Process for an additional 5 minutes. Remove ice cream to a freezer safe container and freeze until hard, two to four hours (if you can wait that long).

Thanks for stopping by my kitchen today.  Have fun making ice cream.  I have been making homemade ice cream for so long that I really can just walk by all that processed stuff in the freezer section. It just doesn’t taste REAL.  It tastes sweet, yes, and cold, and sometimes there’s something gooey running through it, and, on the whole, store bought ice cream  has good mouth feel and texture and creaminess, but no TASTE.