Tag-Archive for ◊ potluck ◊

24 Jun 2013 Crab and Brie Macaroni and Cheese

Crab and brie mac n cheese

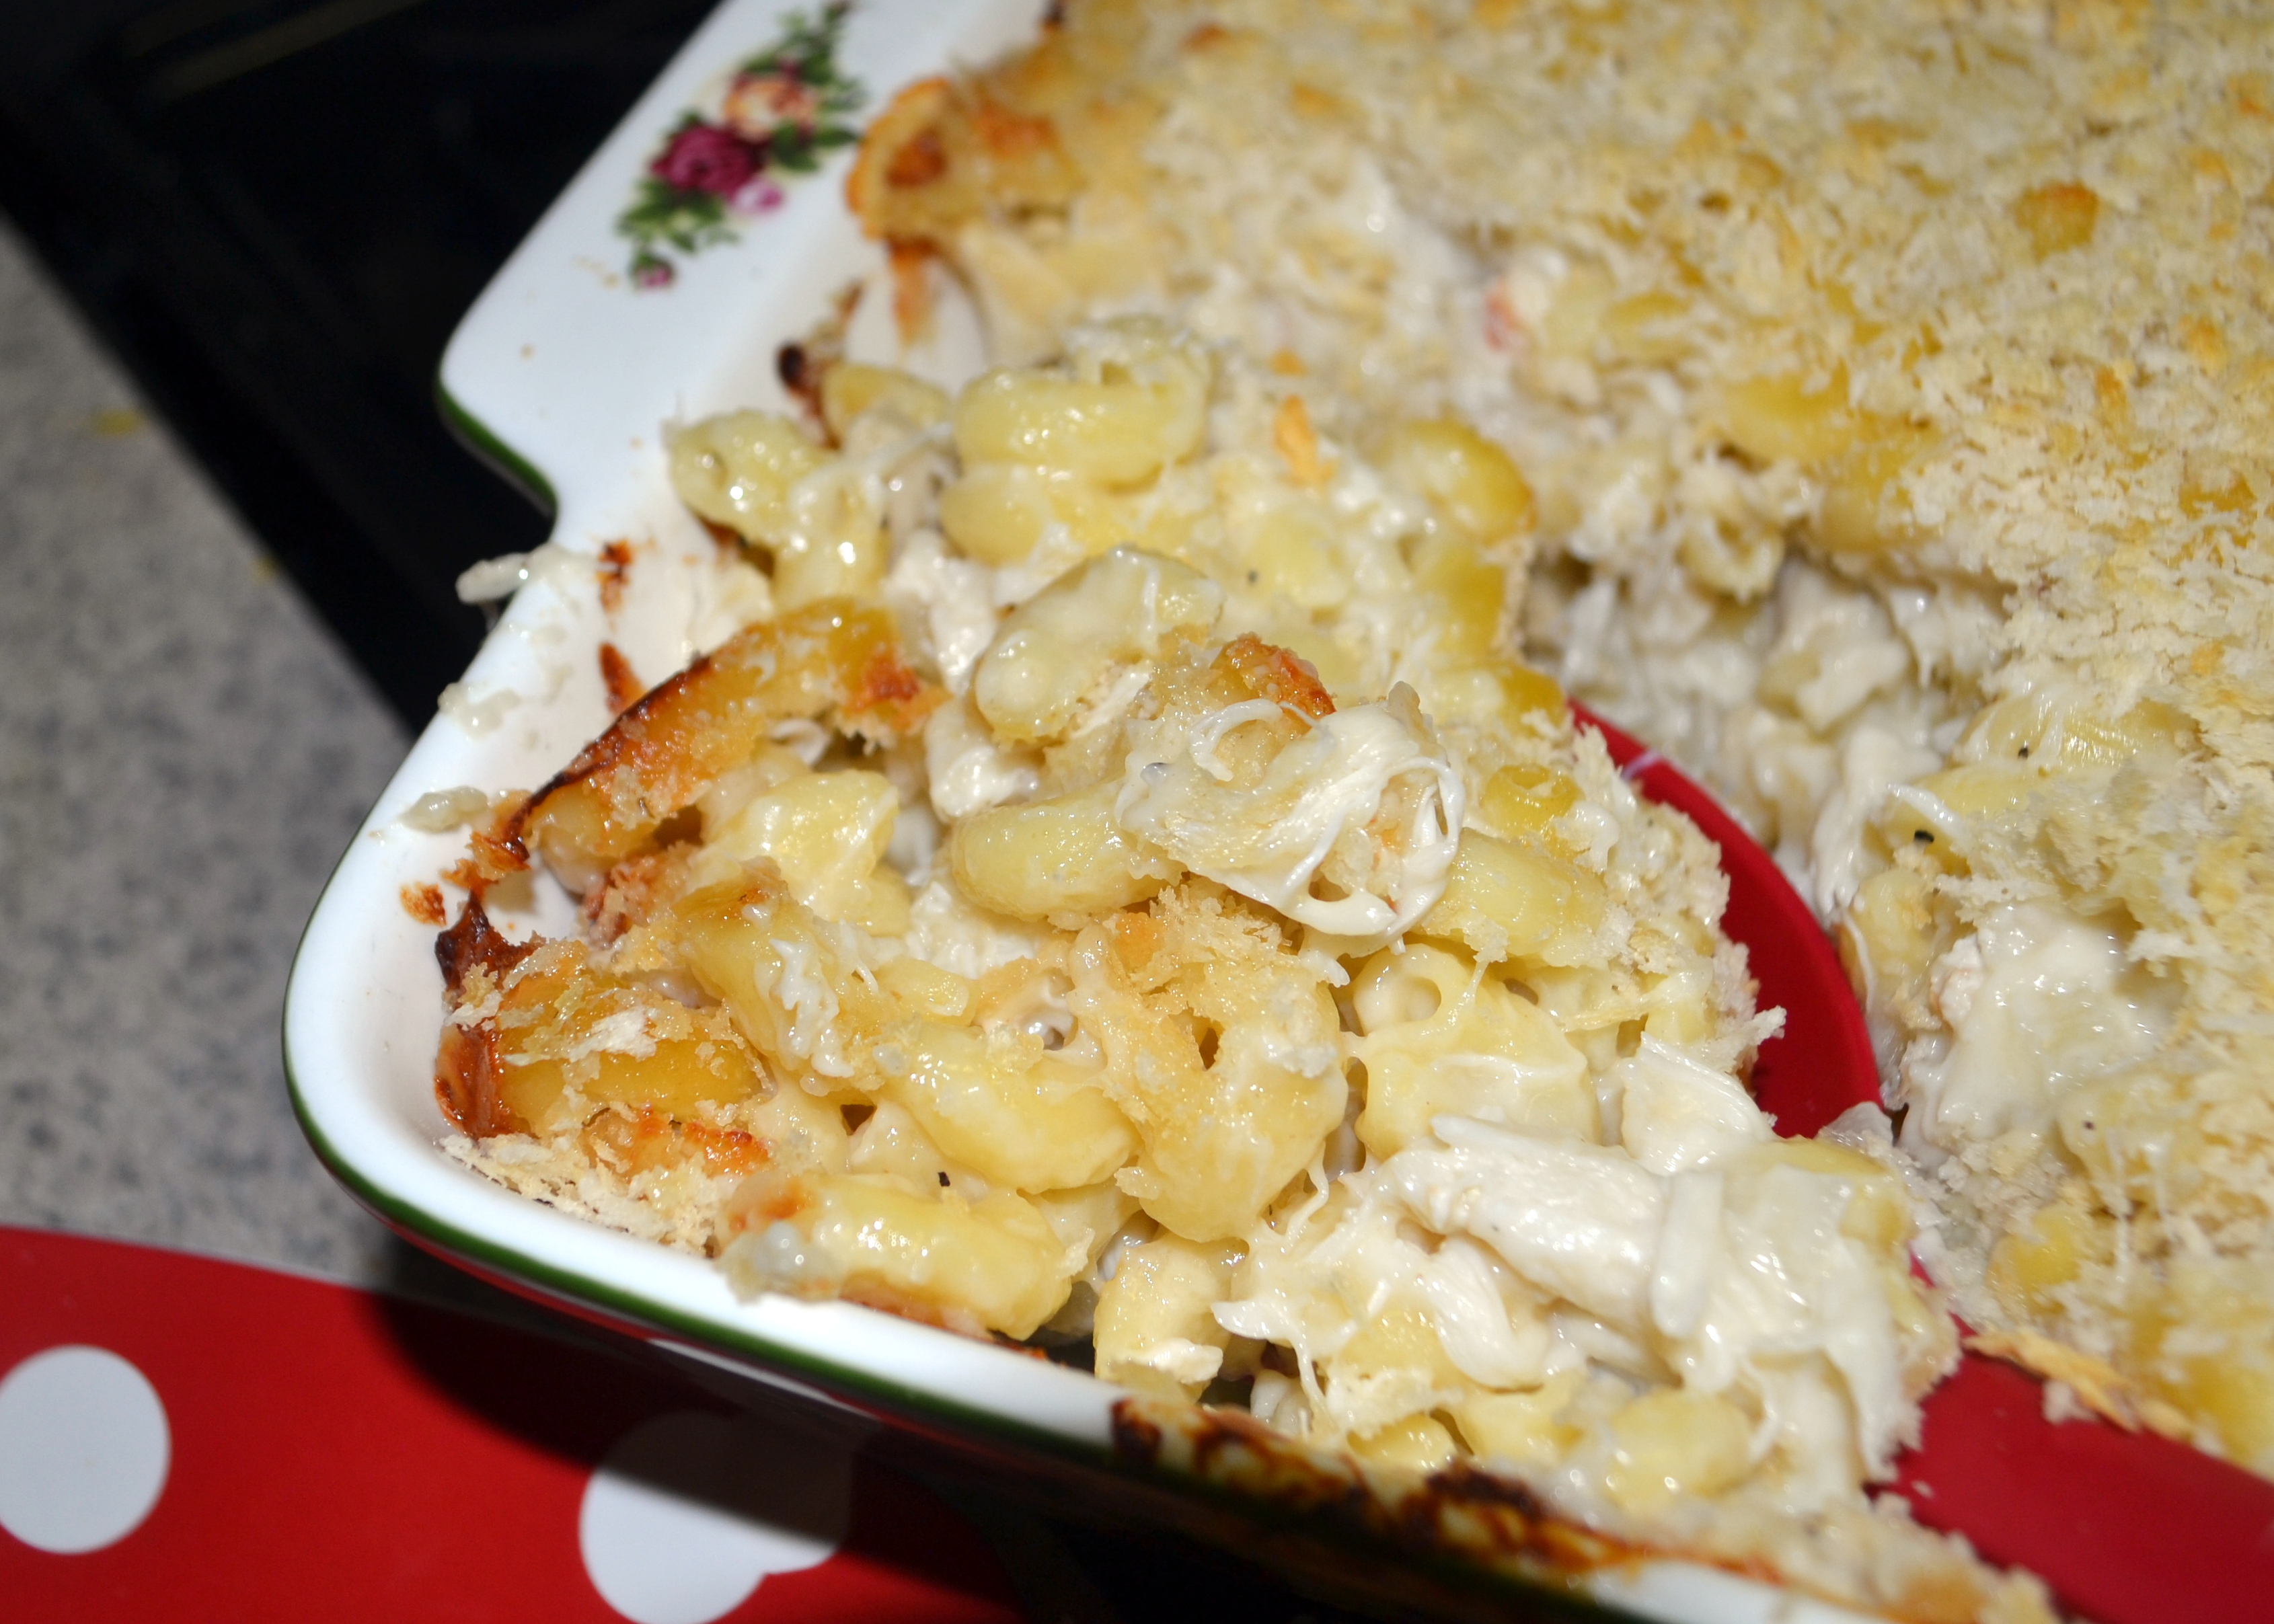
Whooooa Nelly!  Crab and Brie Macaroni and Cheese?  Over-the-top decadence in a comfort food?  YEP! And the decadence makes the comfort food even more comforting–like ‘died and gone to heaven’ comforting!  Yet another winning recipe from Better Homes and Gardens Special Interest Publication “Best Loved Reader Recipes; 125 Winners from 1930 to Today”. (My last post was a recipe for “Peach Iced Tea” inspired by a recipe from this magazine)

If someone is having a hard time, and that sweet “I am going to drop off a casserole” American tradition seems appropriate, THIS is the casserole to take.  I took it to my 120-miles away daughter who is bravely attempting a semester long college Physics course in a six-week summer session, working the 4 PM-midnight shift at Target, and sweltering in the hot central valley heat. I am not saying this Macaroni and Cheese is miraculous or anything, but she did  score 15 points over the class average on her first mid-term. Not dropping off a casserole to a friend-in-need anytime soon?  I’ll bet you’ll be going to a potluck then. Take this!  Want to eat it at home, like we did?  We had it with mixed roasted veggies, but a leafy green salad would be nice too, and a corn muffin.

This casserole is not cheap, but if you shop at Costco for your pound of brie and pound of crab (the only two expensive ingredients), it won’t break the bank and you’ll have made a casserole big enough feed a small army.

Truth be told, I was a bit afraid of this recipe at first, wondering if the Brie would be too strong, and wondering if I would be able to taste the crab over the brie.  Both worries proved needless.  Everything melds together nicely.  Comfortingly nice.  I’ll say it again, because it’s true, ‘died and gone to heaven’ nice!

I changed the recipe just just a bit; one, to conform to the quantities of crab and brie sold at Costco (no leftover bits and no need to buy two big cartons of anything) and two, to make the recipe a bit easier by  substituting panko instead of homemade bread crumbs. I also re-wrote the recipe a bit, making roux is not hard, just follow my instructions: brown the flour and butter (and don’t skimp on the butter), remove the pan from the heat, then vigorously stir in hot milk until sauce is smooth.

Enjoy your comfort food decadance.

Crab and Brie Macaroni and Cheese

  • 1 lb. dried macaroni (small shells or elbows)
  • 1 medium onion, chopped
  • 5 tablespoons butter (maybe a bit more)
  • 3 cups milk (I used 2%)
  • 1/3 cup all-purpose flour
  • 1 teaspoon salt
  • 1/2 teaspoon black pepper
  • 13-16 oz. Brie, cubed
  • 16 oz. refrigerated container crabmeat, drained and flaked
  • 1/2 cup Panko or favorite breadcrumbs
  1. Cook macaroni in salted water according to package directions.  (Choose the shortest cooking time since pasta will continue to cook when baked.) Drain and set aside.
  2. Preheat oven to 350 degrees. Grease a 9-in by 13-in casserole dish.
  3. In a large skillet over medium-high heat, saute onion in butter until tender and golden, about 15 minutes.  (Do not skimp on the butter.  You’ll need the full quantity of  butter to make the roux in the step 5.)
  4. Heat 3 cups of milk in microwave until hot (3-5 minutes).
  5. Meanwhile, over medium heat, stir flour into onion and butter mixture.  Stir constantly for 3 minutes (to cook flour and to incorporate butter into the flour).  If mixture is too lumpy or dry, add an additional tablespoon of butter.
  6. Remove hot pan with onion and roux from heat.  Pour in 1 cup of hot milk.  Stir well, and keep stirring-vigorously if needed-until mixture is smooth and lump free.  Add another cup of hot milk, stir and mix again.  When mixture is smooth and lump free, repeat with last cup of milk.
  7. Return pan to medium heat. Add cubed brie to sauce in pan.  Stir constantly until brie is melted and incorporated.  Remove pan from heat when brie has melted and the sauce is smooth once again.
  8. Fold drained crab into cheese sauce then stir in cooked and well-drained macaroni.
  9. Season with salt and pepper.
  10. Pour crab-brie-macaroni mixture into a well buttered 9-in x 13-in casserole dish.
  11. Sprinkle bread crumbs over top of macaroni and cheese.
  12. Bake in preheated 350 degree oven for 30 minutes or until mixture is heated through and bread crumbs have browned.  If breadcrumbs don’t brown, turn on the broiler and broil casserole for a few minutes.
  13. Remove casserole from oven. Let cool 5 – 10 minutes, then serve. In a bowl, while curled up on the couch with a good book or good movie, or on a plate with roasted veggies or a salad, and maybe a small corn muffin. Enjoy.  Feel better. Ace the Physics test!

Leftovers can be reheated in microwave or frozen for a future treat.

Thank you for stopping by my kitchen again today,  I love having you drop by!  Let’s see what else I can make from this magazine. It’s supposed to be on the shelves until July 15, 2013, so if you see it, you might want to pick up a copy.

08 Jun 2013 Peach Iced Tea

2 Peach Iced Tea Vert

I made a Peach Iced Tea! I am so excited that I have to share the recipe with you, even as I work to make it more natural (off to the farmer’s market tomorrow for my first try). I didn’t want you all to have to wait until I got the natural version perfected as this version works fine!  I know there are hot days and summer parties in your near future–graduations, Father’s Day, showers, birthday parties, July 4th celebrations, and BBQ’s, so I know you need this recipe now!

This tea, as is, is not too sweet, and definitely has a pronounced peach flavor; it’s like Snapple Peach Iced Tea, only better!  Make the big-batch peach base to keep in the freezer and you’ll be able to whip up a quart of Peach Iced Tea for yourself and a good book! Or make a gallon or two  for a  summer party in a flash.  I, for one, would love to go to a summer party where there’s something to drink other than bottles of beer, soda and water 🙂 (BTW, I have a recipe posted for Blueberry Lemonade, too, which is also very good!).

The peach part of the tea was inspired by a recipe I found in a “Better Homes and Gardens Special Interest Publication” entitled , “Best Loved Reader Recipes; 125 Winners from 1930 to Today”.  The recipe in the magazine was for a “Sparkling Peach Punch”, where the base below is mixed with ginger ale or sparkling water.  I tried both versions. The ginger ale version was very sweet, the sparkling water version was given a thumbs up by my daughters, but the iced tea version created by yours truly was the star of the show.

Notes:

#1 Make the base and freeze it in three 1-quart batches or six 2-cup batches.  Each 1-quart peach base will mix with 2 quarts of strong tea to make 12 cups/3 quarts of  Peach Iced Tea, add ice and you have a party!  Each 2-cup peach base mixed with 6 cups of strong tea will make 8 cups/2 quarts of Peach Iced Tea, add ice and a friend and you have a cool and tasty summer drink with which you and  your friend can enjoy a little down time.

#2 Make the tea twice as strong as you would for regular hot tea!  I prefer English or Irish tea bags such as Barry’s Irish Gold, or Yorkshire Gold or PG tips.  Trader Joe’s Irish Breakfast tea is also very good (but, oddly, the English Breakfast tea isn’t very good at all). I use 3 or 4 tea bags to each quart of boiling water.  If I had to use Lipton or Red Rose Tea, I’d use at least six tea bags to a quart of boiling water.  I haven’t experimented with green tea, as I am not a big fan, but I am sure green tea could substitute for the black tea, and of course, decaf tea could be used too, if that is your preference.

#3 I don’t know why there is gelatin in the base, that’s one of the things I am going to experiment with and try to remove, but, I think it probably does add to the overall peachiness of the drink. Yes, yes, yes, one of the first things I will experiment with is using fresh peaches in place of the canned peaches…but until that happens, make this version, it’s yummy!

Peach Iced Tea

For the Peach Base:

  • 3 cups water
  • 1 1/2 cups sugar
  • 13-ounce package peach-flavored gelatin
  • 1 29-ounce can peach slices in light syrup
  • 4 11 ounce cans peach nectar (find them on the shelves of the grocery store next to the bottled juices)
  • 1/2 cup lemon juice
  1. Combine water, sugar, and gelatin in a saucepan. Bring to a boil, stir to dissolve the gelatin then remove from heat and allow to cool.
  2. Place undrained peach slices in blender, and blend until smooth.
  3. In a 1 gallon capacity bowl, pan or pitcher combine gelatin mixture, pureed peaches, peach nectar, and lemon juice. Stir to combine.
  4. Divide peach mixture into three 1-quart batches or six 2-cup batches.  Use now (see steps below), or freeze until needed.  According to the original recipe, the base can be frozen for up to 3 months.

To Brew the Tea and Combine With the Peach Flavor:

  • Desired quantity of peach base (remove from freezer an hour or two before needing)
  • Tea bags (Make the tea twice as strong as you would for regular hot tea, see note #2 above)
  • Boiling water (You will need to make 2X the amount of water for the quantity of base you are using, see note #1 above)
  1. Pour the required amount of boiling water over the tea bags and let steep for 3-5 minutes.  Don’t let the tea steep for more than 5 minutes or it will start to get bitter.
  2. Fill a pitcher half full of  ice.  Pour the hot brewed tea over the ice. Discard the tea bags.
  3. Stir the peach base into the iced tea.
  4. Pour into glass and enjoy! ahhhhhhhh

It’s mercilessly HOT here, and I hate hot, but a glass of Peach Iced Tea, a day off, and a good book does make the summer somewhat enjoyable(!)

Thanks for stopping by my kitchen today!  I am going to try some more recipes from this magazine–Calypso Shrimp Skewers, Coconut Salmon Curry, Macaroni and Brie with Crab, Green Beans with Basil and Mint, so stay tuned!

BTW, if you have the magazine, I’ve already tried the “Bagel, Lox and Egg Strata” recipe… The picture looked great.  The make-ahead casserole wasn’t bad, but neither was it great, and I see no reason to make it again.

06 Mar 2013 White Mint Dark Chocolate Layer Cake

chocmintcake

I know, I know, this is a horrible picture.  Don’t let that put you off though.  This is a delicious cake, one of my best!  The reason this picture is so bad, well, aside from me not being a talented photographer, is that everyone ate the cake!  This is the one piece  that was left, and it was left out all night.  It looks like it, too, doesn’t it? Poor cake.  I really should bake this cake again just to get a better picture of it.  Problem with that is, folks are hollering for the recipe! I served the cake at my Dining For Women meeting and had several requests for the recipe.  I told everyone it was on my website, but this morning  I was shocked to find I hadn’t posted it.  Ever. Oops. What have I been doing with my time?

So here is the recipe, finally!  I found the original  recipe on epicurious.com the year that my twins graduated from high school, in 2009, I believe.  I made it for their high school graduation.  See how good this cake is?  I know exactly when I first tasted it! (I was pretty impressed with myself!)

The only thing I changed was making two layers instead of three (I think three layer cakes are pretentious–and who has three matching layer cake pans anyway?).  Don’t change anything else!  Use peppermint extract, not mint.  AND, one more warning:  stick to the Lindt Mint Chocolate bar, or something very similar. My daughter made this cake one year with Ghirardelli Mint Squares (the ones with the liquid-y centers).  Not a good idea. She made the cake for my birthday cake.  The top layer kept sliding off the bottom layer.  Yes, more than once. The cook took it very hard.  I think there were tears.

There shouldn’t be tears served with this cake.

This cake can be dressed up a bit for Christmas.  Andes has Candy Cane mints now.  Those and a few candy canes or peppermints can adorn the sides/top of the cake or the cake platter. Hershey’s Candy Cane Kisses can be melted for the top of each layer, if you want, but they don’t taste nearly as good as the melted Lindt Mint chocolate bar…, and they don’t have the delightful thin crunch that comes from the melted Lindt bar.

Chocolate Mint Layer Cake

For Cake and Chocolate Mint Topping

1 ¾ c. flour
¾ c. unsweetened cocoa powder (use Hershey’s Special Dark)
1 ¼ tsp. baking soda
½ tsp. baking powder
¾ tsp. salt
2 c. sugar
¾ c. butter, at room temperature (1 ½ sticks)
3 eggs
4 tsp. vanilla
1 ½ c. buttermilk
1 large Lindt Mint Chocolate Bar, chopped

Preheat oven to 350 degrees. Butter and flour three 9-inch diameter cake pans. Line bottom of pans with parchment paper. Sift together flour, cocoa powder, baking soda, baking powder, and salt. In another bowl beat sugar and butter together until light and fluffy, at least 5 minutes. Add eggs, one at a time, beating well after each addition. Mix in vanilla. Beat for another 5 minutes. Add dry ingredients alternately with buttermilk in 3 additions each, beating just until blended. Divide batter equally between the three cake pans (a generous 2 cups of batter in each pan). Bake in preheated oven for about 25 minutes, or until cake springs back to touch. Remove cake and sprinkle chopped Lindt Mint Chocolate over tops of each layer. When chocolate melts, spread gently evenly across tops. Let cool in pans for 15 minutes then remove to racks to cool completely. Remove parchment paper.

For Creamy Minty Frosting

1 ½ 1-lb. boxes powdered sugar
½ c. butter, at room temperature
2 tsp. peppermint extract (not mint extract, peppermint extract)
¼ c. milk or cream, approximately
1 box Andes Mints, unwrapped and chopped

Combine powdered sugar, butter, extract, and milk/cream in a mixing bowl. Beat until light and fluffy, adding more milk or cream, 1 tsp. at a time, if needed to bring mixture to spreading consistency. Place approximately 1/5th of frosting on top of each layer cake. Carefully smooth frosting on top of mint chocolate covered cake layers. Place frosted layers on top of each other on a serving plate. Use remaining 2/5ths of frosting to carefully frost sides of cake. Sprinkle chopped mints on tops and sides of cake. Let sit for an hour or two before serving.

Thanks for stopping by my kitchen today!  If you like what you read, sign up.  You’ll get a three line email letting you know when I post another recipe.  I won’t use your email address for anything else, ever, I promise!


09 Dec 2012 Skibo Castle Crunch

This cookie is something you’ve never tasted before.  There’s no chocolate, no caramel, no peanut butter, no nuts, no oatmeal, no coffee, no mint, nor is there any jam in this cookie, so how can it be good?  I don’t know, but it is.  Damn good.  Two bites and you’ll be addicted and you won’t know why.

I don’t know why I made this cookie in the first place.  I found it in “The Gourmet Cookie Book: The Single Best Recipe From Each Year 1941-2009” by Gourmet Magazine.  This was billed as the best cookie of 1999.  Maybe I made it because it was made famous in Scotland and I have a fondness for all things Scottish.  Maybe because it was a 15 minute bar cookie recipe and I had all the ingredients on hand.  Nevertheless, I made it, and this odd, crunchy ginger cookie has become one of my favorite all time cookies.

I had to change the recipe though.  The first year I made it, I loved it, but it was ODD, downright ugly and temperamental (no two batches turned out the same).  So I twiddled with it a bit and then , sadly, had to let it go as an “almost great” cookie.  This year,  I found the recipe again,  on Epicurious. com…, with twenty-five comments!  So I tried the recipe again and incorporated some of the suggestions.  Success!  This is the cookie I am taking to my Cookbook Club’s annual Christmas Cookie Exchange (my yoga group already gave it 10 thumbs up–and they got to taste both years’ versions).

The biggest change was doubling the recipe, but baking in the same size pan as the original recipe.  The second big change was using a food processor to make the base.  The third big change was cutting the cookie into squares before the cookie cooled. So here is the recipe for an odd, crunchy, ginger-y cookie that takes 15 minutes to bake and is totally addictive.

If you want more ginger flavor, add 1/2 cup minced candied ginger to either the shortbread base or sprinkled on top of the glaze.

Skibo Castle Ginger Crunch

For Shortbread Base:

2 ½ cups all-purpose flour
6 tablespoons granulated sugar
2 teaspoons baking powder
2 teaspoons ground ginger
½ teaspoon salt
1 cup (2 sticks) cold butter, cut into pieces

For Glaze-like Topping:

1 1/2 cups butter
2 tablespoon Lyle’s Golden Syrup (British cane sugar syrup-try World Market or an Indian Grocery or Amazon.com…or sub dark corn syrup)
2 cups confectioners sugar
1 teaspoon ground ginger
1 teaspoon vanilla

Preheat oven to 350°F . Line  a 13″ by 9″ baking pan with parchment paper.

Make shortbread base:
Place the dry ingredients in a food processor and whirl to combine.  Add in and blend in butter  and whirl until mixture resembles coarse meal and just starts to hold together.  Pour mixture into parchment lined baking pan. With your fingers, press mixture evenly into bottom of pan.  Do this lightly.  If you press too hard the shortbread will suffer.  Bake shortbread in middle of oven until golden and crisp around the edges, 25 to 30  minutes.  Keep  your eye on this.  The shortbread can go from perfectly done to over baked in a minute.

Just before shortbread is done, make the topping:
Five minutes before the shortbread is to be taken out of the oven, melt the butter in a small saucepan.  Whisk in remaining ingredients until smooth. Bring mixture to a boil and simmer, stirring, for one minute. Remove shortbread from oven and pour topping over, tilting pan to cover shortbread evenly.

Cool in pan on a rack for about 20 minutes, then cut the Skibo Crunch into small squares or rectangles.  Let the Skibo Crunch cool completely before removing from pan.  Then…WOW your guests with this seriously odd cookie.

Let me know if it becomes one of your favorites, too.

Thanks for stopping by my kitchen today!